What you need to know:
Adding new blocks to your WordPress post or page allows you to insert new content in your document. To add a new block, drag a block out of the Block Library and drop it in your document. Alternatively, you can use the “+” buttons that appear as you move your mouse cursor across your document to add a new block in the specified location.
Knowing how to add new blocks in WordPress is an essential skill since that’s the primary way of adding new content to your posts and pages. In this tutorial, we’ll explore the various ways in which you can insert a block in your Gutenberg document.
Table of Contents:
What Is Gutenberg?
Gutenberg, commonly referred to as the WordPress Block Editor, is the default way of creating posts, pages, and widgets in WordPress. Unlike its predecessor, Gutenberg uses blocks to encapsulate every piece of content that is shown on your website.
Tip:
If you have not created your own website yet, we recommend getting our free hosting package or one of our professional WordPress hosting plans and installing WordPress in a few quick steps.
You can learn the WordPress Block Editor by exploring its interface and going through the basic actions it supports. Once you have learned the fundamentals, you can improve your knowledge by learning to customize the Gutenberg interface, getting to know the keyboard shortcuts available in the Block Editor, and finding out the best WordPress plugins that augment the Gutenberg experience.
What Are Blocks in WordPress?
Unlike other document editors, Gutenberg uses blocks as containers for your contents. So, when you wish to insert a new paragraph or an image into your document, you need to add a block in your WordPress document that will encapsulate this new content.
There are a lot of blocks available in WordPress by default and new blocks are added regularly. That said, you can further expand the selection of blocks thanks to third-party plugins that add new blocks to Gutenberg.
How Do I Add a Block in WordPress?
There are two main ways of adding blocks to your WordPress posts and pages. We’ll explore both approaches in the next two sections.
Tip:
The steps outlined in the next two sections can be used to add not only regular blocks to your site but also block patterns and reusable blocks.
Using the Block Library
The primary way of adding new blocks in your WordPress documents is via the Gutenberg Block Library located in the Top Toolbar.
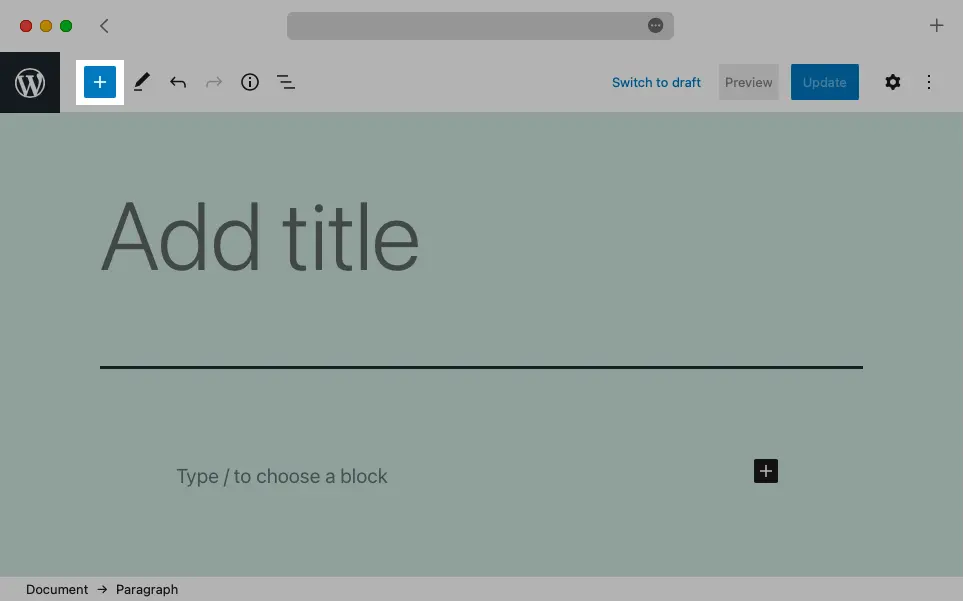
You can use the Block Library button in the Top Toolbar to add blocks in WordPress.
To add a block in WordPress, follow these steps:
- Open the document where you wish to add a new block.
- Click on the Block Library button in the Top Toolbar.
- Drag a block out of the library and drop it in your document. The block will be inserted in the position where it is dropped.
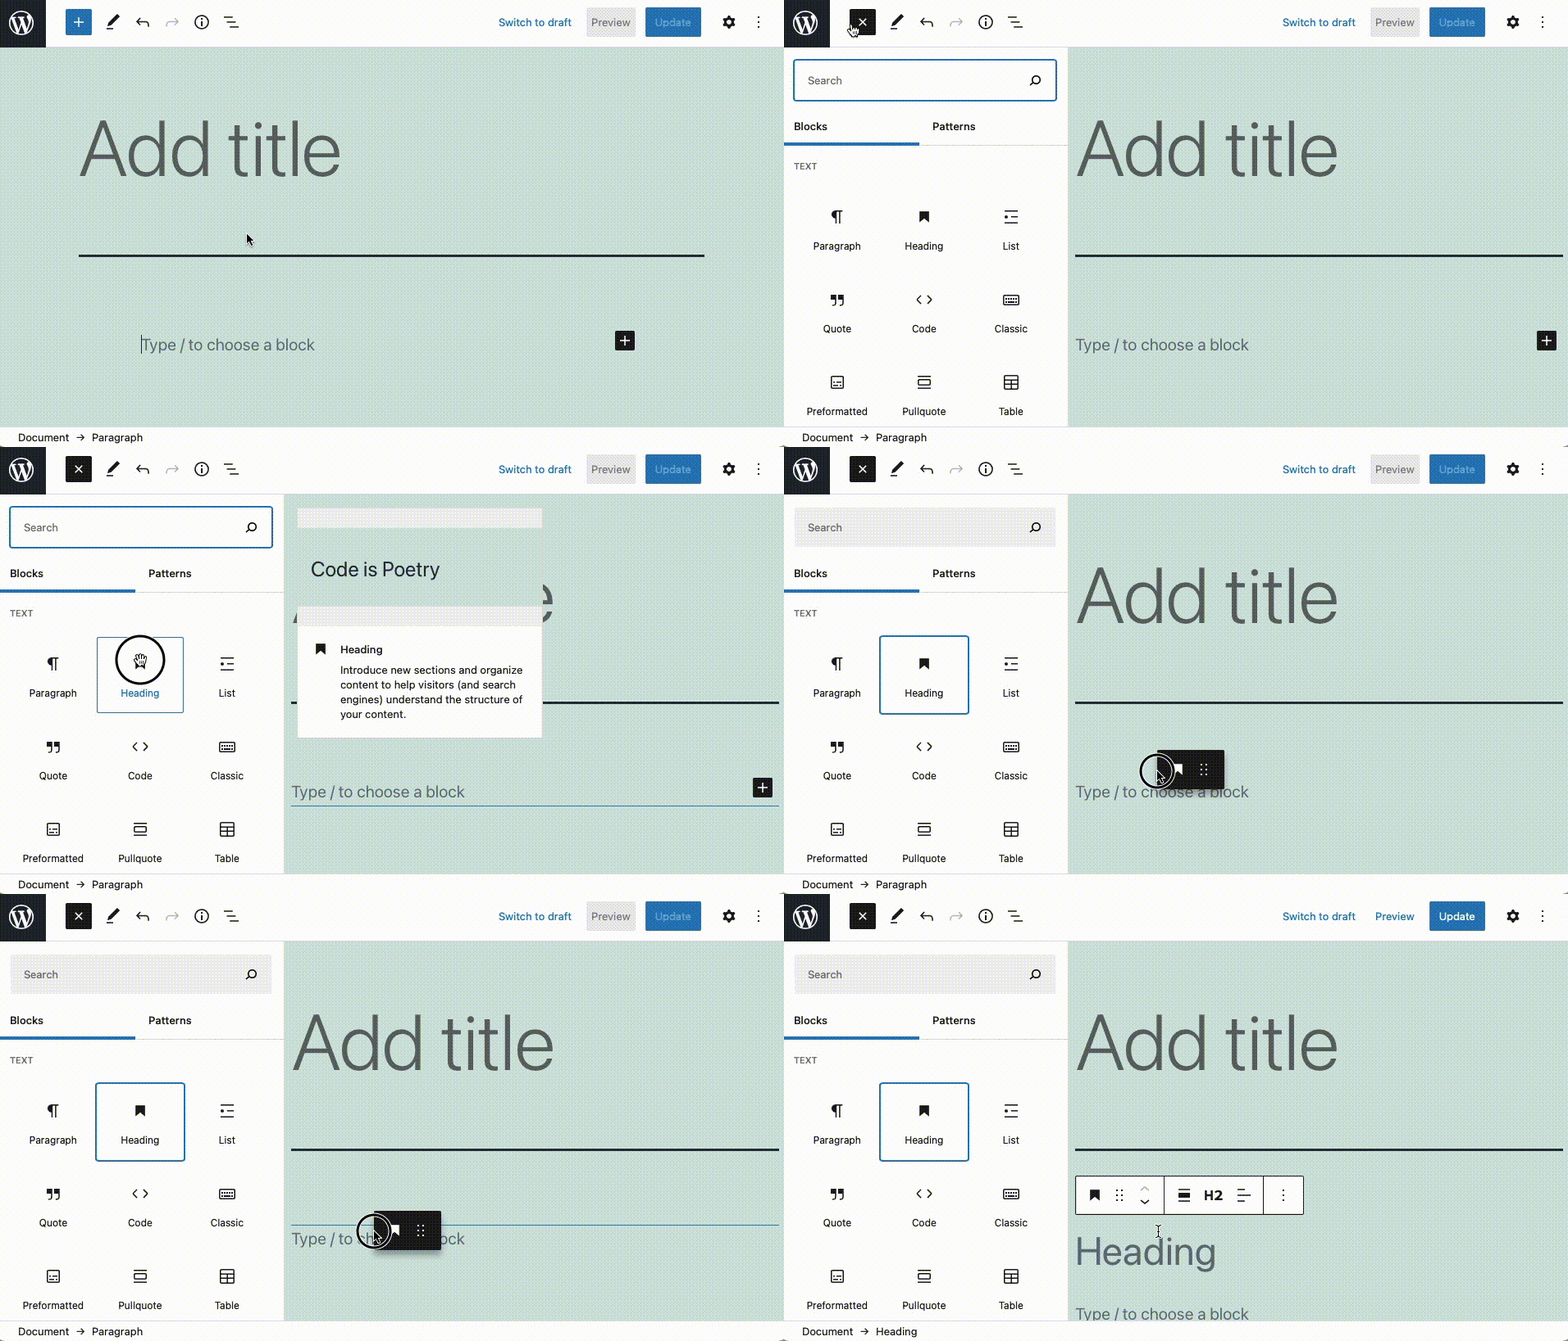
You can drag a block out of the Block Library and drop it in your document.
In addition to the main “+” button located in the Top Toolbar, you can access the Block Library using the additional “+” buttons scattered throughout your document. If you access the Block Library through one of those additional “+” buttons, simply choose the block that you wish to add and it will be inserted in the place of the “+” button.
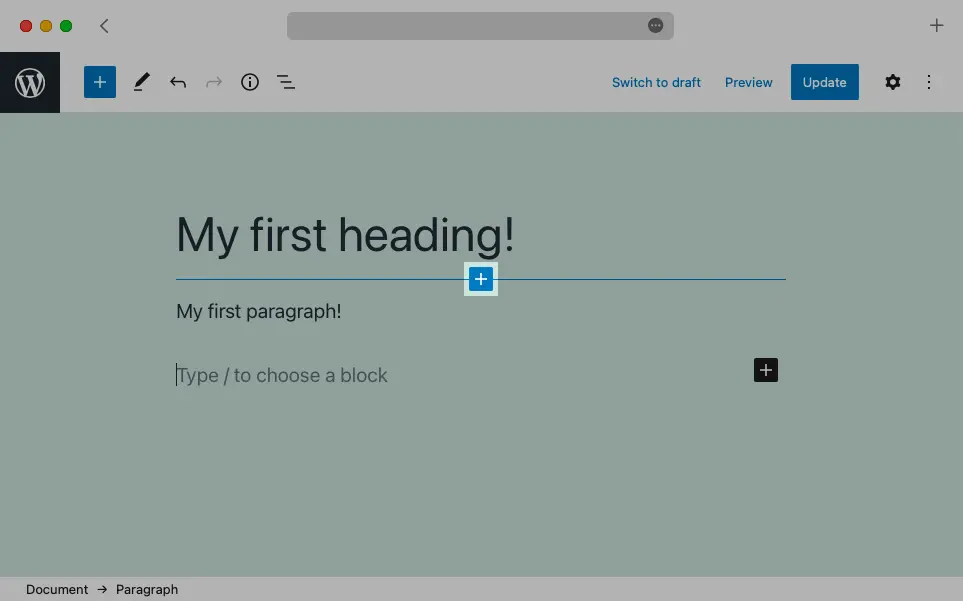
You will find contextual “+” buttons throughout your document that you can use to bring up the Block Library.
Tip:
If you have trouble finding the block that you wish to insert, you can use the Block Library’s search function!
Using a Keyboard Shortcut
Gutenberg also features a set of keyboard shortcuts that allow you to add blocks in WordPress quickly and efficiently.
Begin with an empty paragraph block and press the / key on your keyboard. A search field will appear on the screen. When you see it, type the name of the block that you wish to add. As soon as your desired block gets highlighted, press the Enter key to insert it.
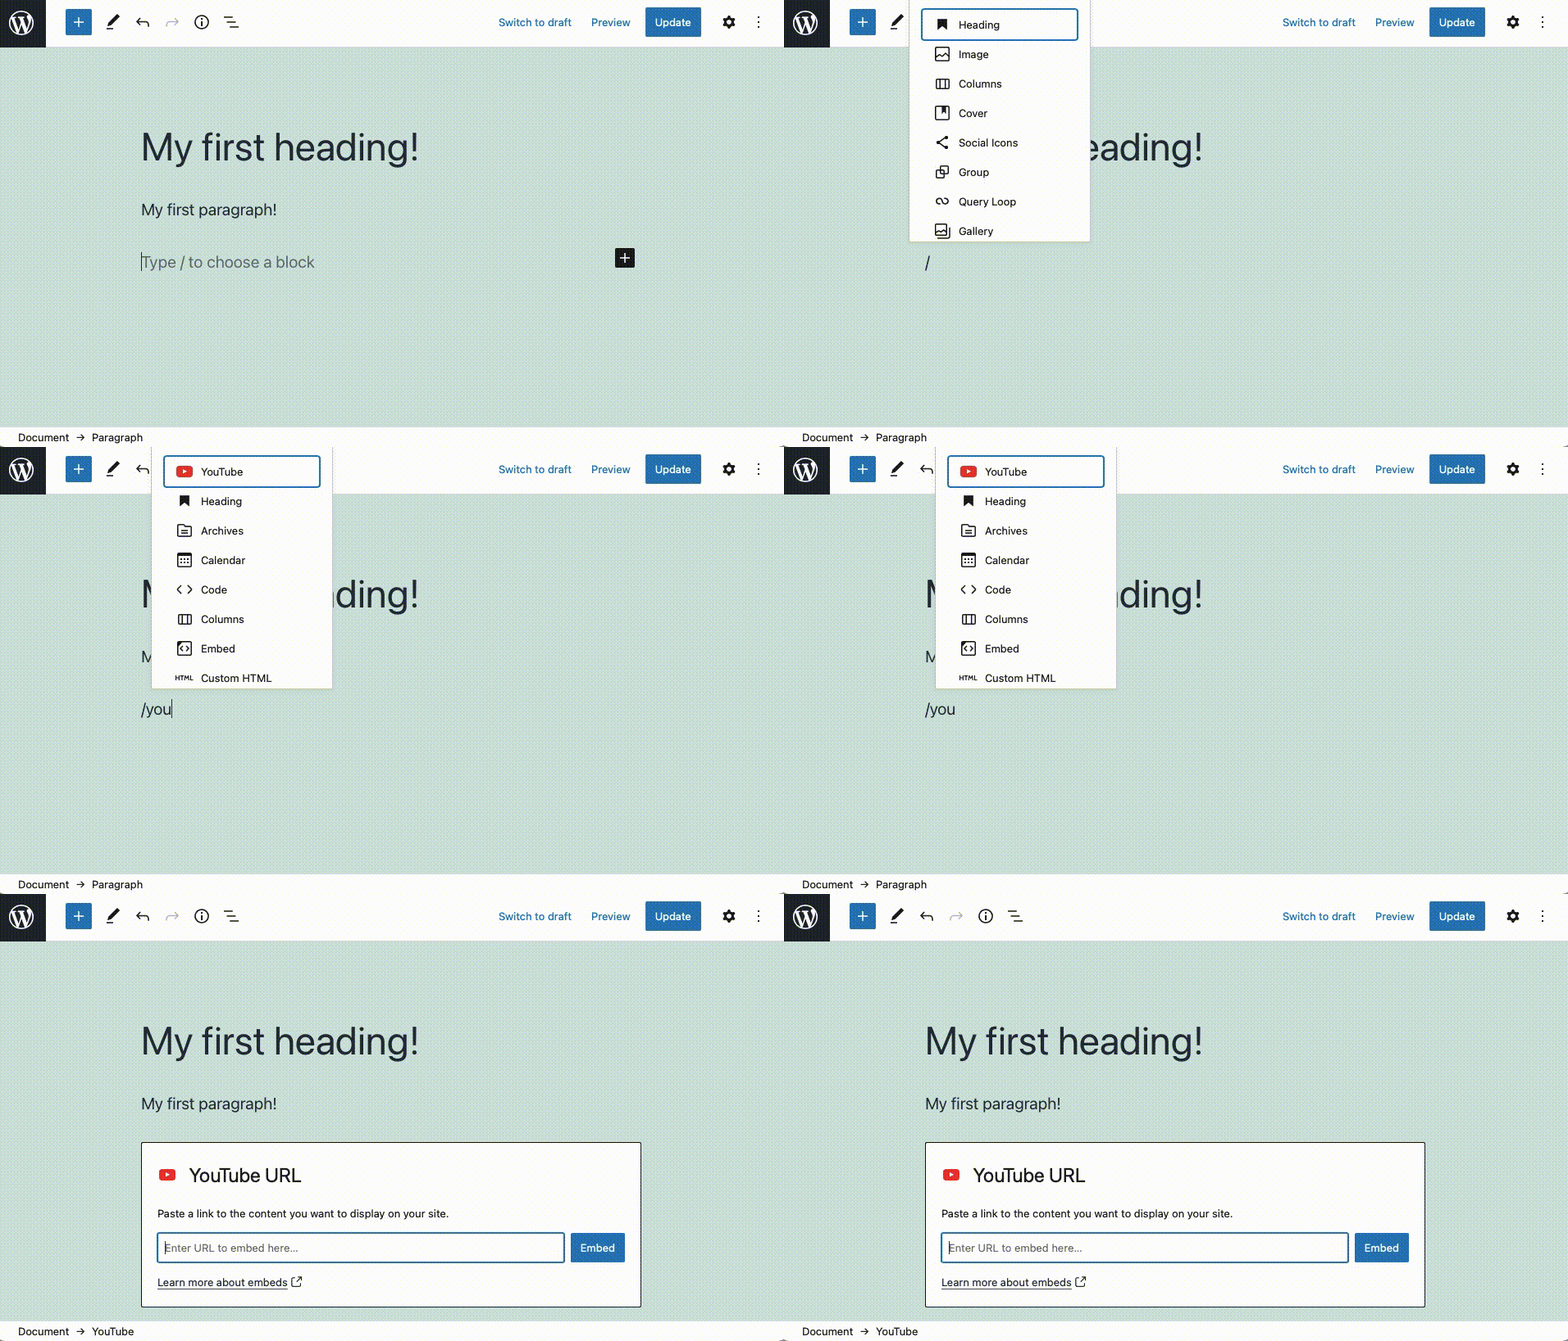
Adding blocks can also be accomplished via a keyboard shortcut.
To learn more, you can check the list of all block-based keyboard shortcuts in Gutenberg.
Tip:
In addition to these block-based shortcuts, Gutenberg also offers a few keyboard shortcuts that are inspired by Markdown. You can use our dedicated guide to learn more about the Markdown-inspired keyboard shortcuts in Gutenberg.
Choosing Where the New Block Is Inserted
The steps that you need to follow in order to insert a block can vary depending on the spot where the new block should appear in your document. In the following three sections, we’ll show you how to add a block at the beginning, in the middle, and at the end of your document.
At the Beginning of the Document
You can add a block at the beginning of your WordPress document in two different ways:
- You can drag a block out of the Block Library and drop it in the beginning of your document.
- You can place your mouse cursor between your first and second block and click on the “+” button that appears. Choose your desired block and insert it. After the block is inserted, move the block up, so it becomes the first block in your document.
In the Middle of the Document
Adding a block in the middle of your WordPress document is a straightforward task that can be accomplished in two ways:
- You can drag a block out of the Block Library and drop it in the middle of your document.
- You can place your mouse cursor between the blocks where you wish to insert a new one and click on the “+” button that appears. Choose your desired block and insert it.
At the End of the Document
You can add a block at the end of your WordPress document in these ways:
- You can drag a block out of the Block Library and drop it at the end of your document.
- You can click in the empty space after your last block to create a new paragraph block.
- You can click on the black “+” button located to the right of your last block.
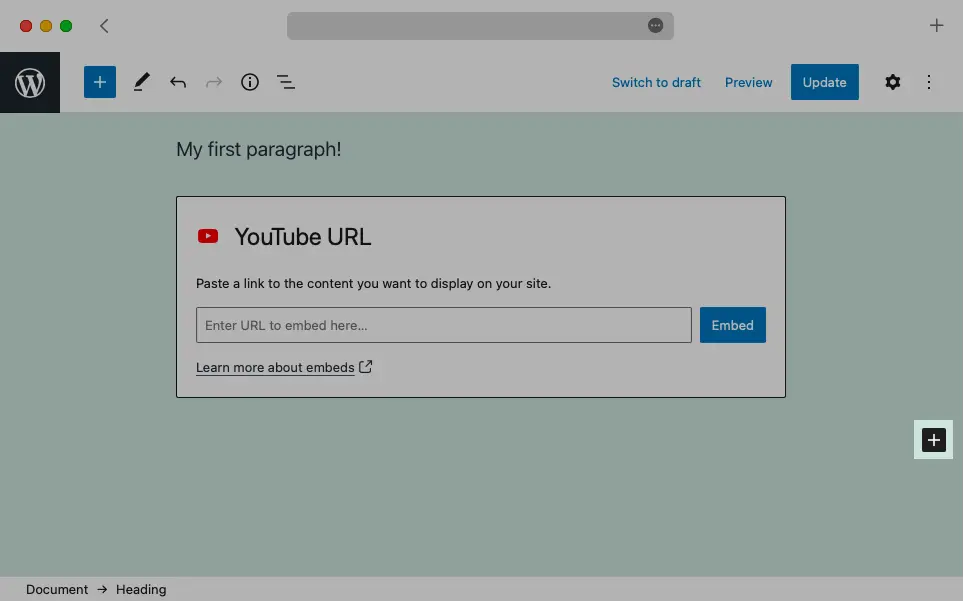
You will find “+” buttons throughout your document that allow you to add new blocks from the Block Library.
Next Steps
This wraps up our tutorial on how to add blocks in WordPress. If you are interested, you may also check our guides on how to edit, move, and delete Gutenberg blocks. And once you are able to craft your ideal document, you should learn how to publish it on your WordPress site.