WordPress offers a wide list of privacy options that are convenient in many situations. When you build a WordPress website, you should focus on learning about site privacy, as this will be greatly beneficial in the long term.
In the following paragraphs, you will learn how to:
- make an entire WordPress site private
- make individual web pages private
You will also learn how to exclude your website or certain web pages from search results.
How to Make Your WordPress Site Private
One of the easiest and most convenient ways to make your WordPress site private is by using WordPress plugins. There are many useful tools that you can choose from and each one offers a different approach to privacy settings.
If you are not sure about how plugins work, then check out our What is a WordPress Plugin article.
1. Make Your Entire Site Private
If you are still working on the final outlook of your site, you might want to fully block access to your site until the job is done. To do so, you can use different WordPress plugins.
One such is Under Construction.
To use the plugin, you must first install and activate it.
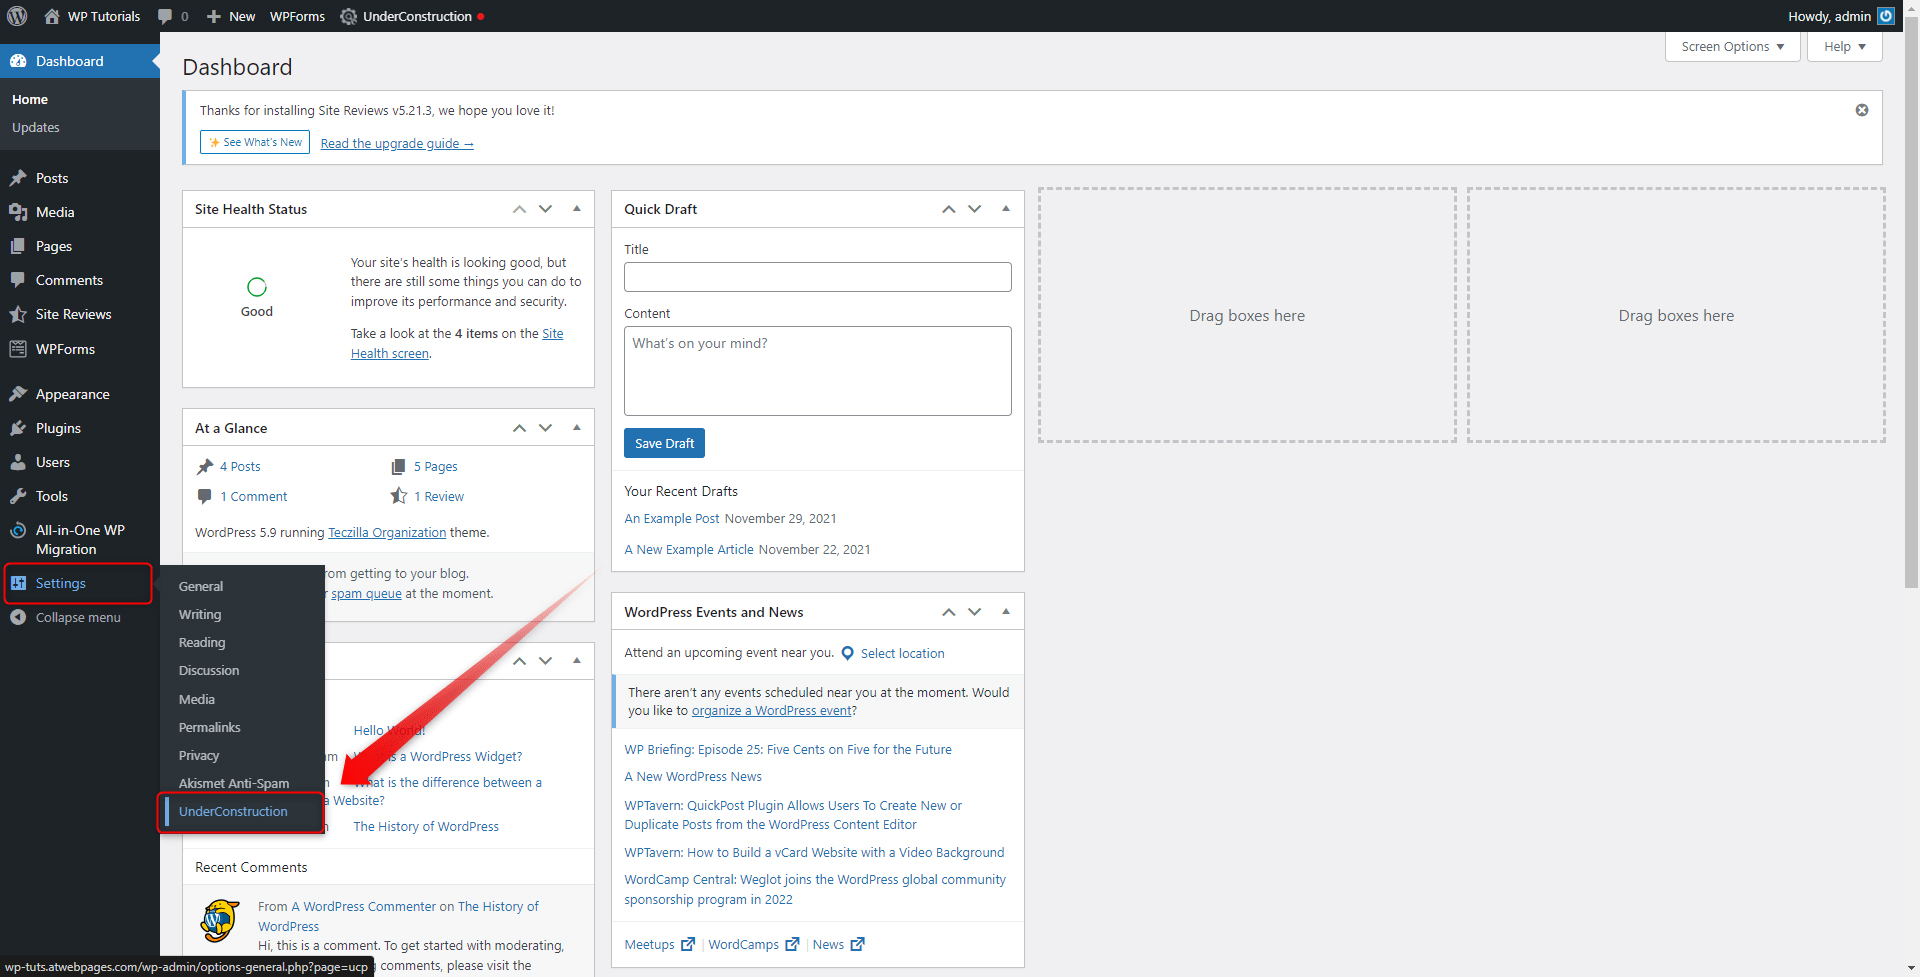
Once you’ve activated the plugin, a new menu with options will appear in your WordPress sidebar:
When you open that menu, a new page with options will appear:
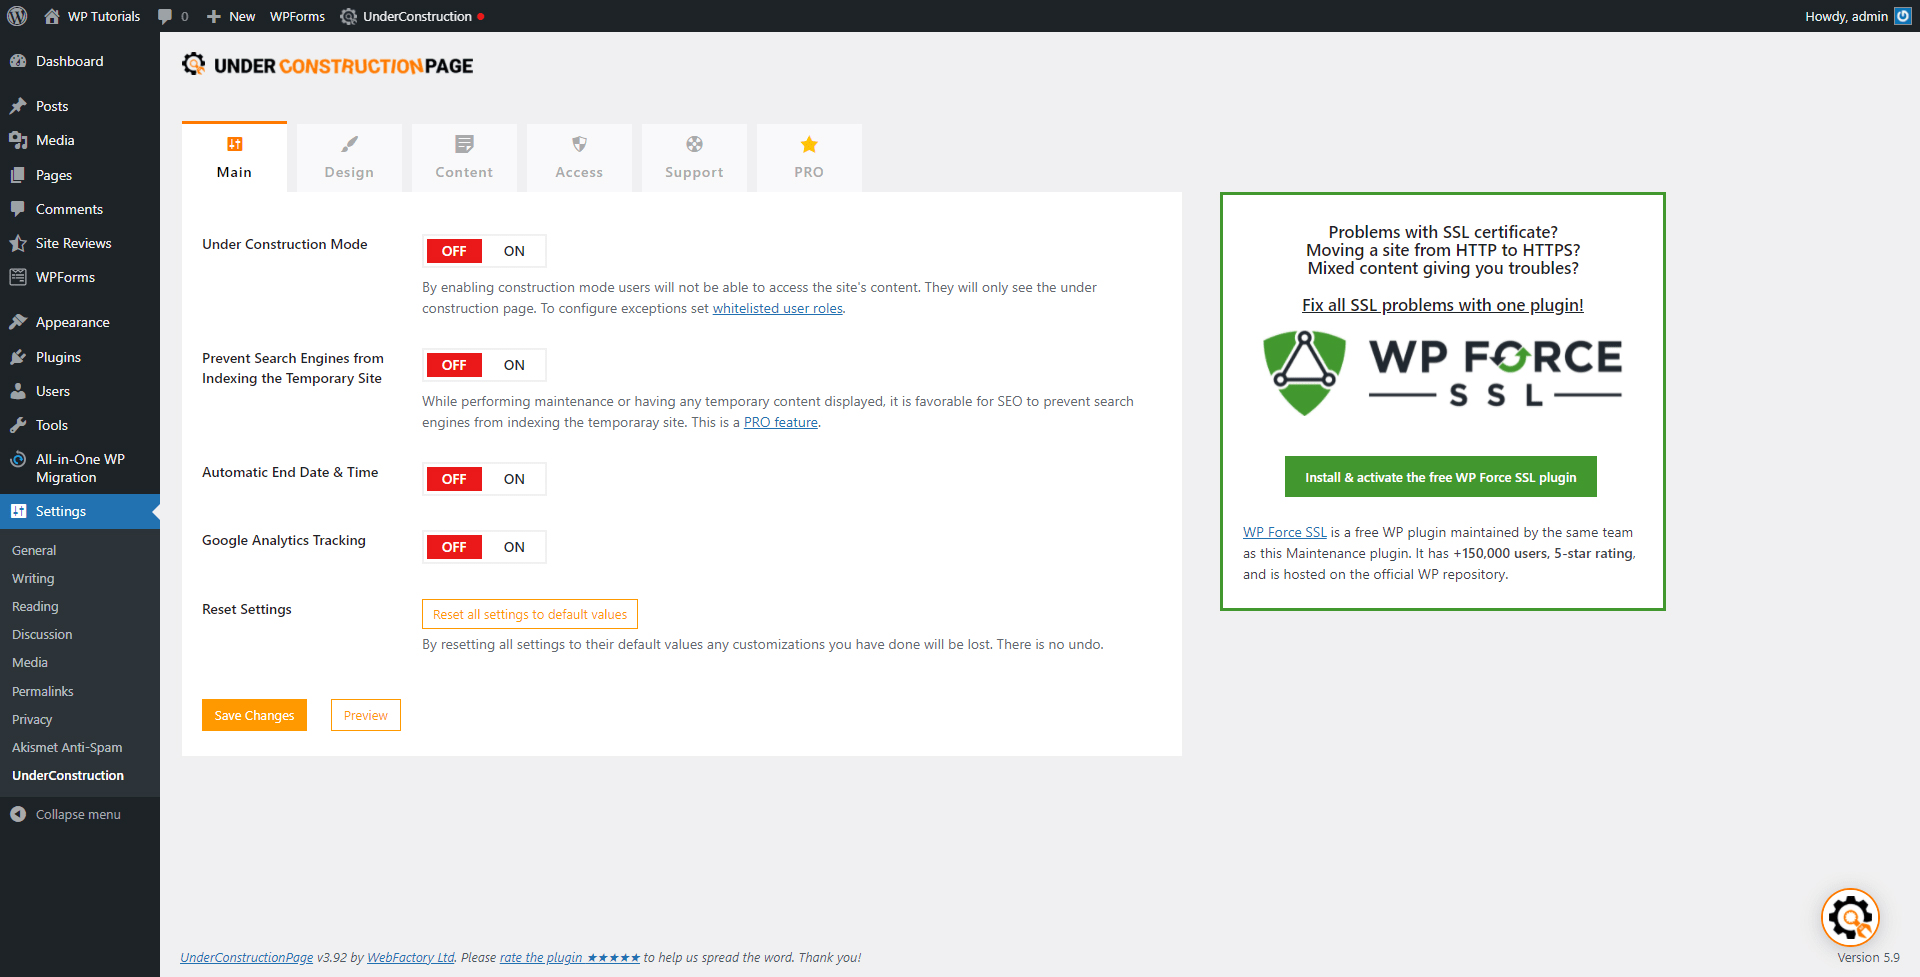
This is the place from where you can set up your preferred privacy settings with this particular plugin.
For example, you can choose the layout of the page that will appear to visitors as they try to access your website. You can also change the text that they will see upon opening the URL and inform them what the cause for limited access might be.
Here are two examples:


2. Make Individual Web Pages Private
Sometimes you might want to block access to a particular page or a set of pages on your website. This is a default WordPress feature and does not require using a dedicated plugin.
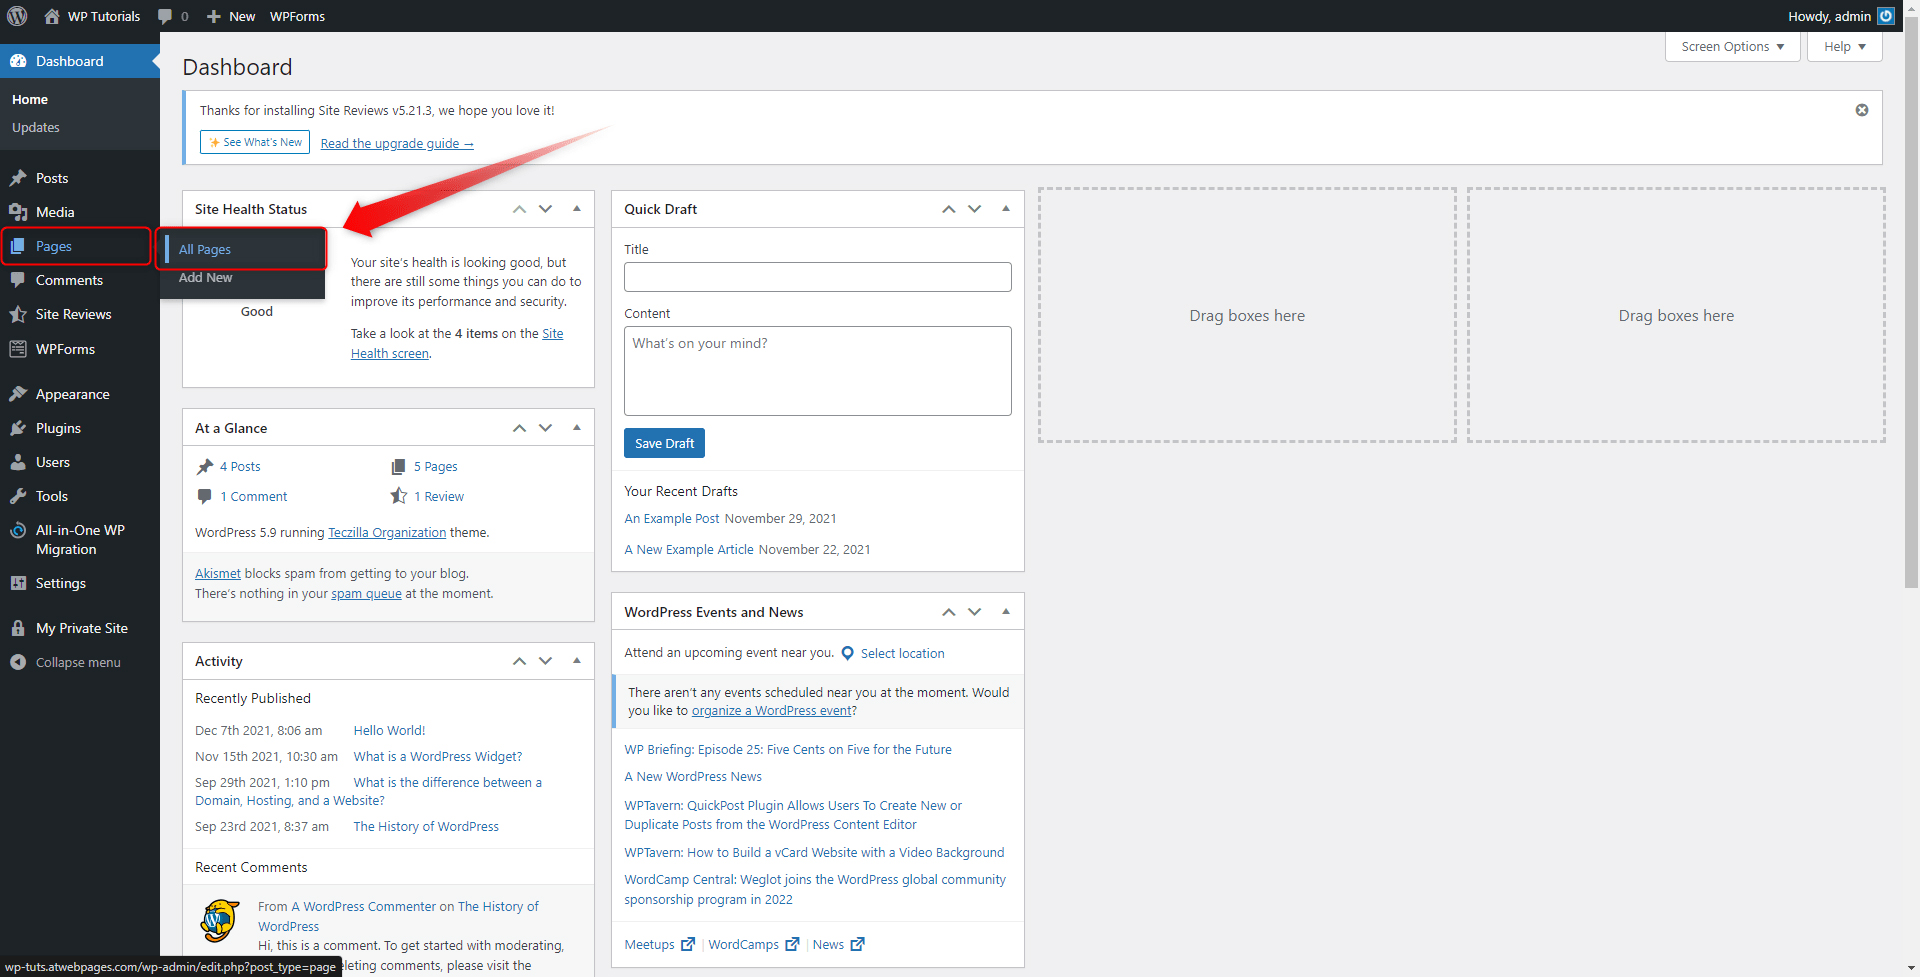
To activate privacy on any of your pages, go to Pages->All Pages via your Dashboard:
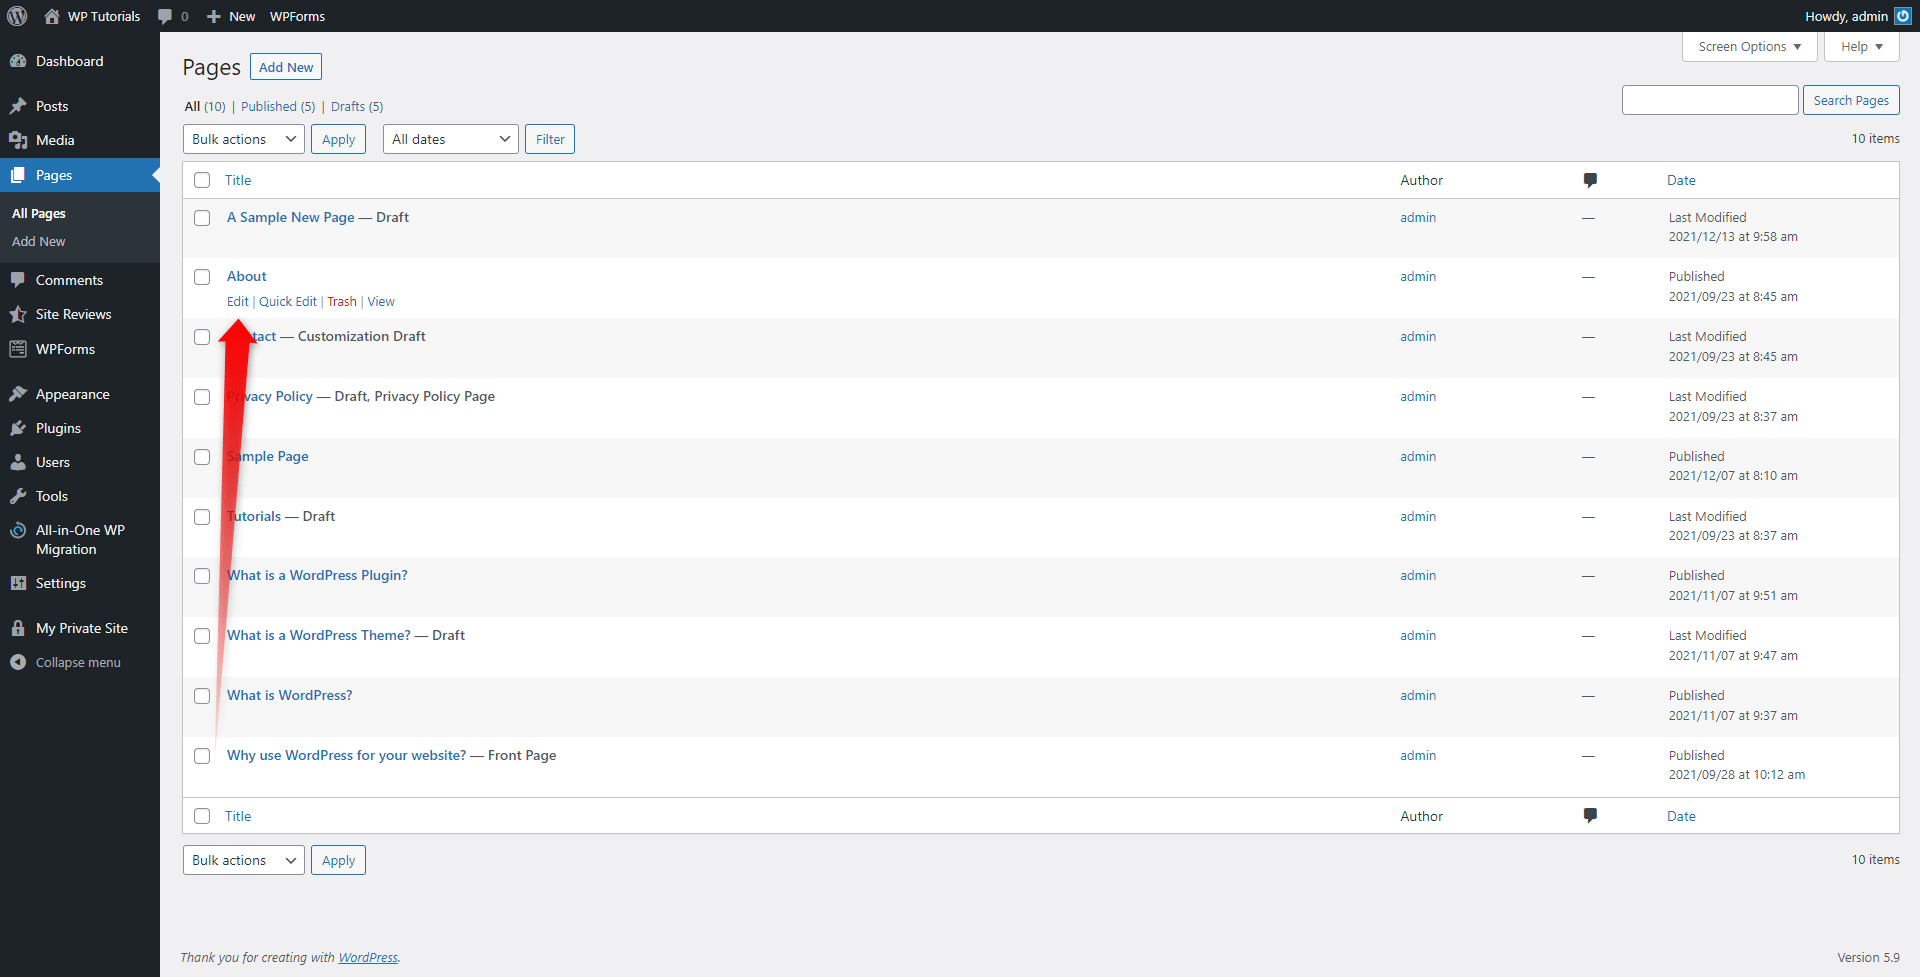
A list with all your site pages will appear. Find the one you wish to make private, hover your mouse cursor over the page’s heading and click on the Edit button that will appear:
This will open the Edit Page options:
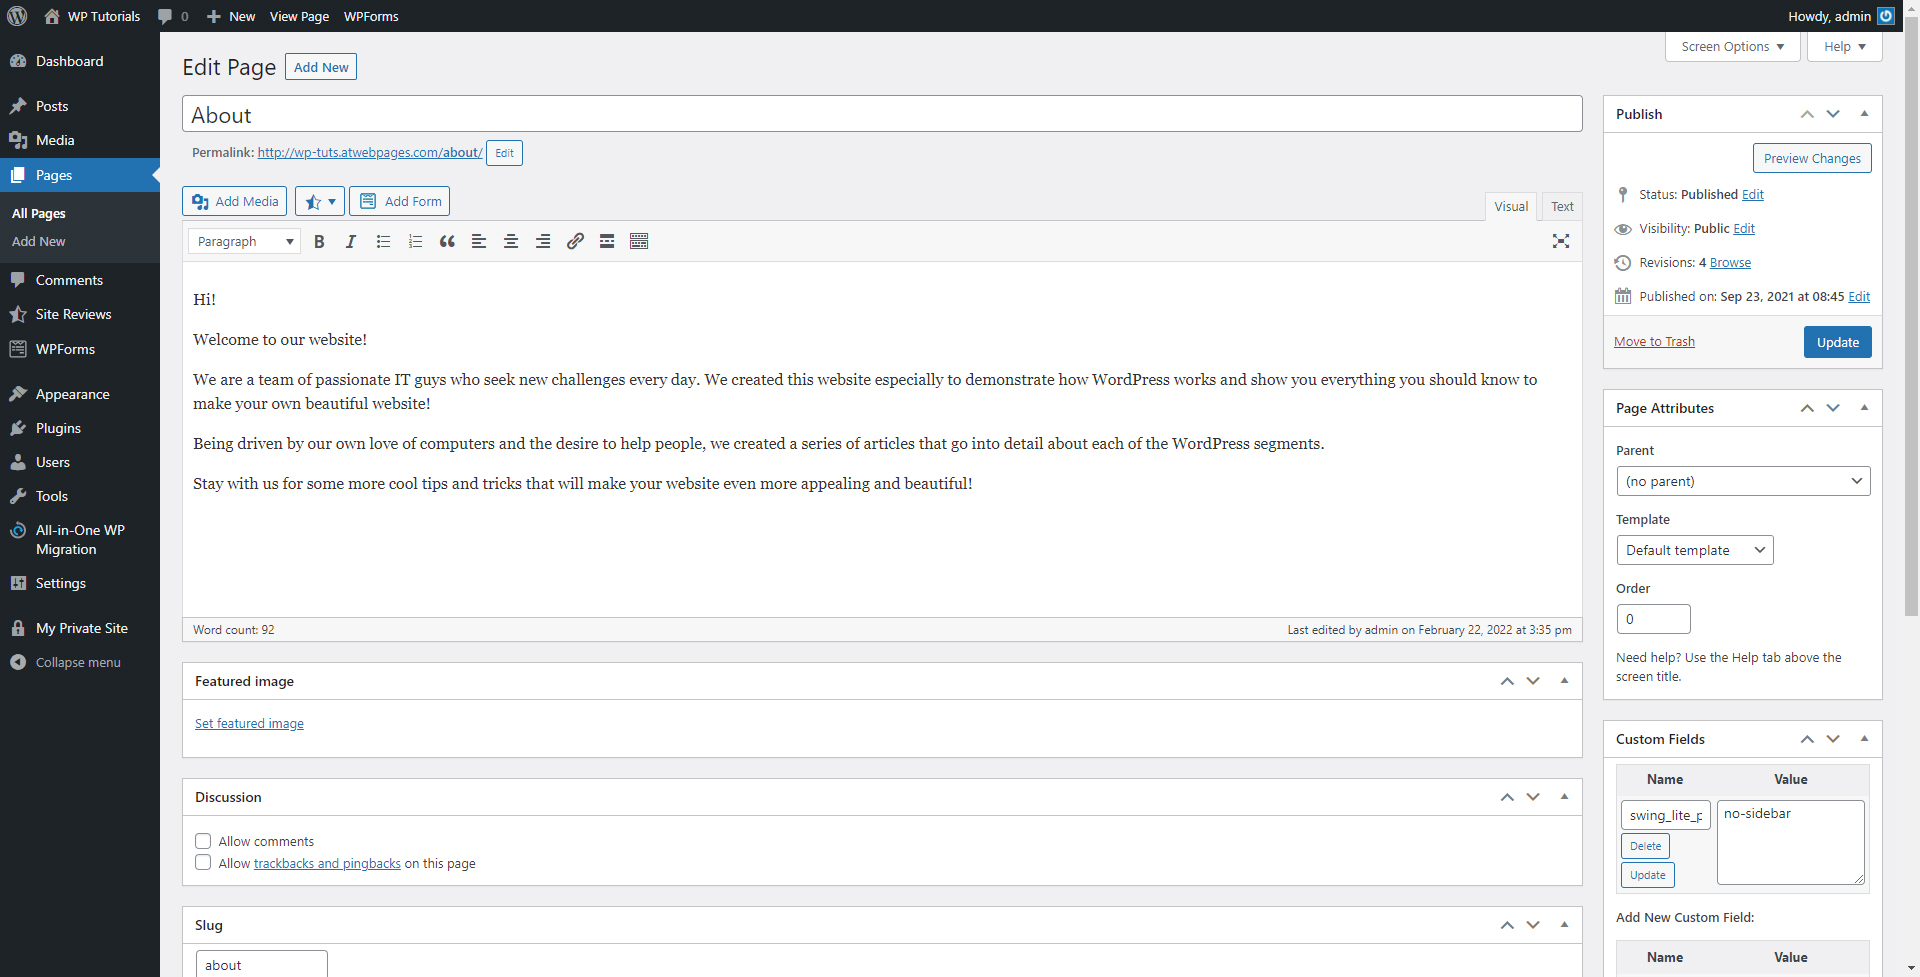
While on this page, find the Publish box, located at the right of the screen, and within this box locate the Visibility menu:
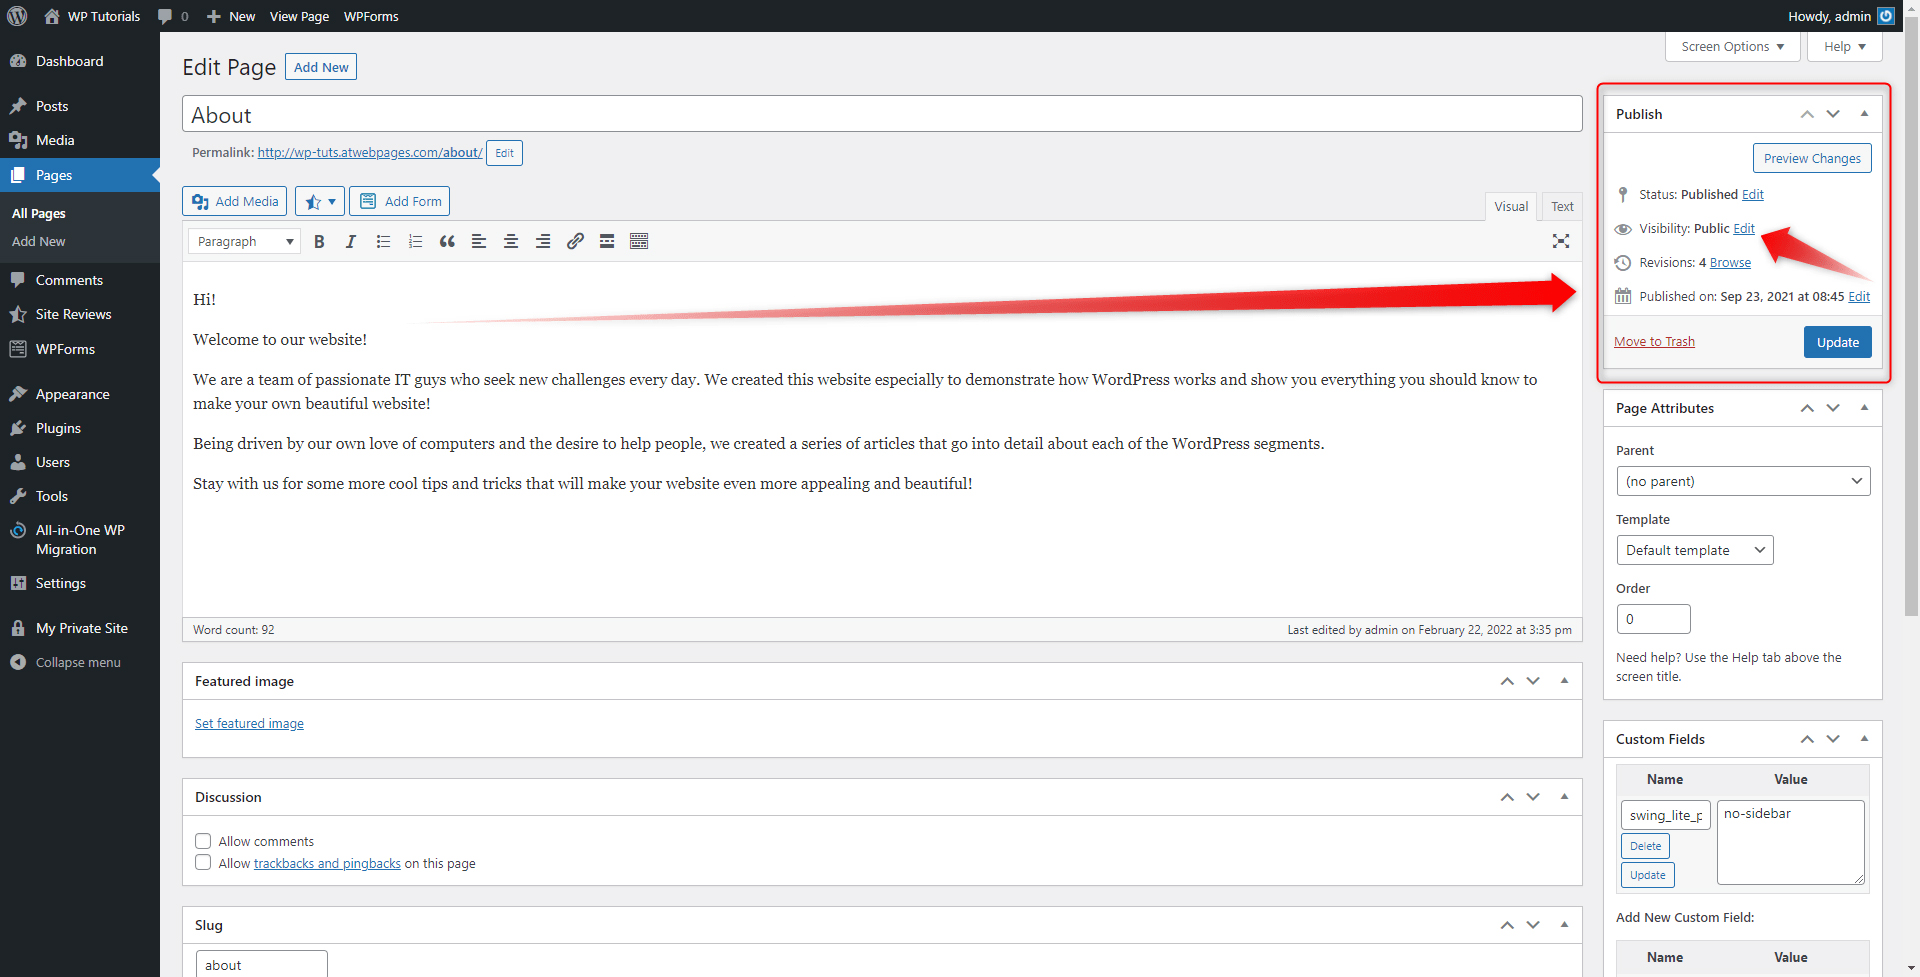
Clicking on the small Edit button will open the page’s privacy settings:
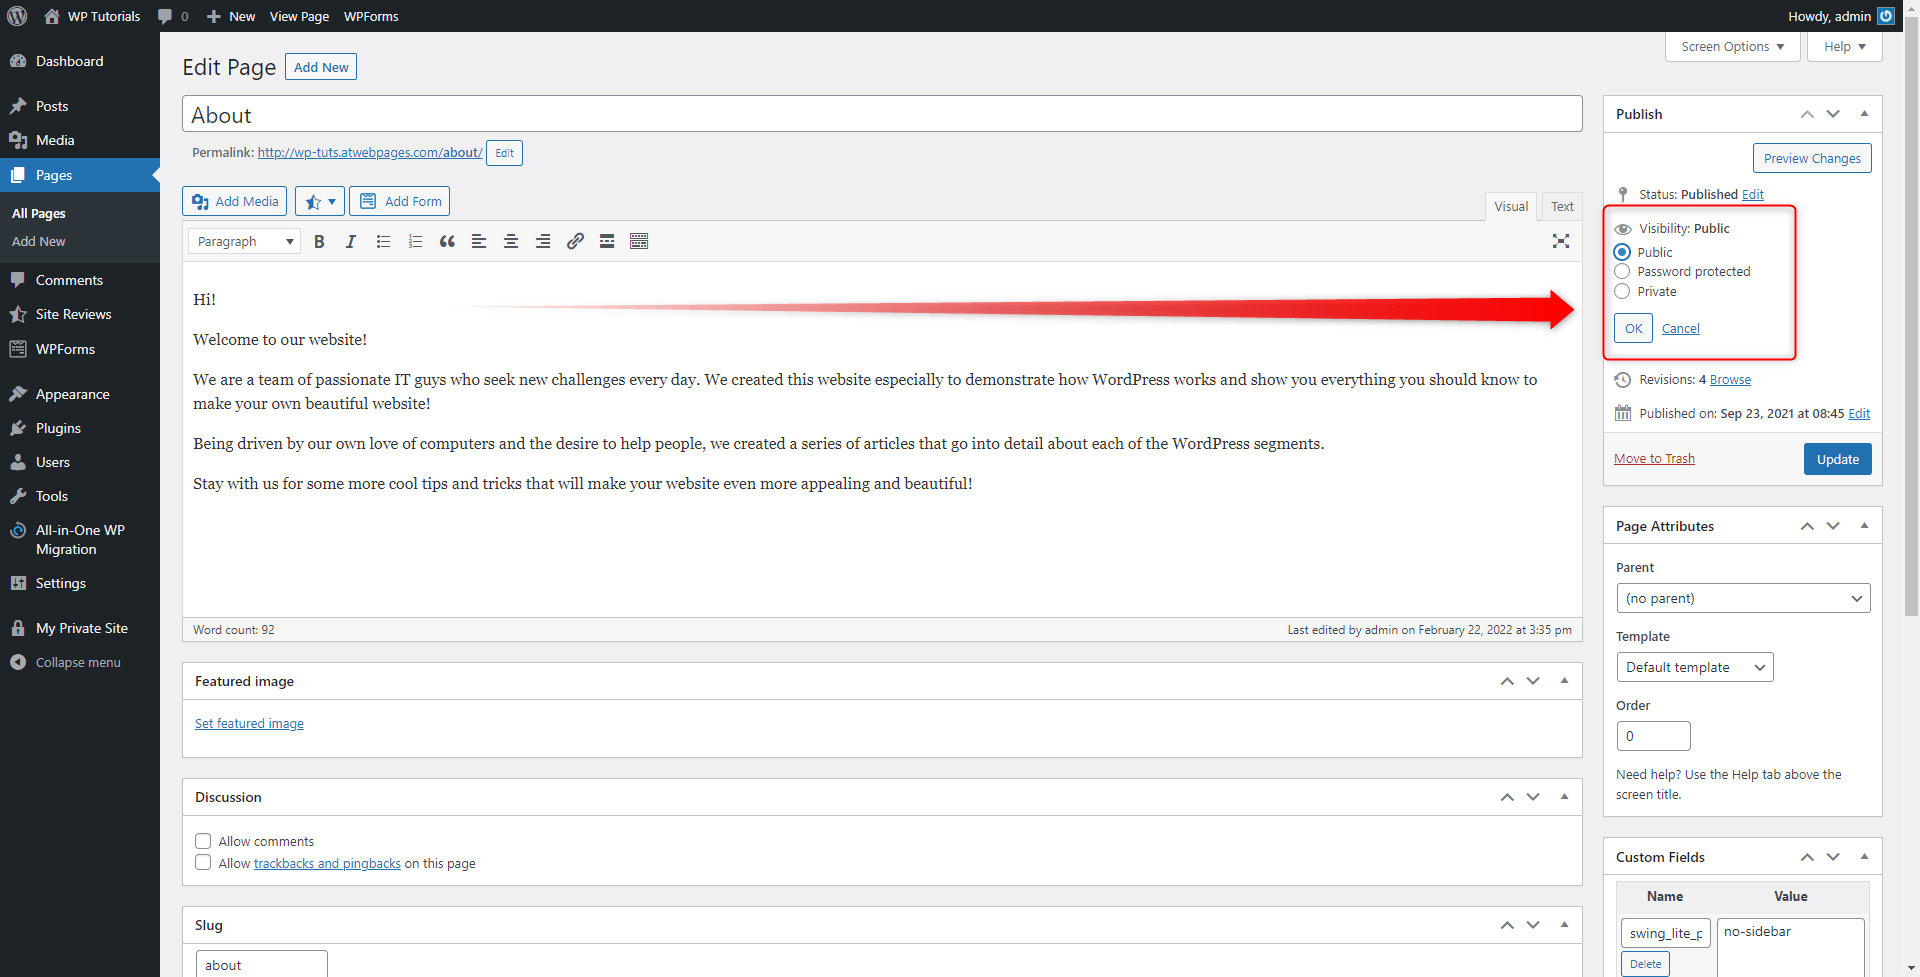
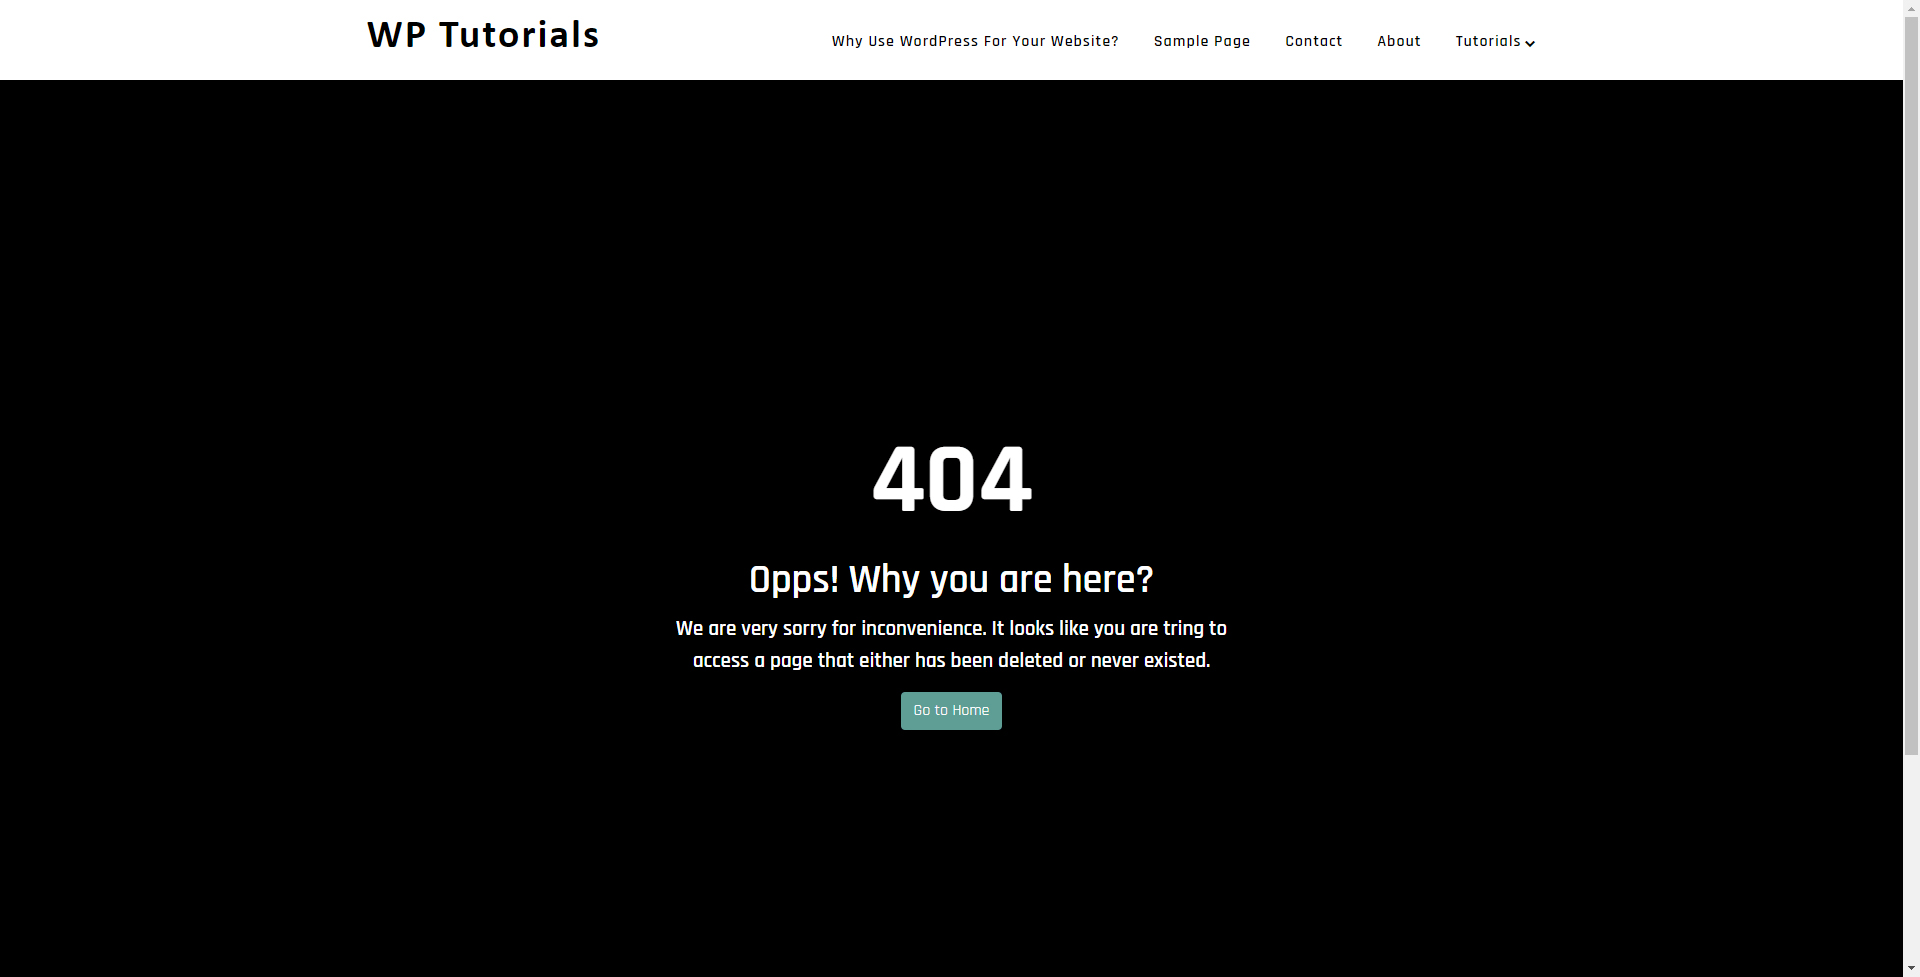
From the options, select Private. This will deny access to all visitors and registered users that take lesser WordPress roles. This is the default message these visitors will see if they try to access the blocked page:
An Alternative to Privacy: Exclude Your Site from Search Engine Indexing
Hiding your website from search engines means that your site won’t be found within the search results of any search engine such as Google and Bing.
To do so, simply go to your WordPress Dashboard and then to Settings->Reading:
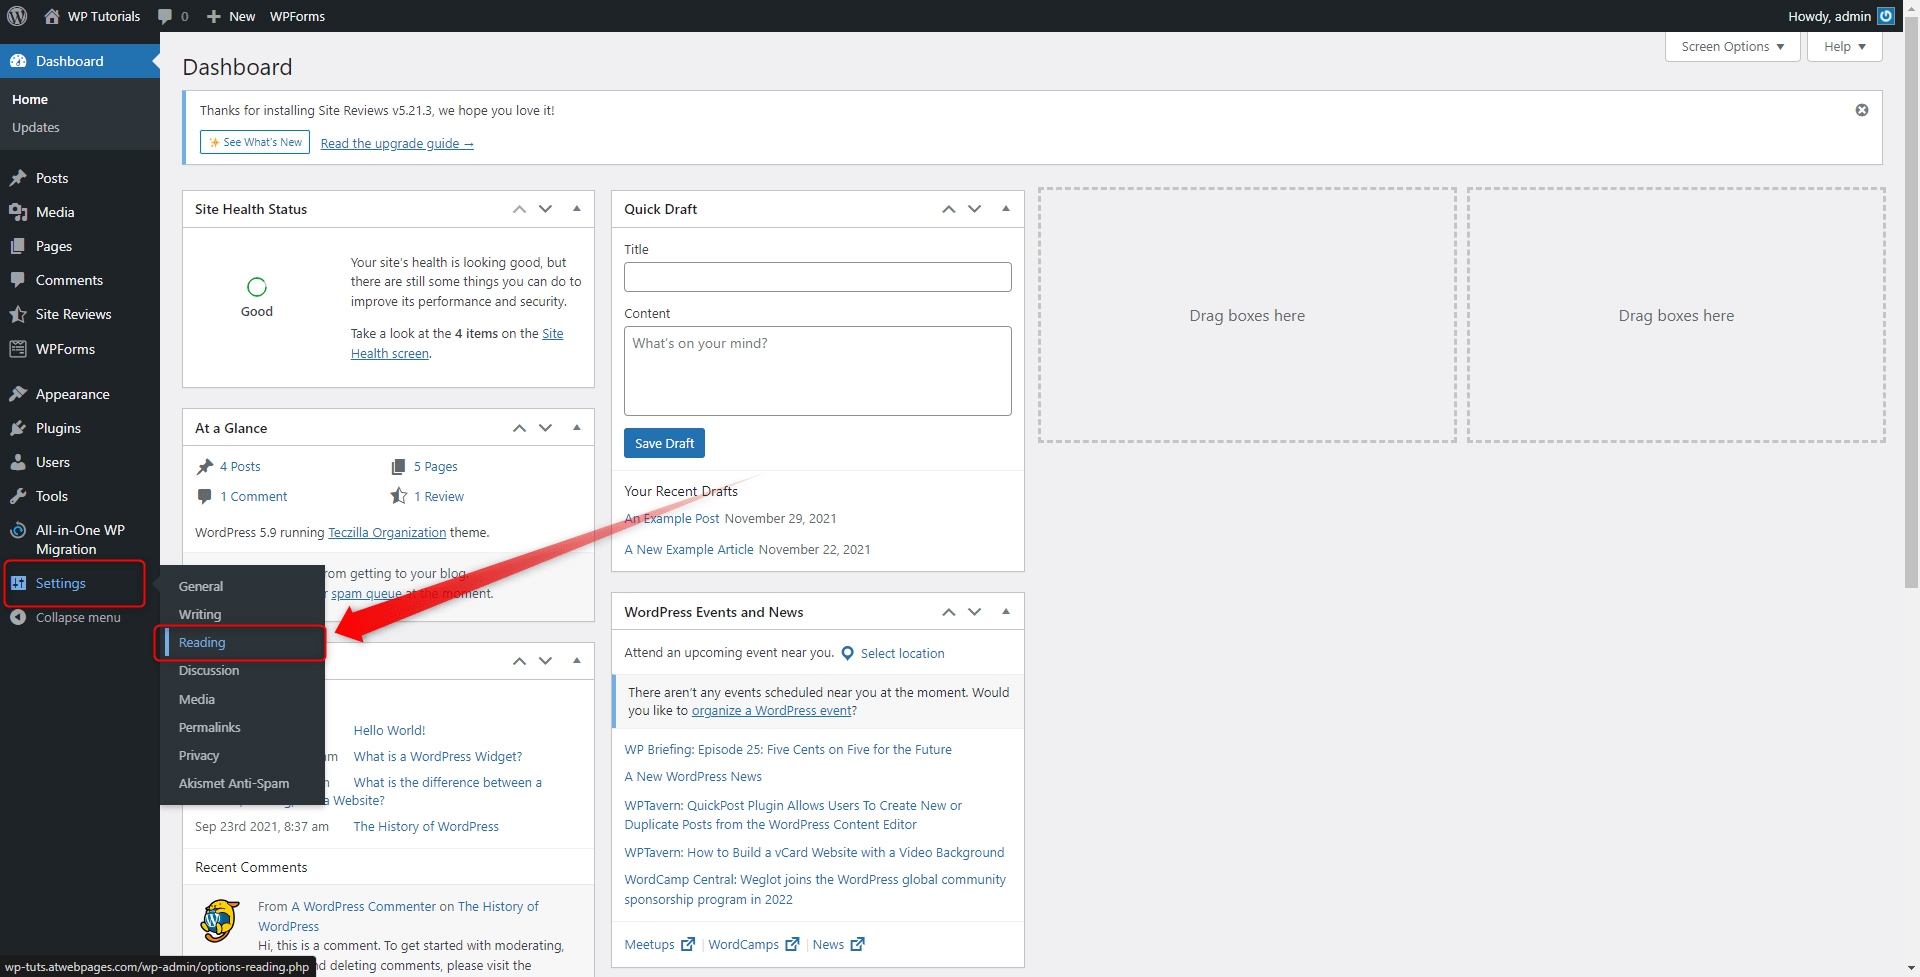
This will open a page with different kinds of settings. At the bottom you will see a Discourage search engine from indexing this page checkbox right next to the Search engine visibility menu:
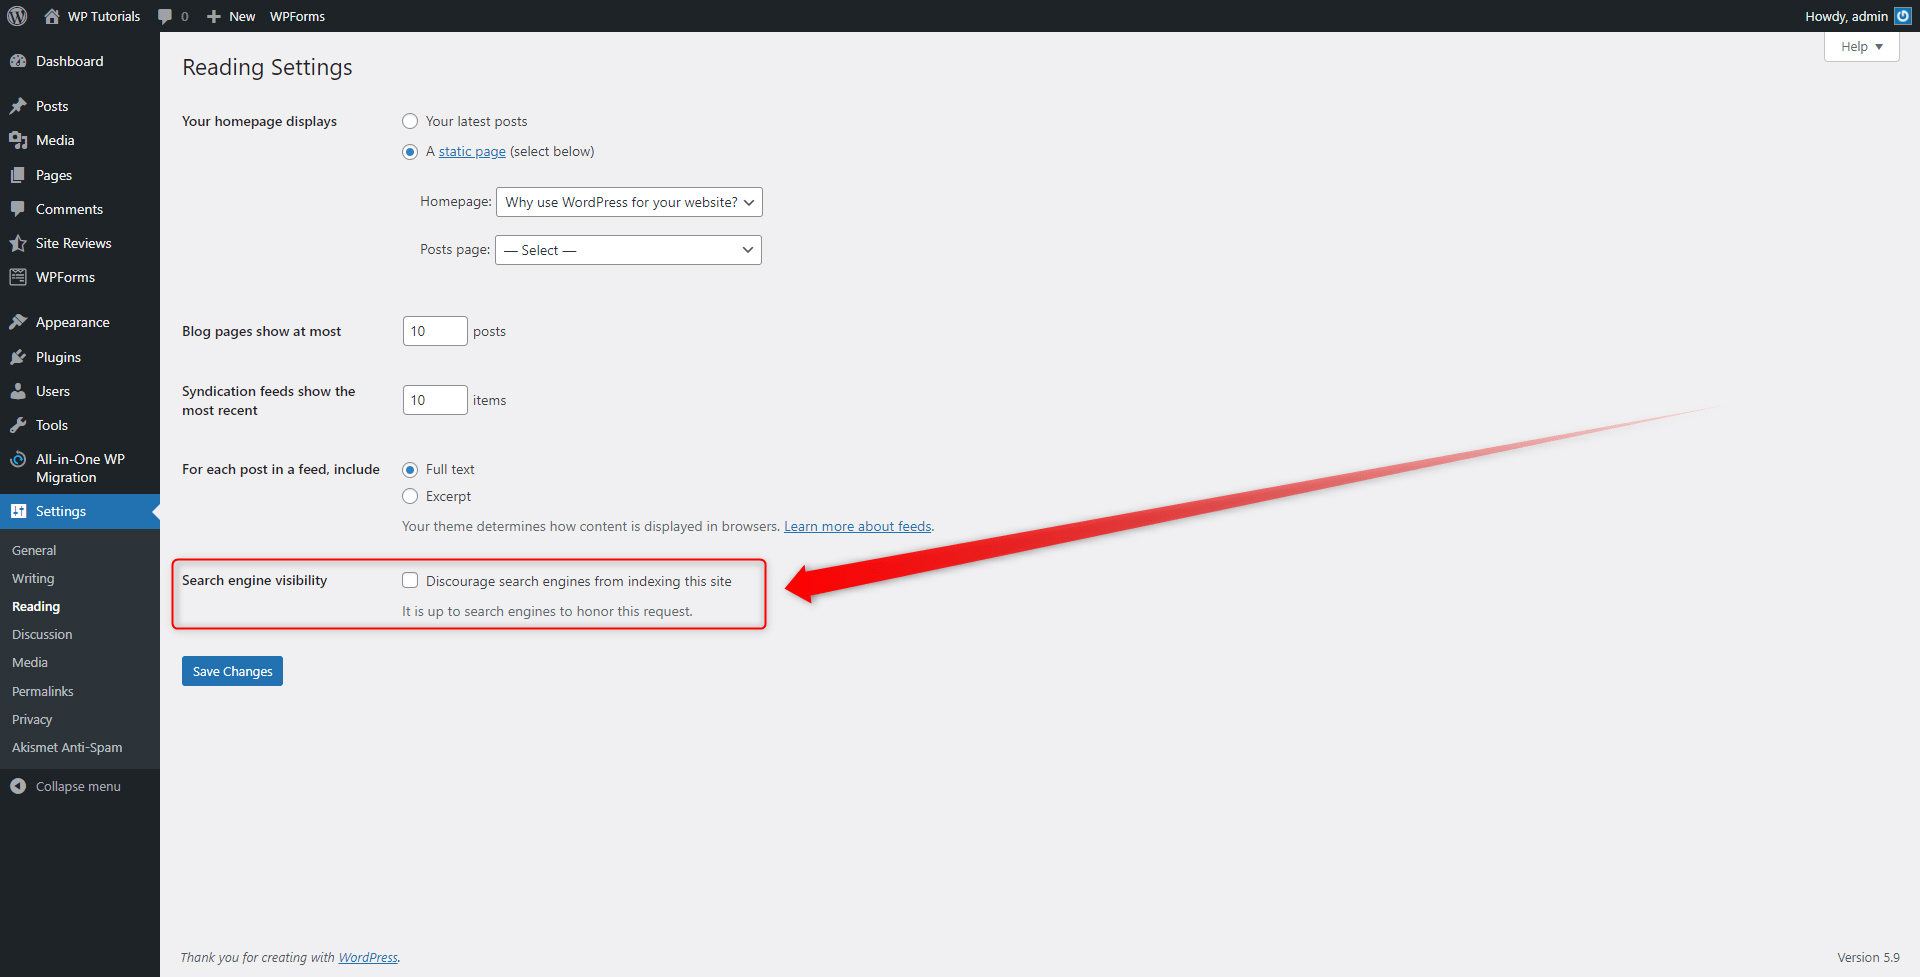
To hide your site from search engines, simply add a tick to this box and then click on the blue Save Changes button. This will ensure that your website won’t be indexed by search engines.
Keep in mind, however, that this approach doesn’t limit access to your site. This means that if someone knows the exact URL of your site and types it in a web browser, they will still open it and browse your content.
Conclusion
There are many reasons to make your website private. Luckily, WordPress is versatile enough to allow you to do so in a fast and efficient manner.
Protection can never be overestimated. This is why we, at ZETTAHOST offer some enhanced security with SSL Certificates. If you are not sure where to start, check out our plans and secure your website today!
Related: