The Gutenberg full site editor is a very faceted set of tools that allows you to craft a WordPress website that perfectly fits your website preferences and business goals.
The full site editor gives you the opportunity to customize even the smallest details that comprise your pages’ overall layout and functionalities.
See how to access the Gutenberg full site editor in the following paragraphs.
How to Access the Gutenberg Full Site Editor
To be able to access the editor, you should first install and activate a WordPress theme that supports the feature.
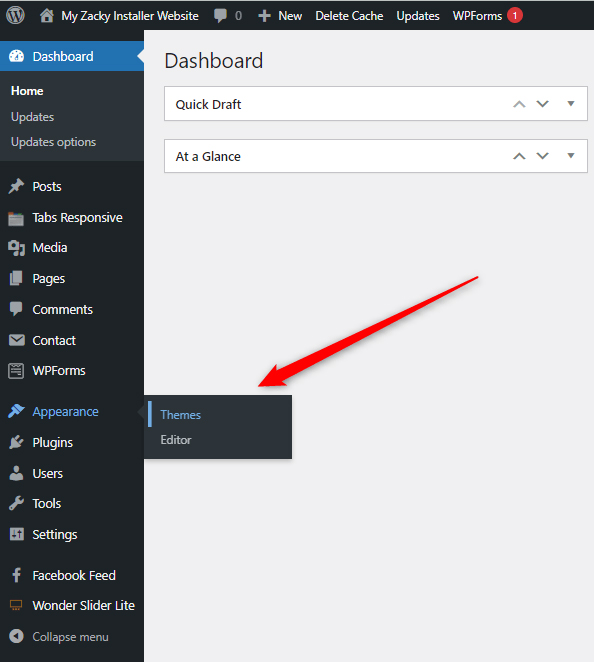
To do so, via your WordPress admin panel head to Appearance->Themes:
Once there, you will see a list with all your installed themes:
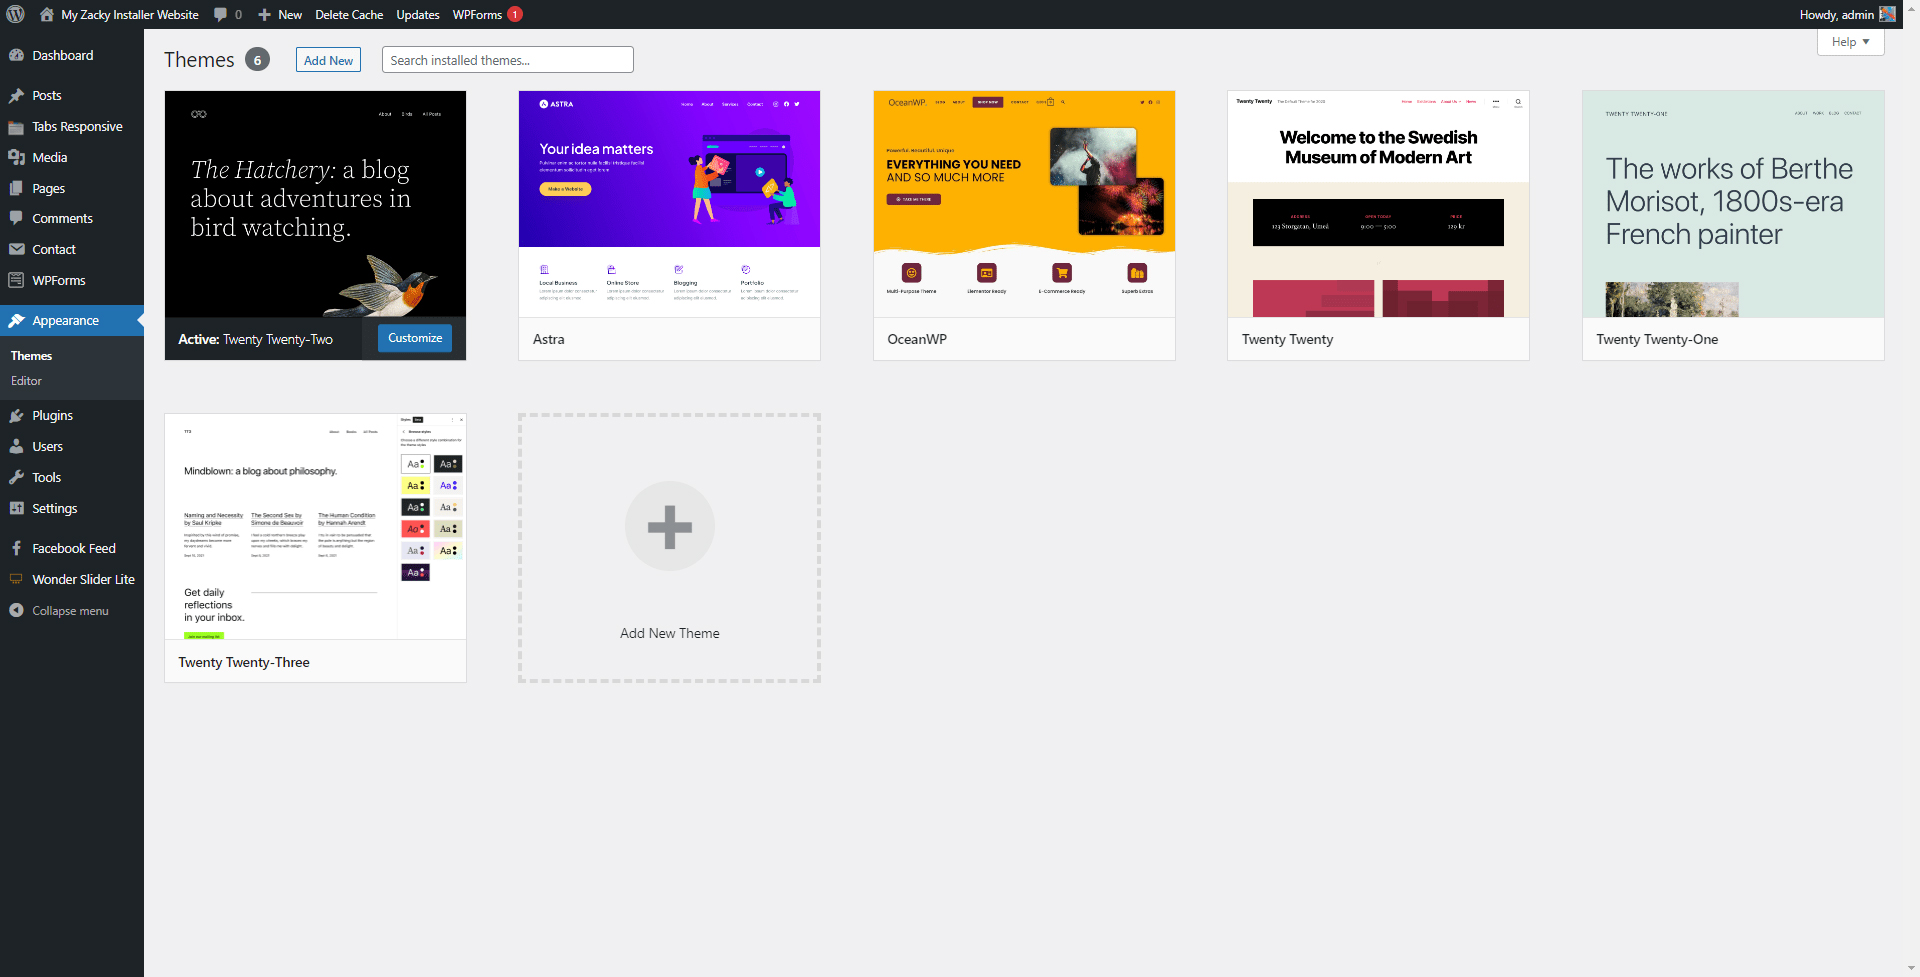
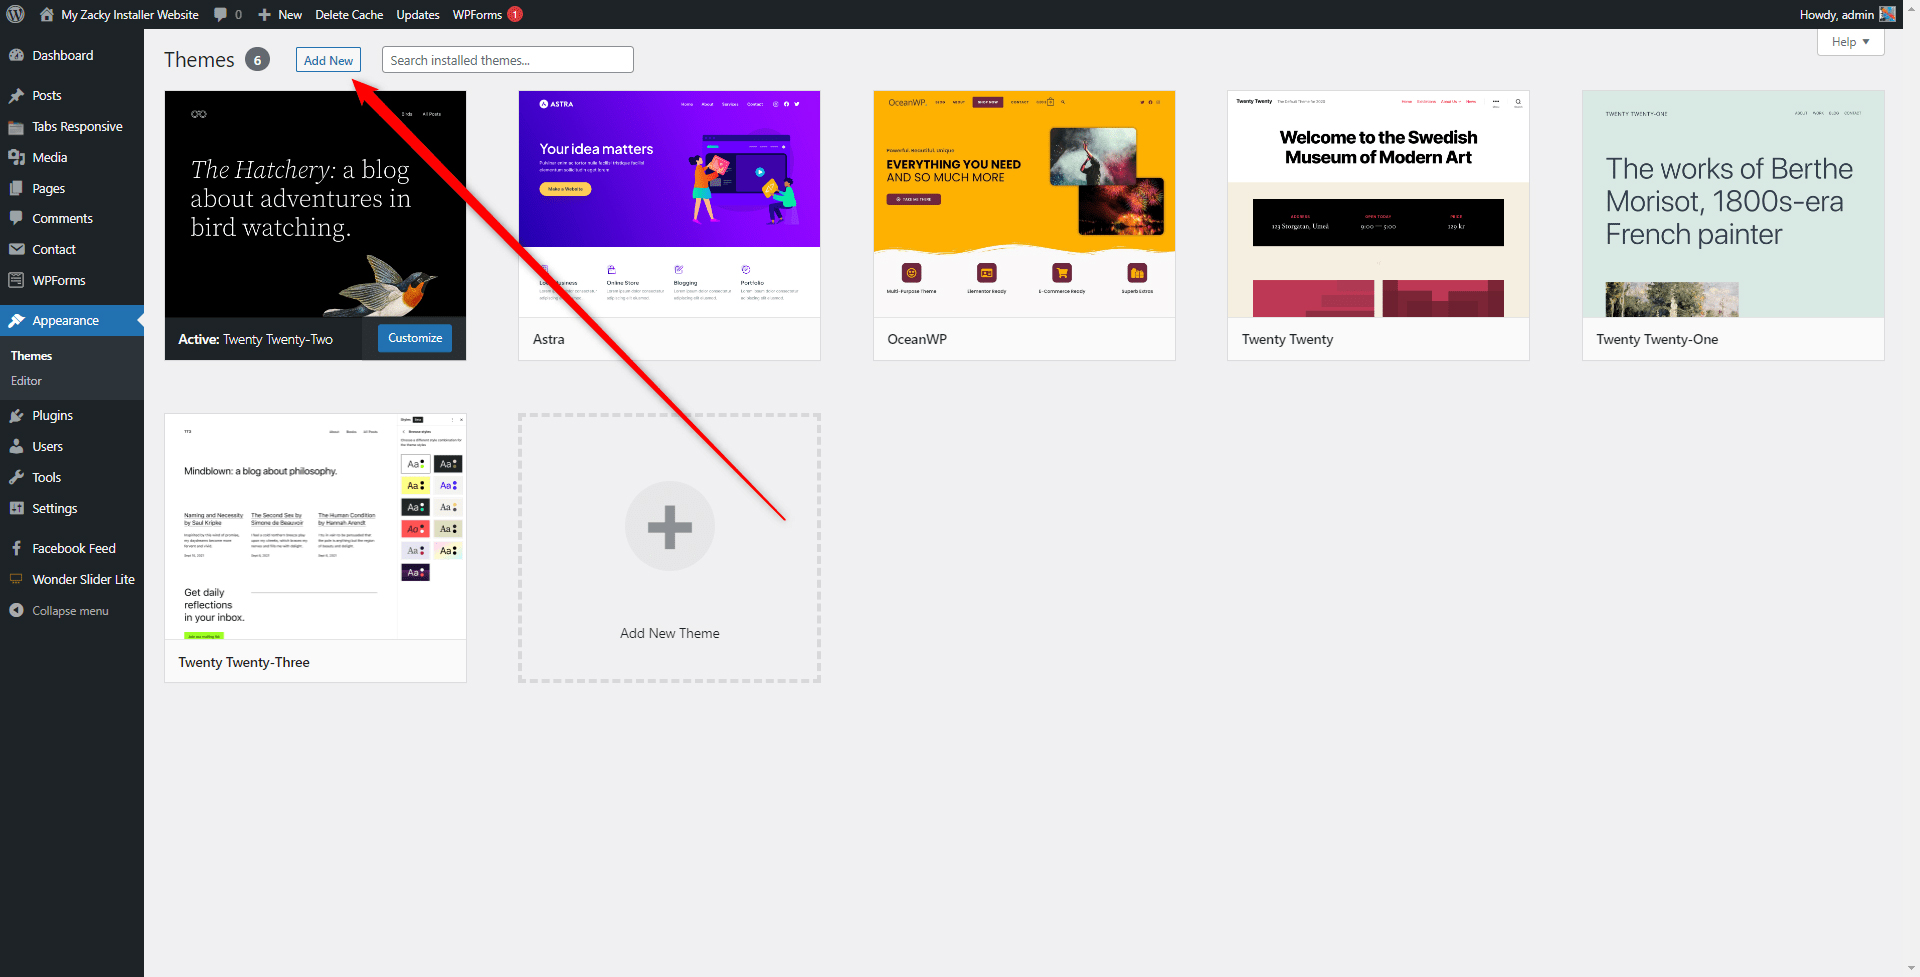
While on this page, click on the gray Add New button at the top left of the page:
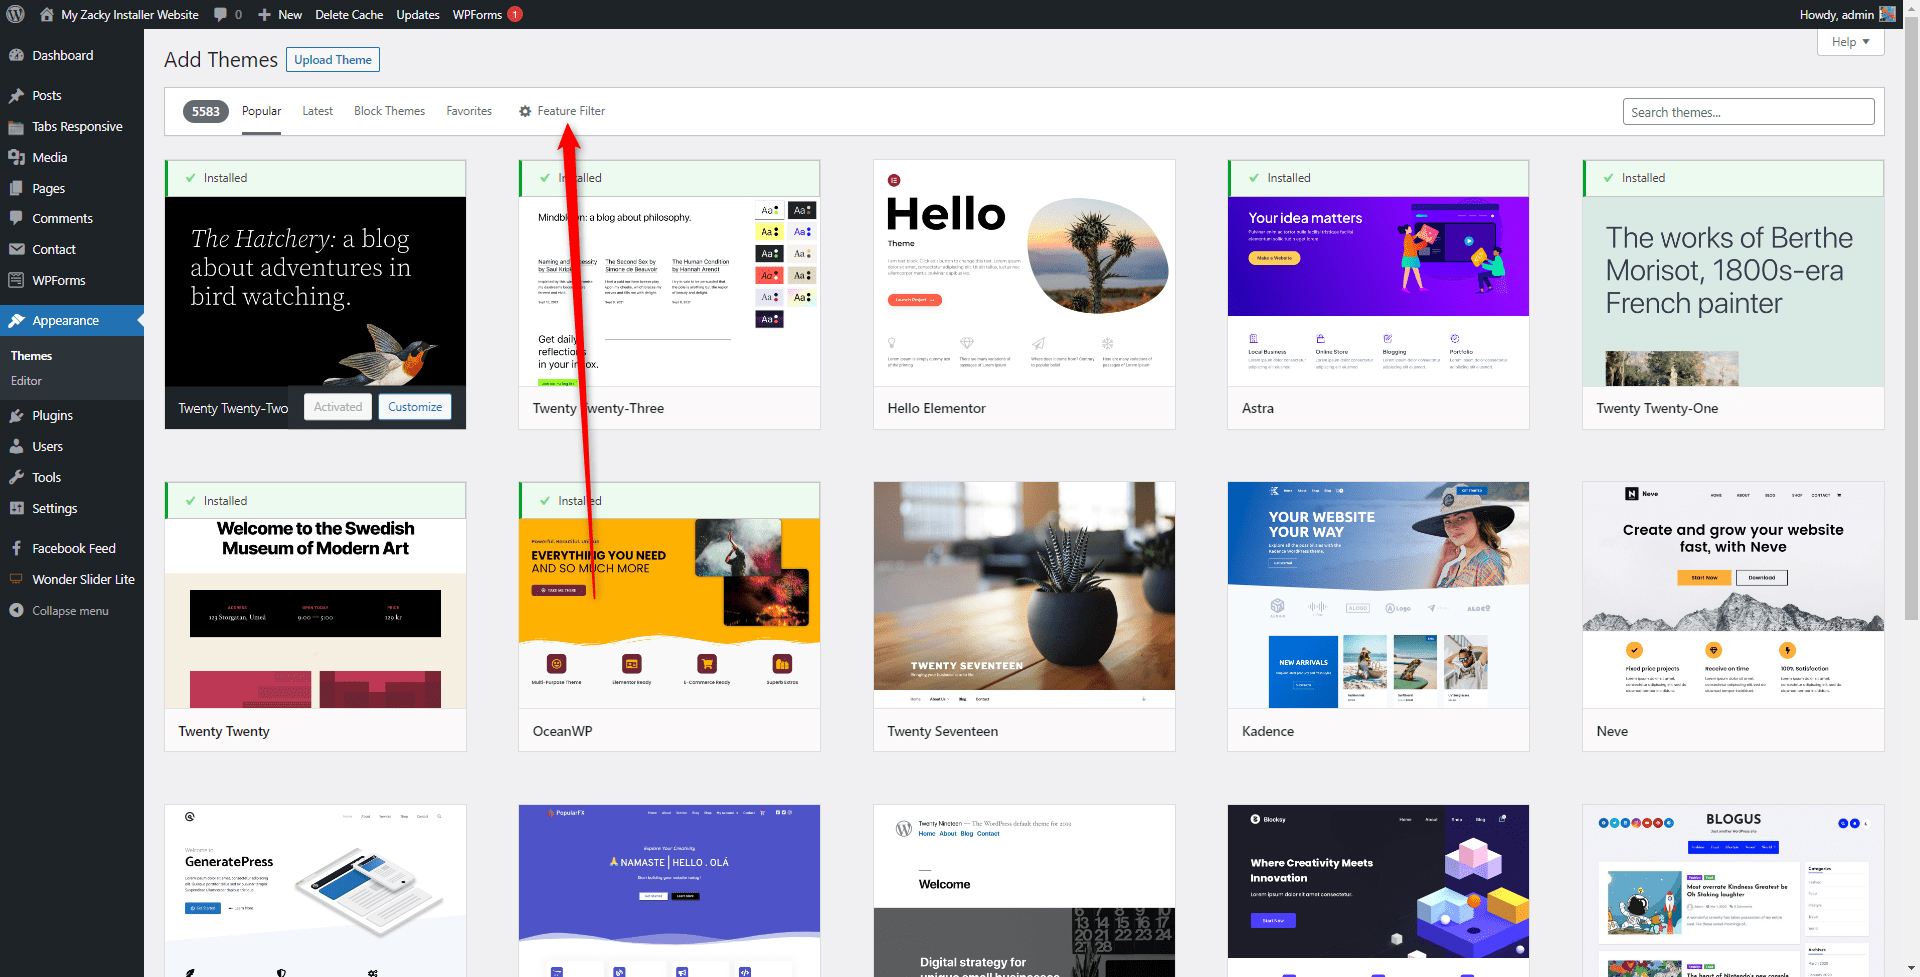
Clicking the Add New button will open a list of all available WordPress themes that you can use on your website:
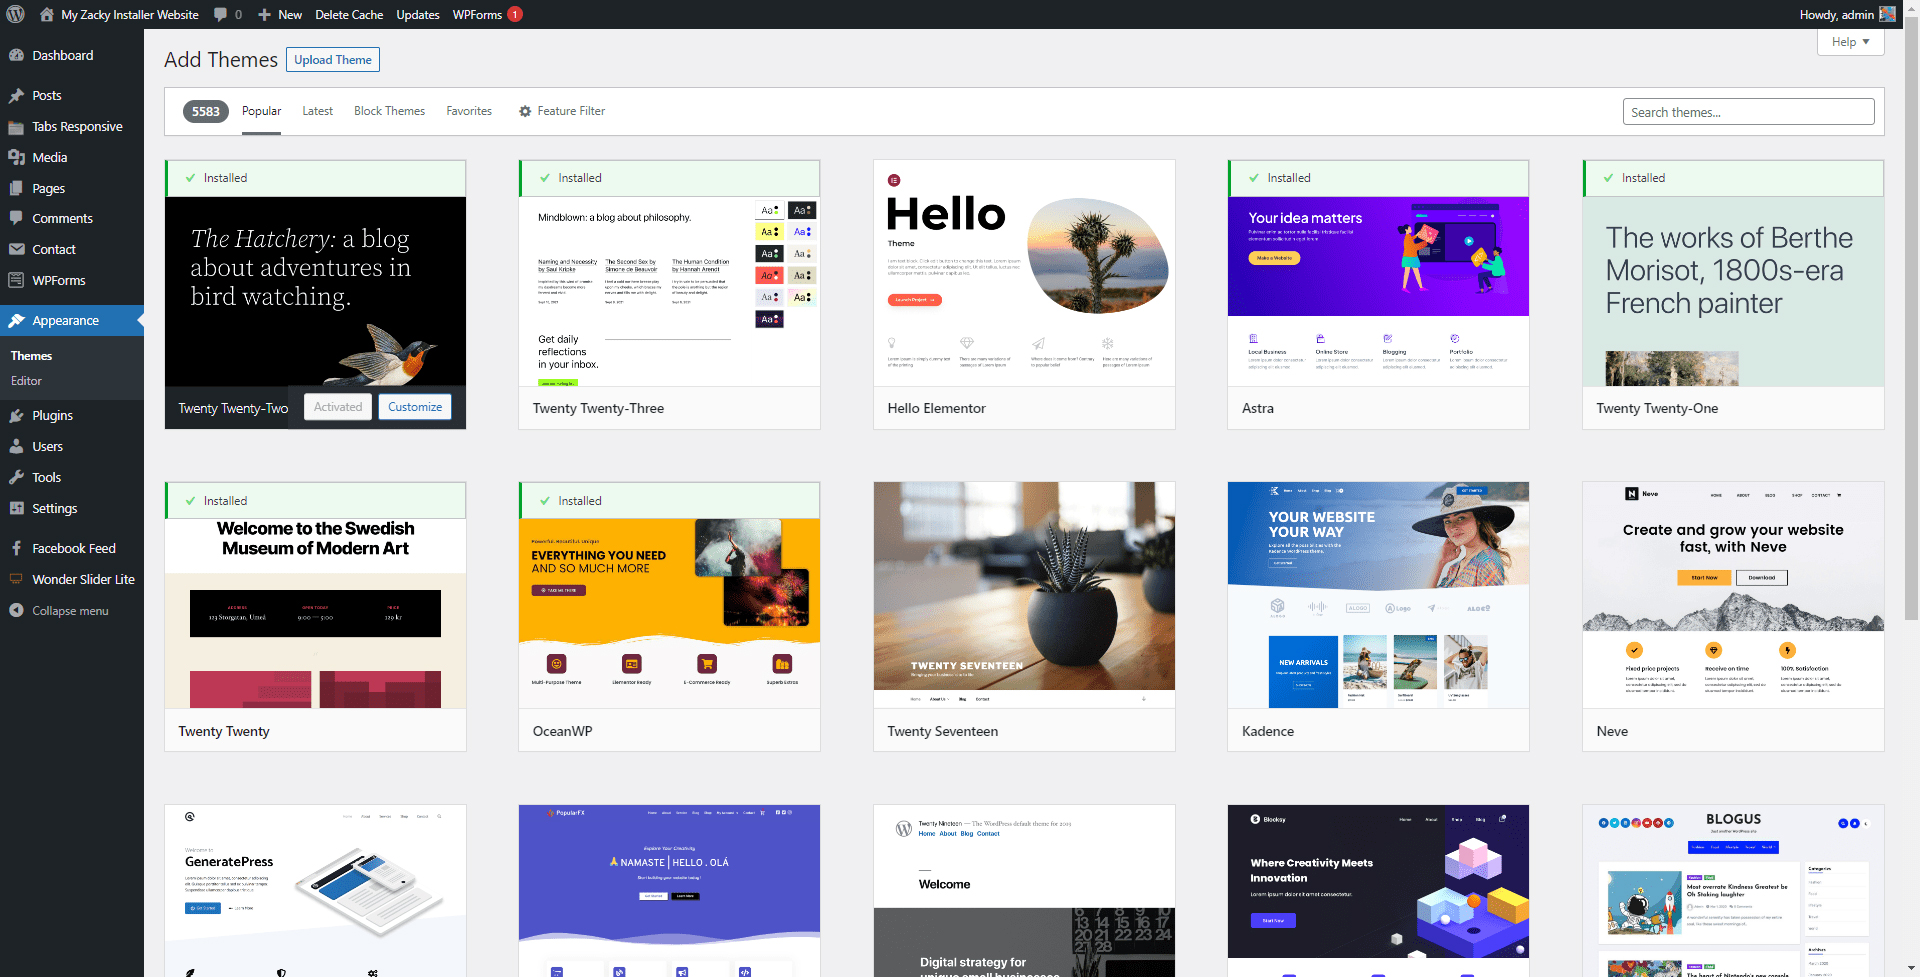
From this ample choice, you should filter the themes that feature the full site edit option. To do so, click on Feature Filter at the top of the page:
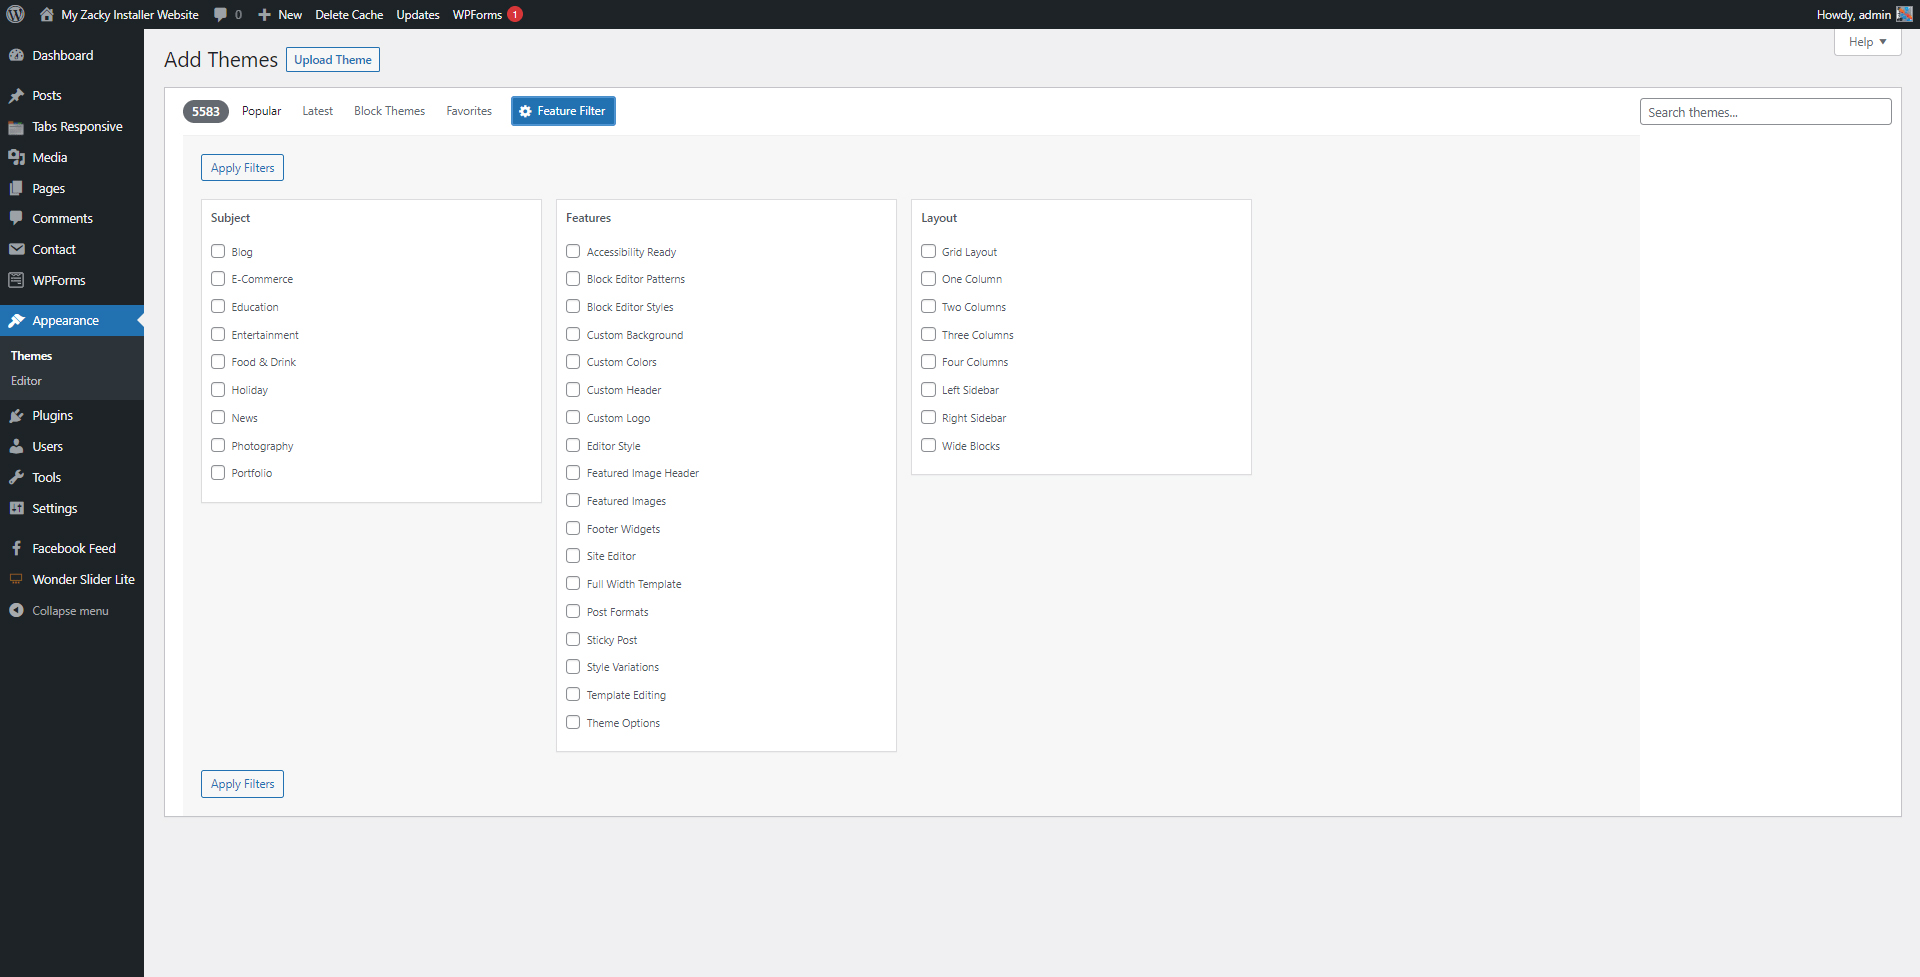
This will open a list of features that you can filter out:
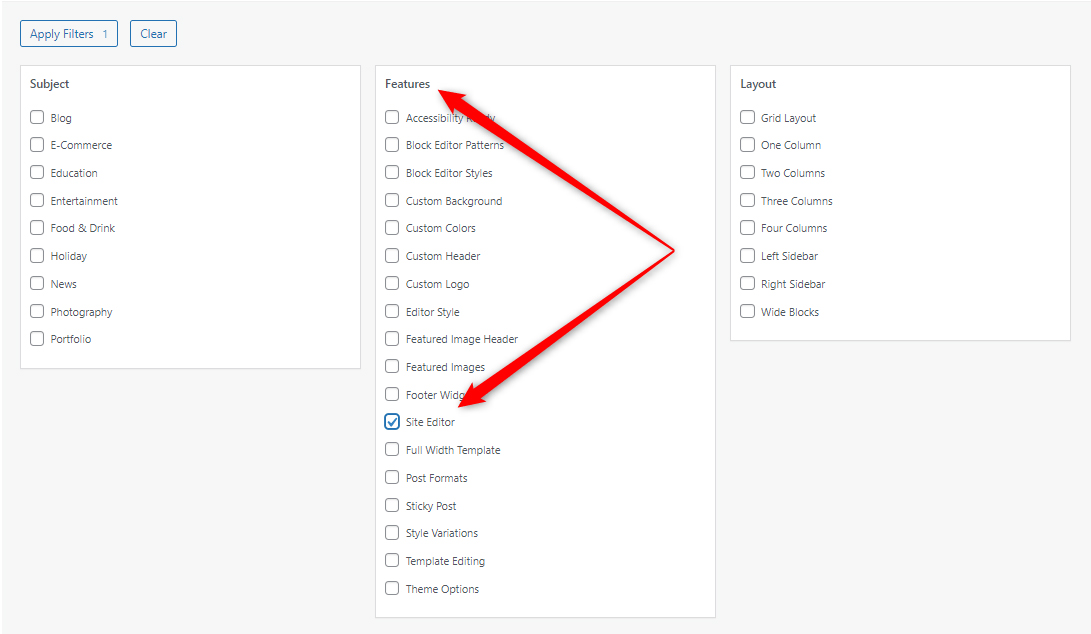
To prompt WordPress to display only themes that include the full site edit option, in the Features column add a tick to Site Editor:
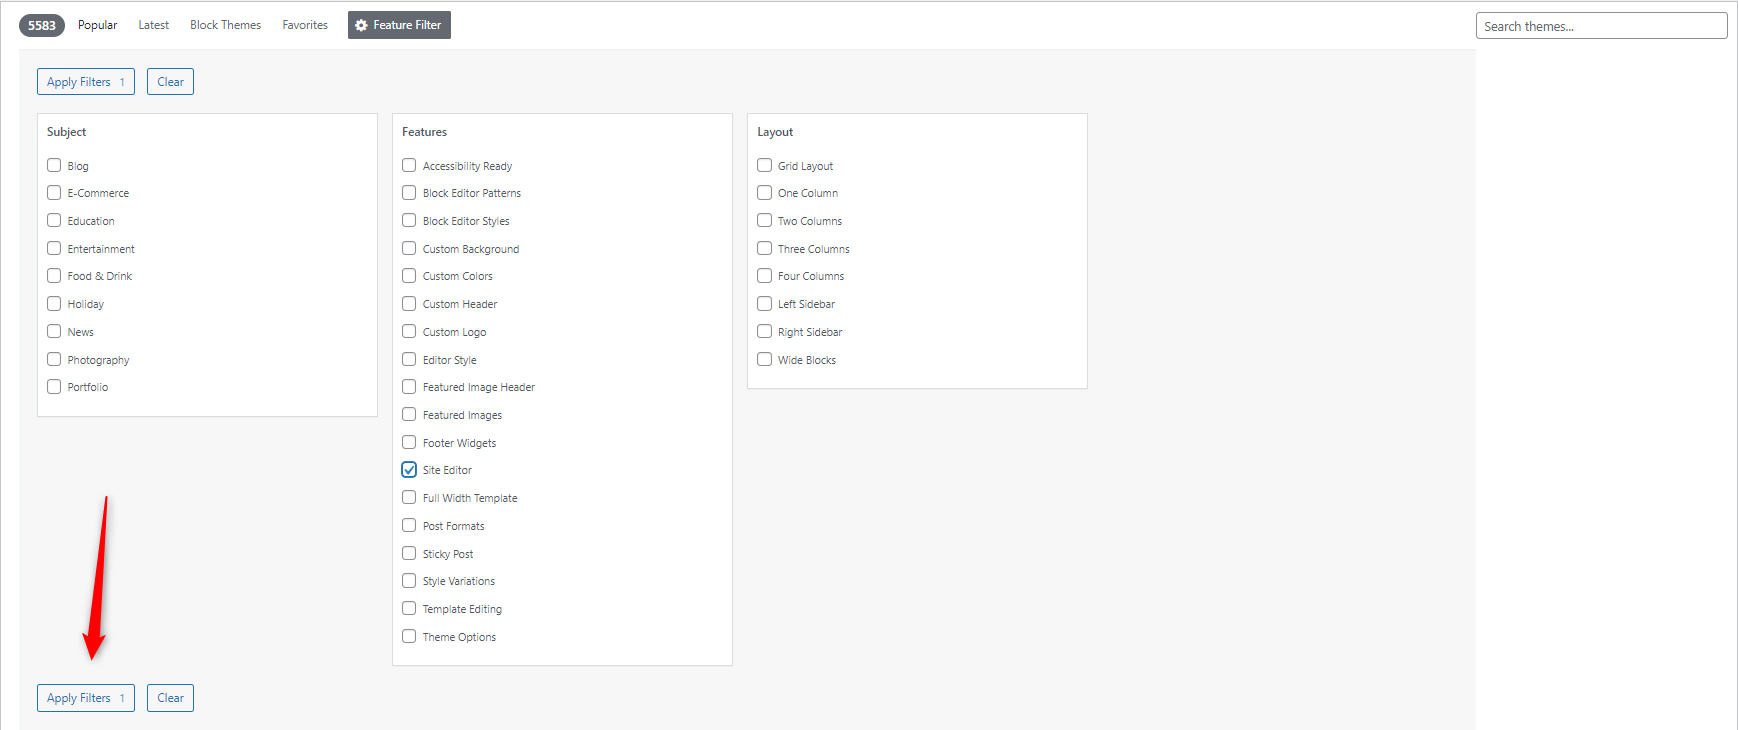
Once you add a tick to Site Editor, click on Apply Filters, so WordPress displays the requested results:
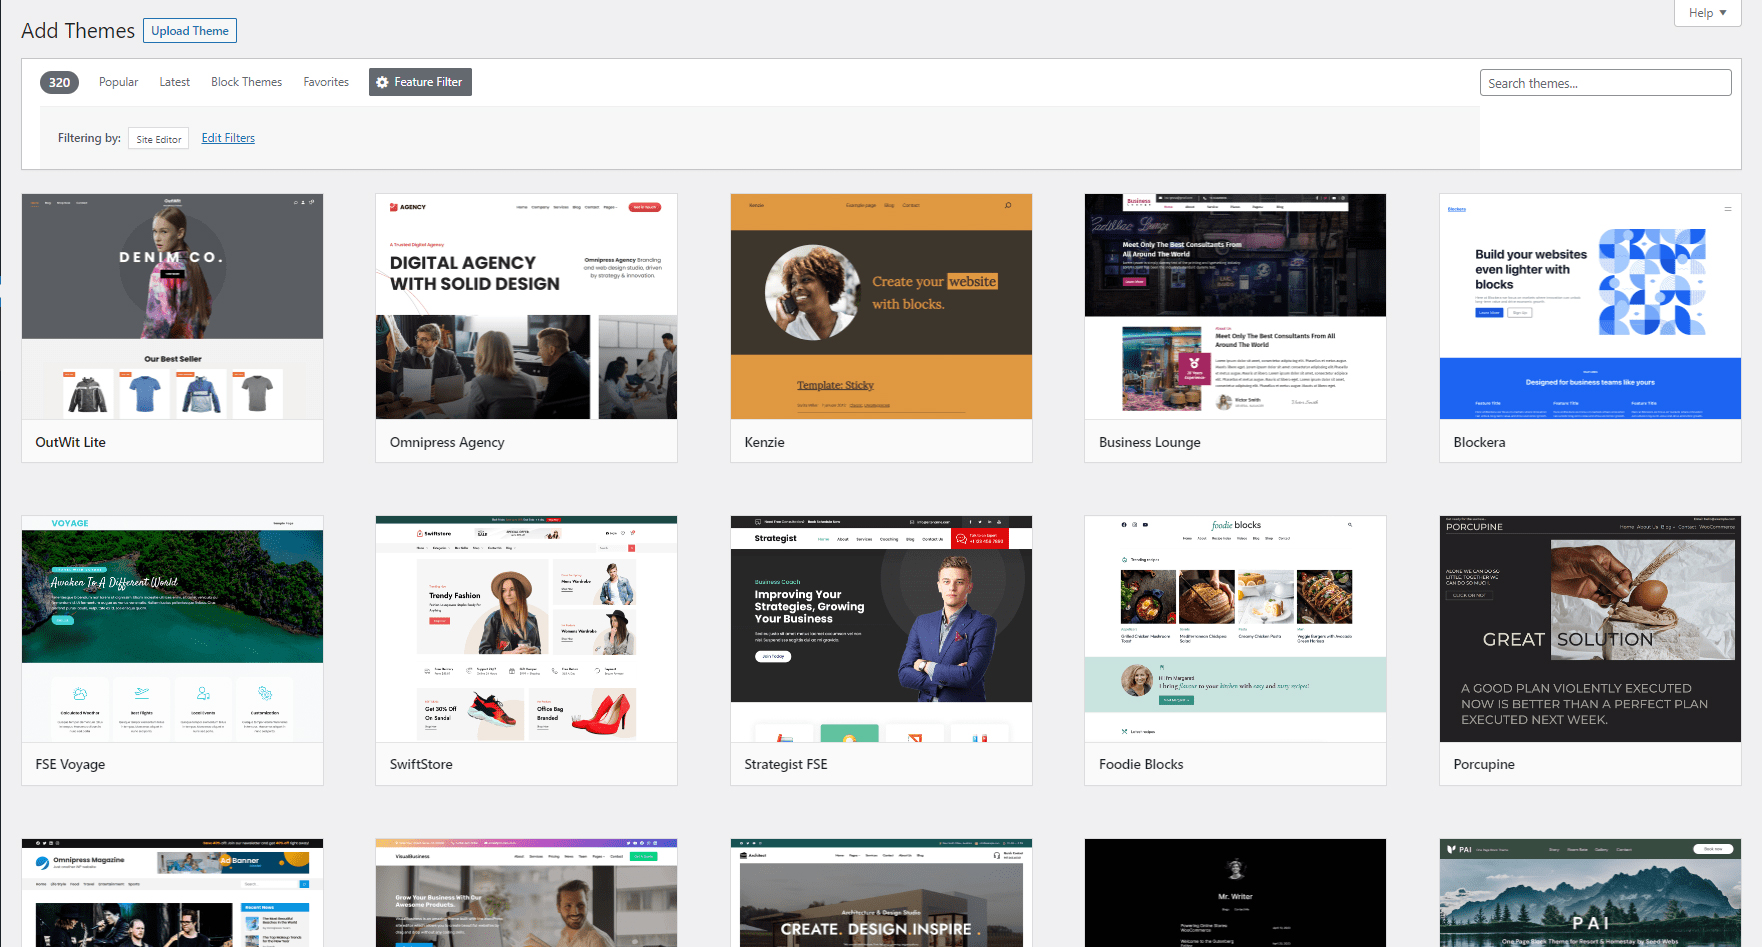
After you click the Apply Filters button, a list with suggestions will appear. From this list choose a theme that fits your needs and activate it:
Now that you have installed and activated a WordPress theme that supports the full site editor feature, it is time to access it.
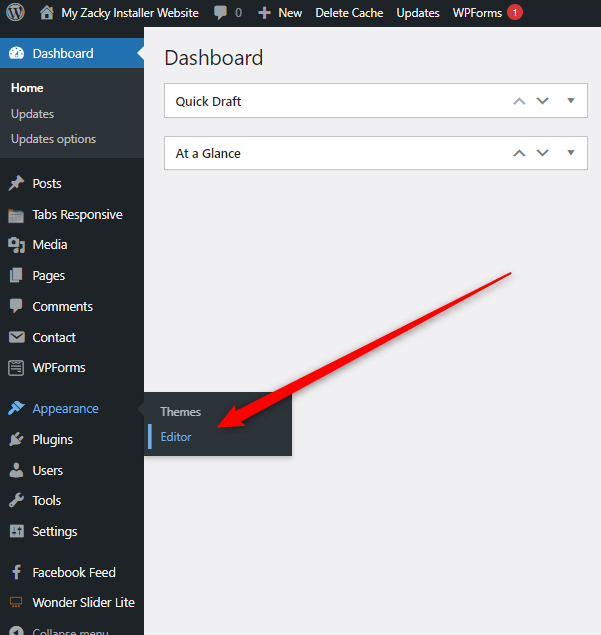
To access the full site editor, via your WordPress dashboard head to Appearance->Editor (keep in mind that you will see the Editor option only if your activated theme supports the full site editor feature):
Once you click the button, the full site editor will activate. It should look like this:
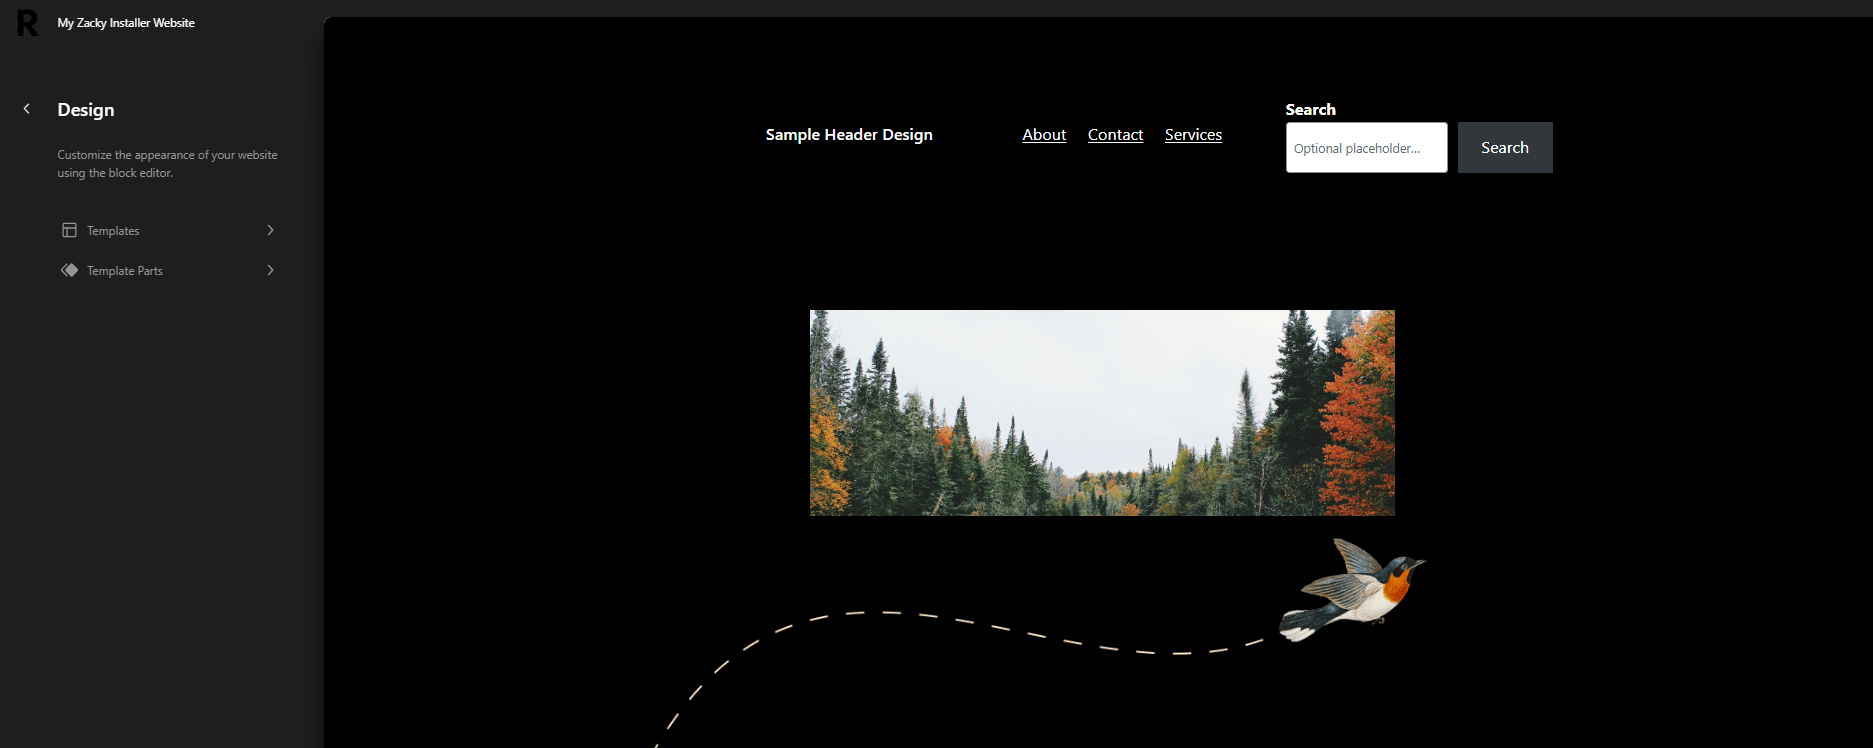
While on this page, notice the Templates and Template Parts menu sections:
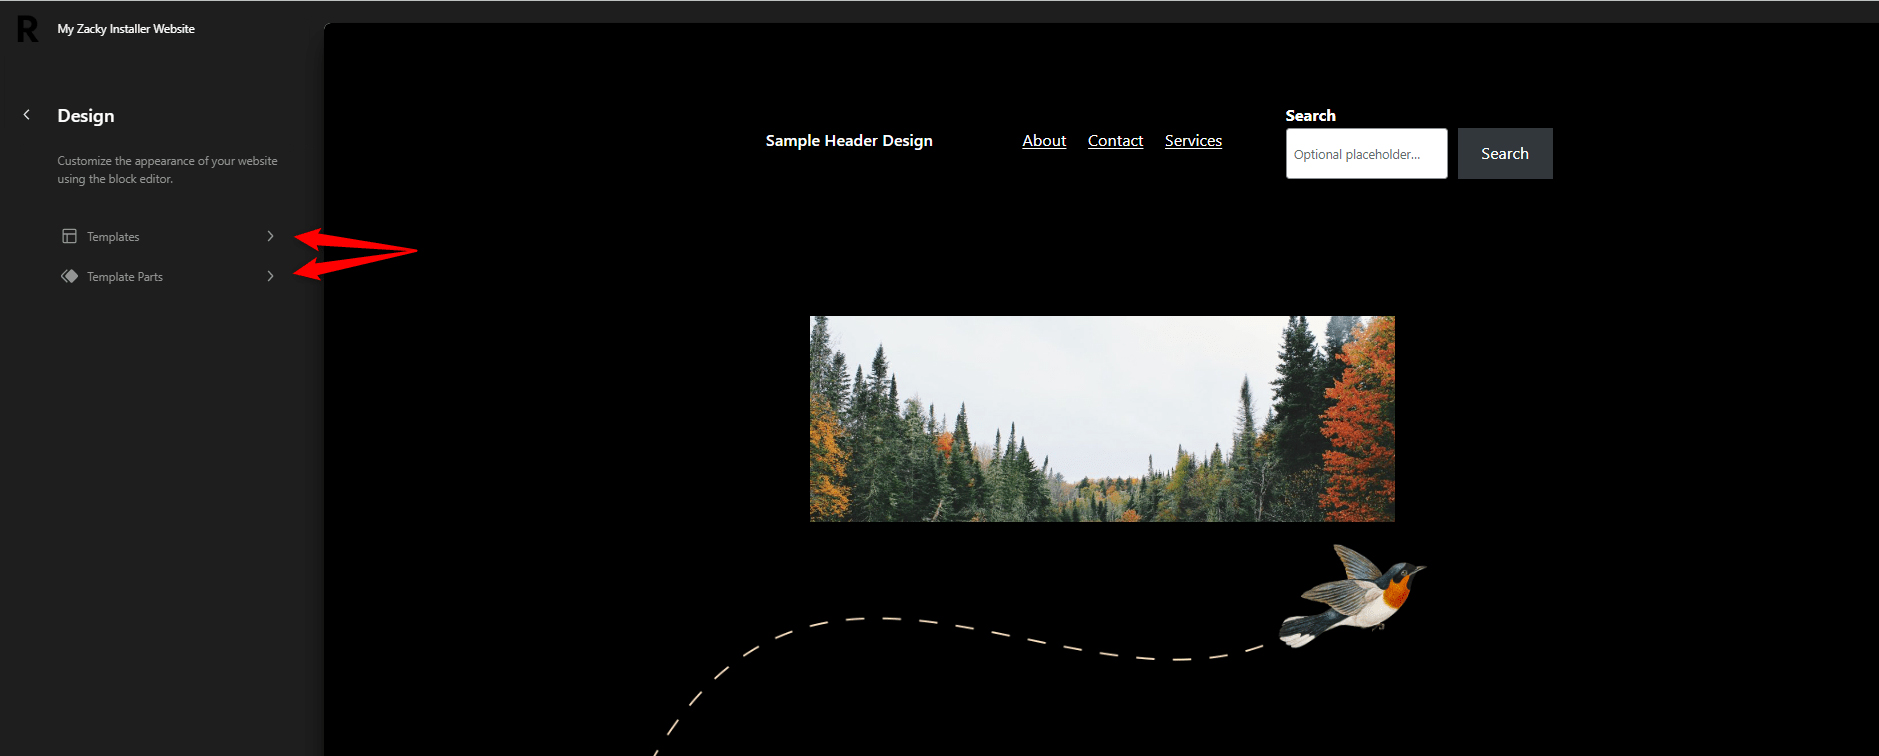
These two options allow you to customize an entire page to your liking (Templates), or a single web page component (Template Parts).
In the following paragraphs, you will read how to use each one of them.
Templates (Full Page Edit)
If you click on the first option, Templates, you will see a list of your website pages:
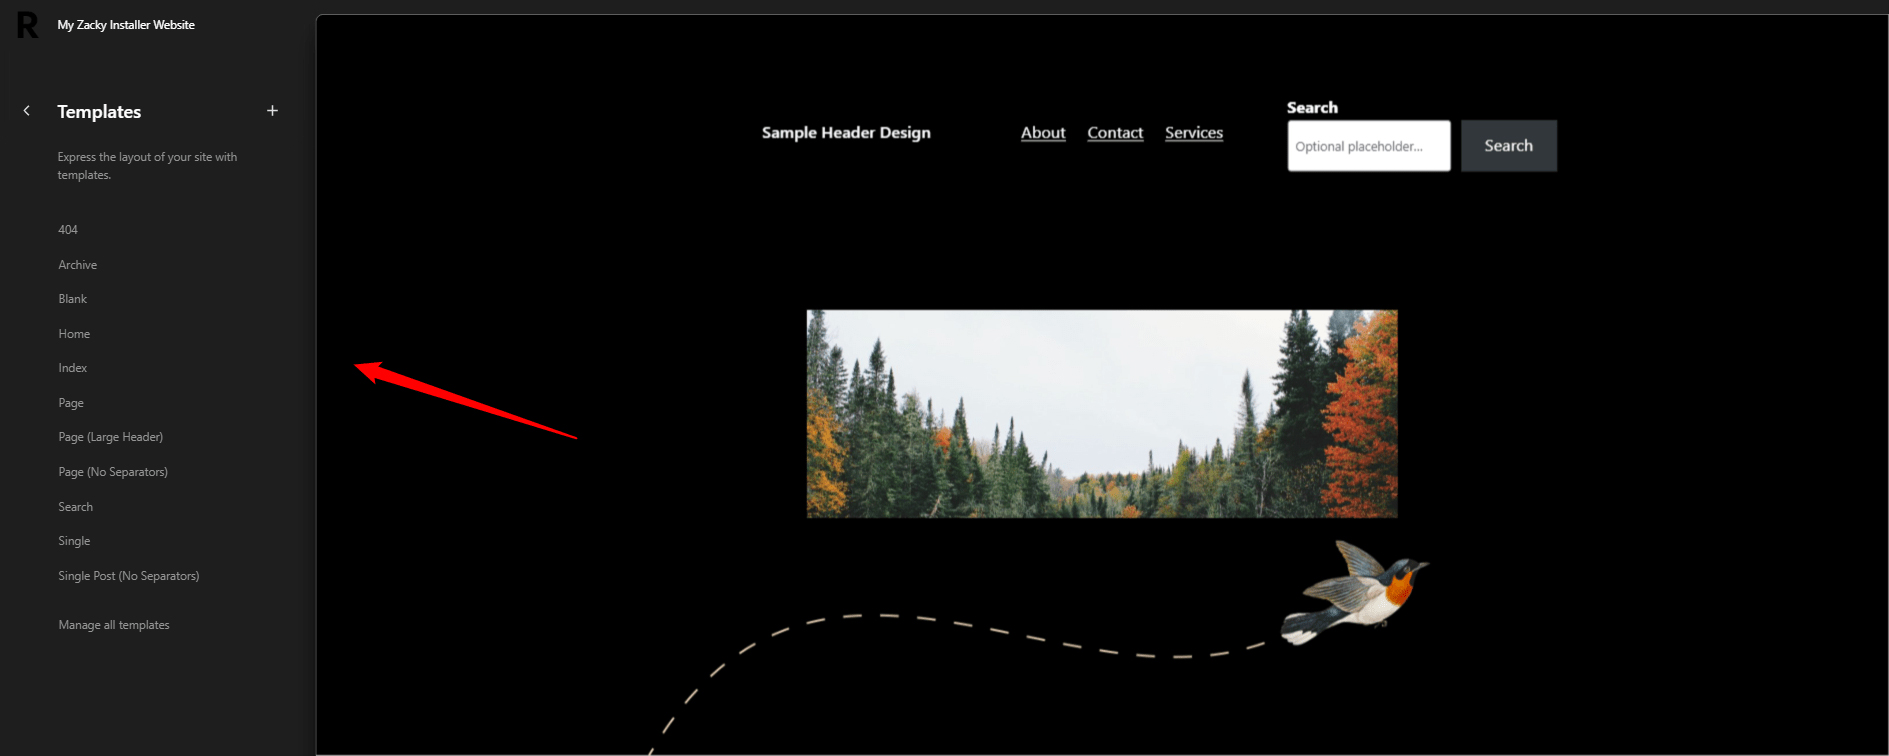
To be able to edit your pages, simply click on one, so the editor activates. In this demonstration, we will click on Home. Regardless of which page you click on, a new page with options will appear:
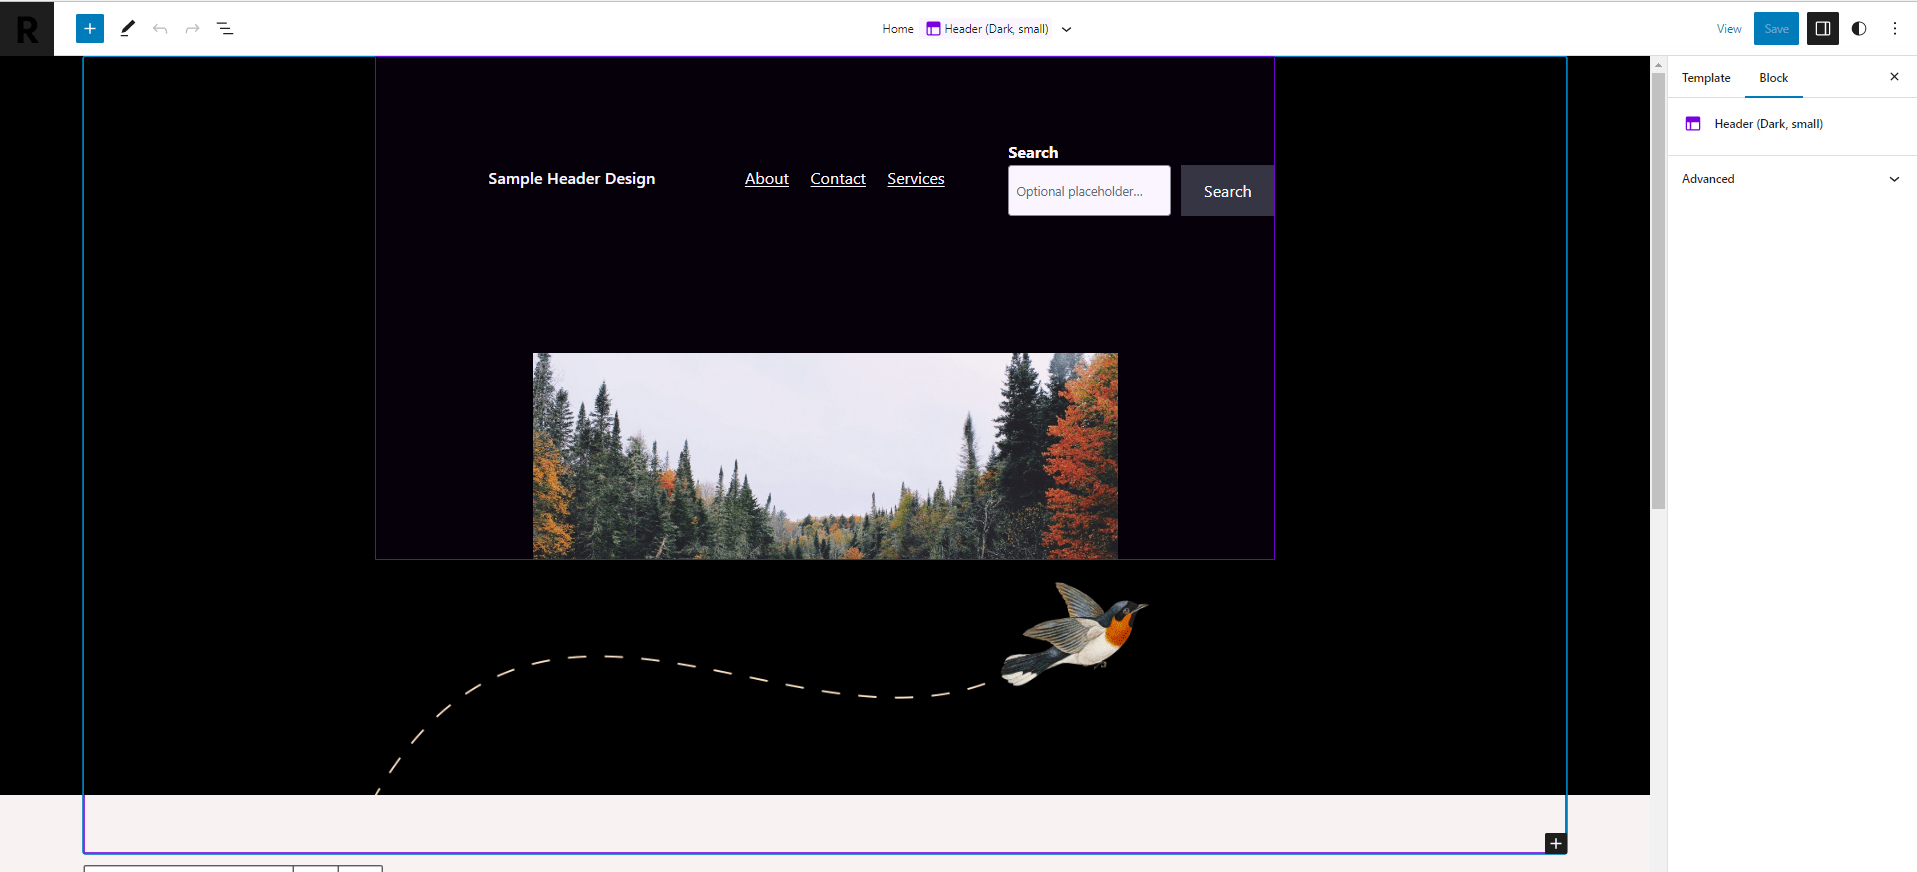
Now that the editor is active, you can start editing your page’s layout, so it perfectly fits your design requirements.
To make changes, simply insert blocks in the content area, by clicking on the + button, or clicking on the already inserted ones, so you can access their options.
For more clarity, you can also activate the List view, so you see how blocks are distributed in relation to each other by clicking on the List View icon:
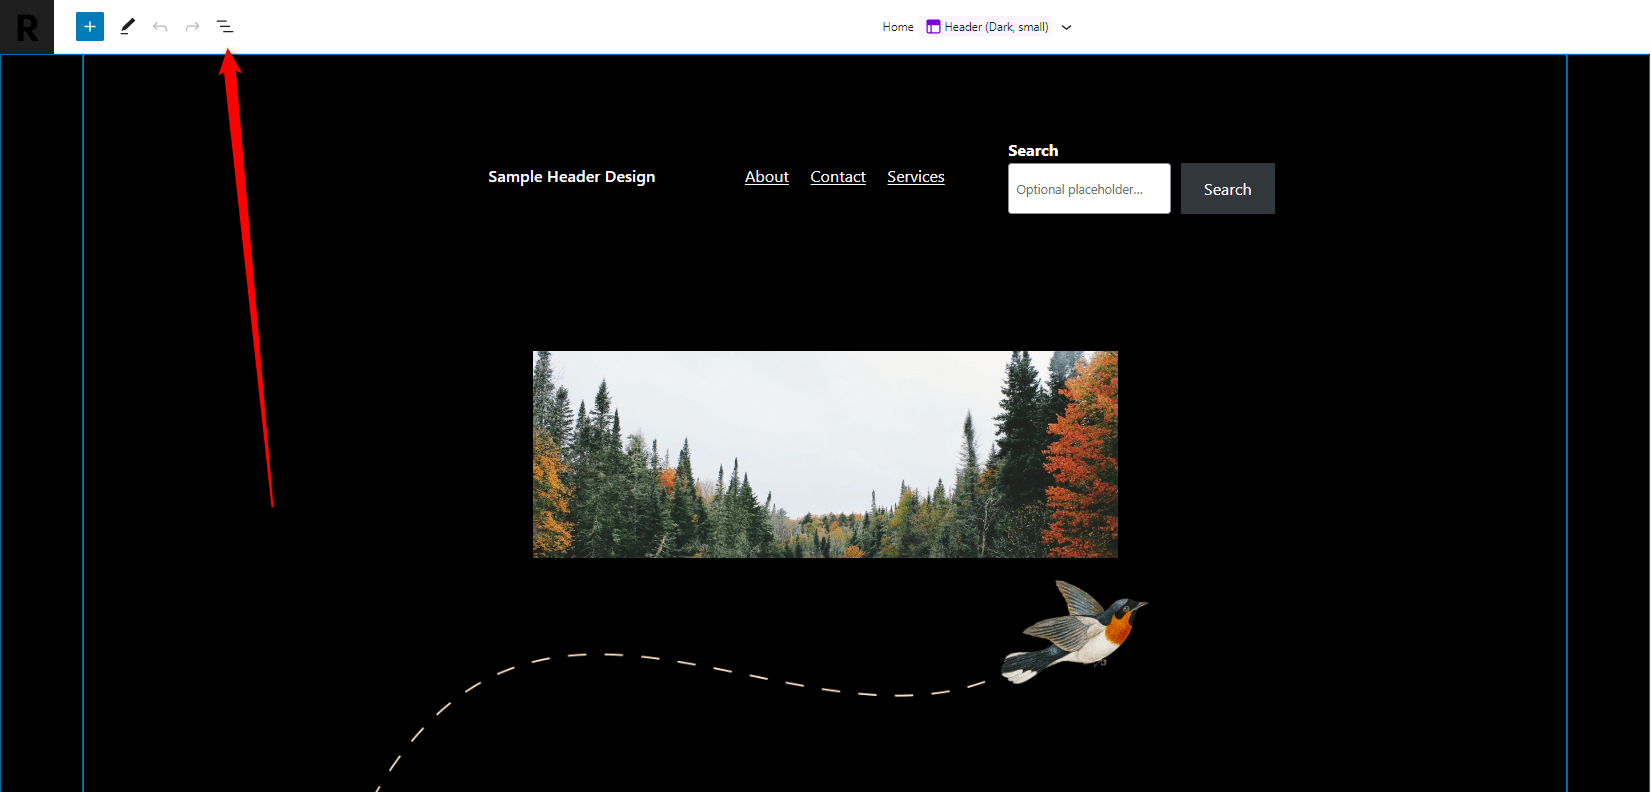
Once you click the View List icon, a sidebar on the left of the screen will appear:
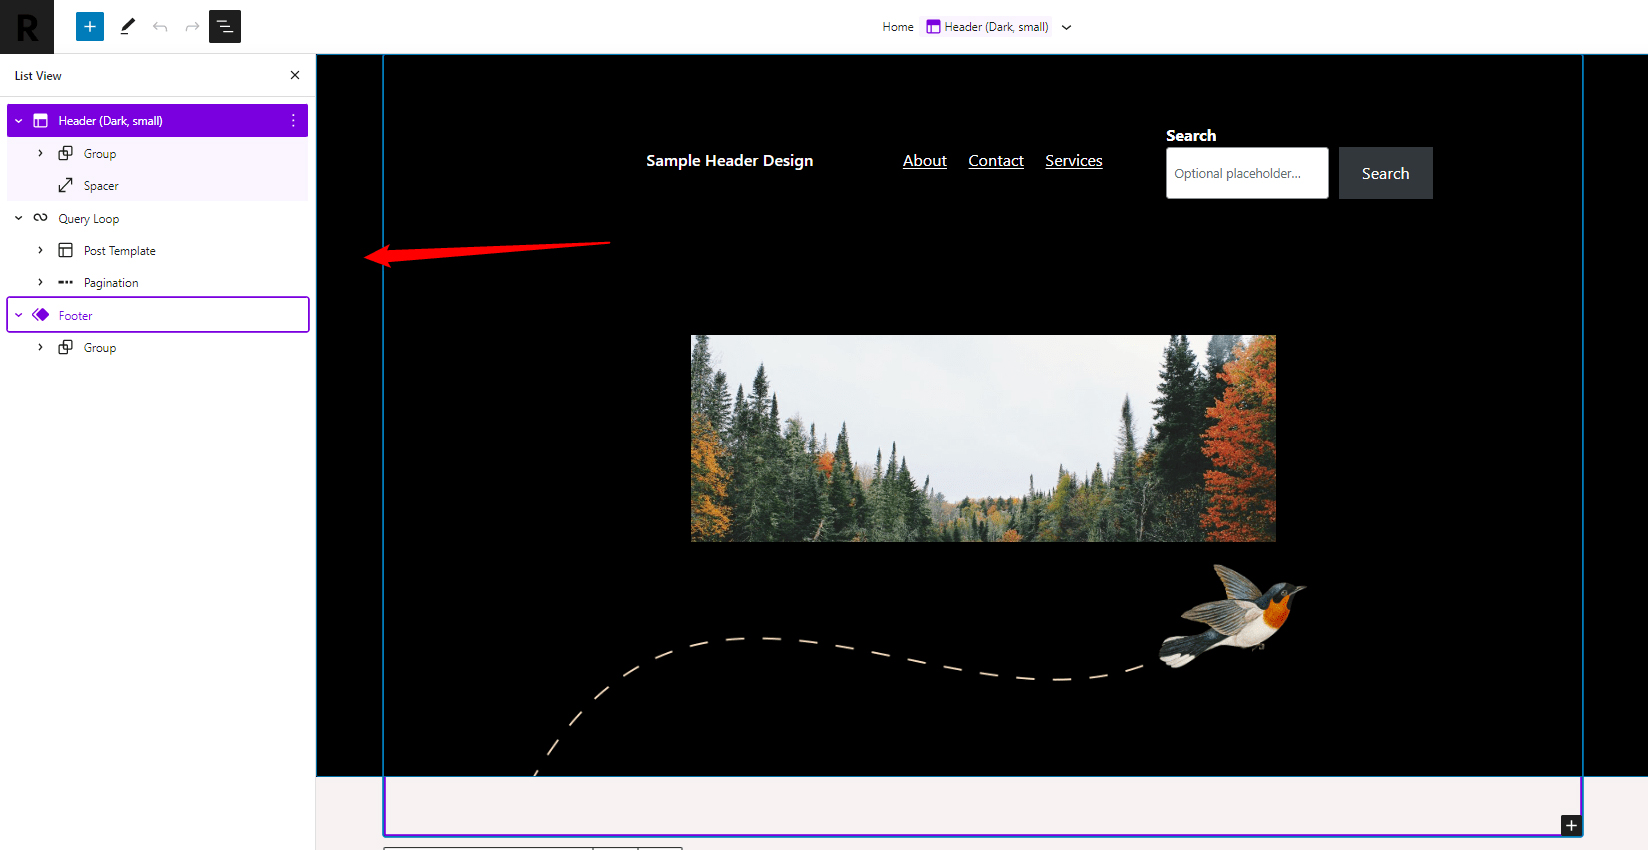
Use the View List as an orientational tool, so you see which blocks are contained by others and which blocks are placed beneath or above other blocks.
This tool becomes very handy in the event that you work with numerous elements, as it gives you a clear vision of the order you placed the various blocks that comprise your content.
Once you are finished with the edits, you should save your setup by clicking on the blue Save button located at the top right corner of the page:
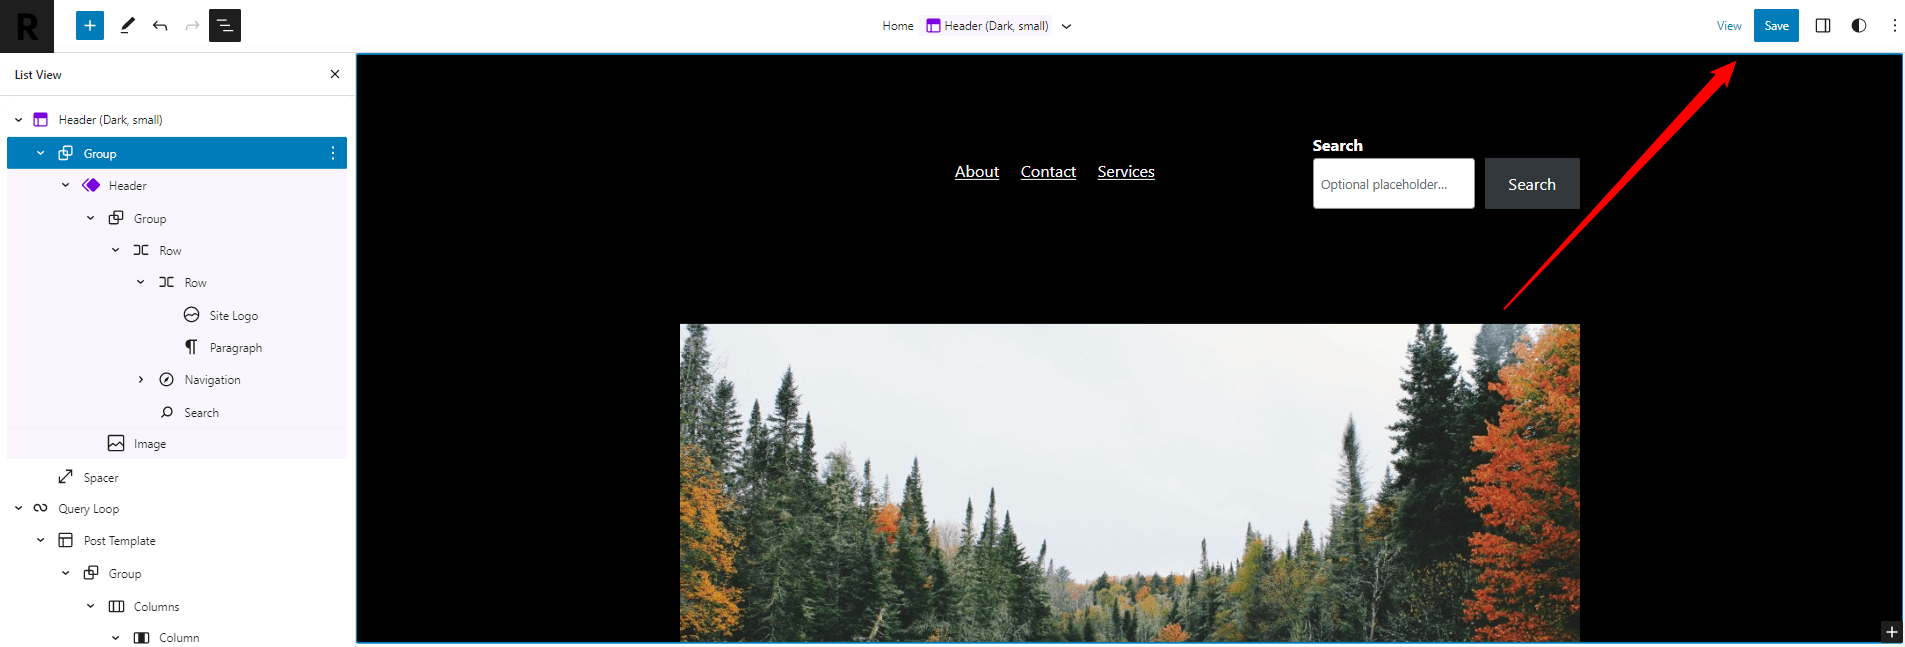
Now you have managed to edit a page of your WordPress site via the full site edit feature.
Should you wish to edit only a single element on your web pages, you should use Template Parts. Read more in the next section.
Edit a Single Page Element (Template Parts)
If you wish to edit a single component on your web pages via the full site editor, activate it (WordPress dashboard->Appearance->Editor) and then click on Template Parts:
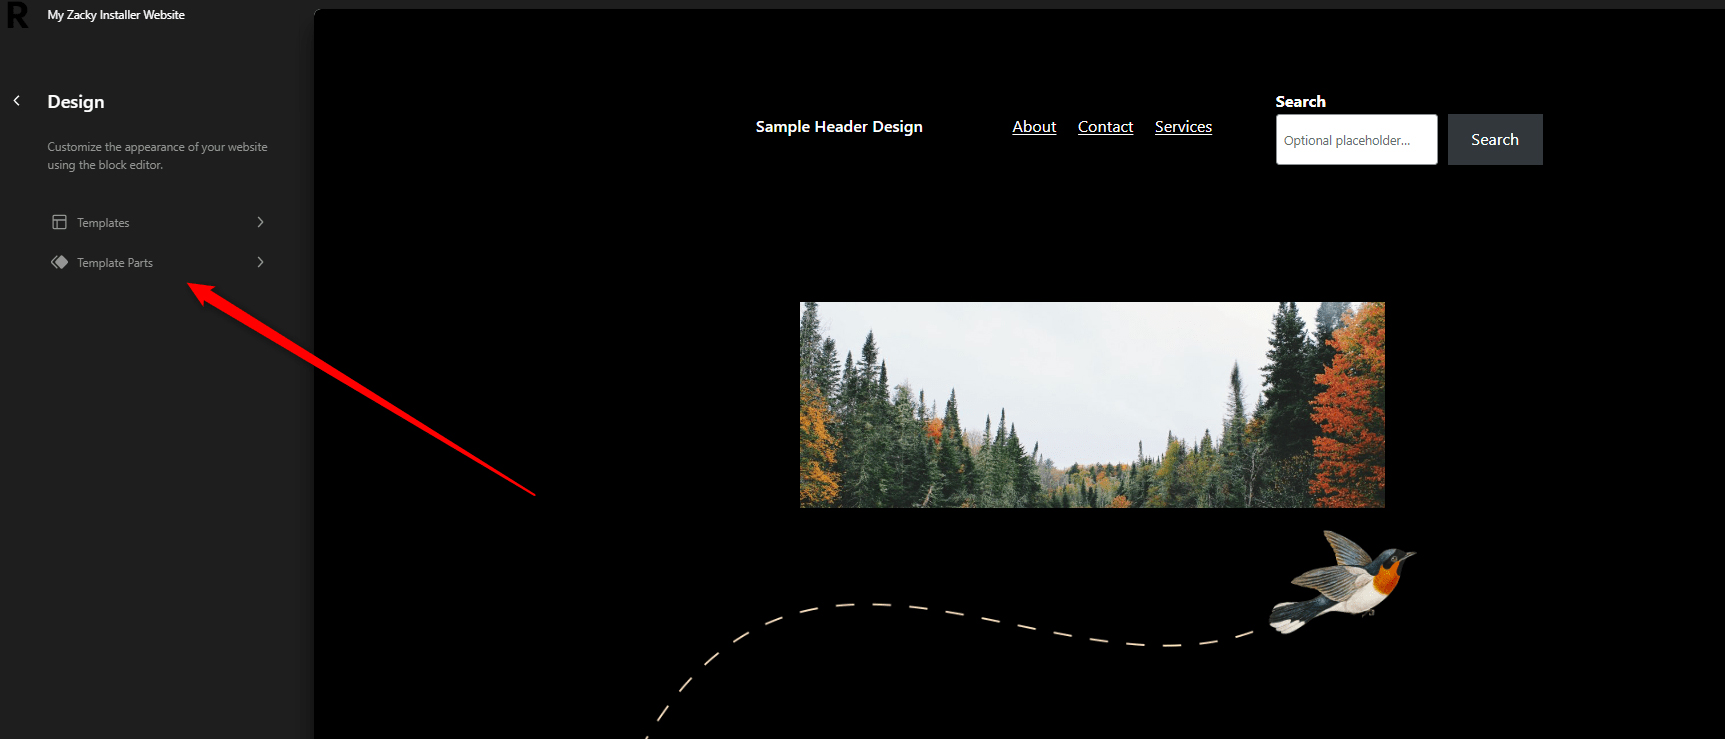
Clicking on Template Parts will open a new menu with a list of various webpage parts that you can edit via the full site editor:
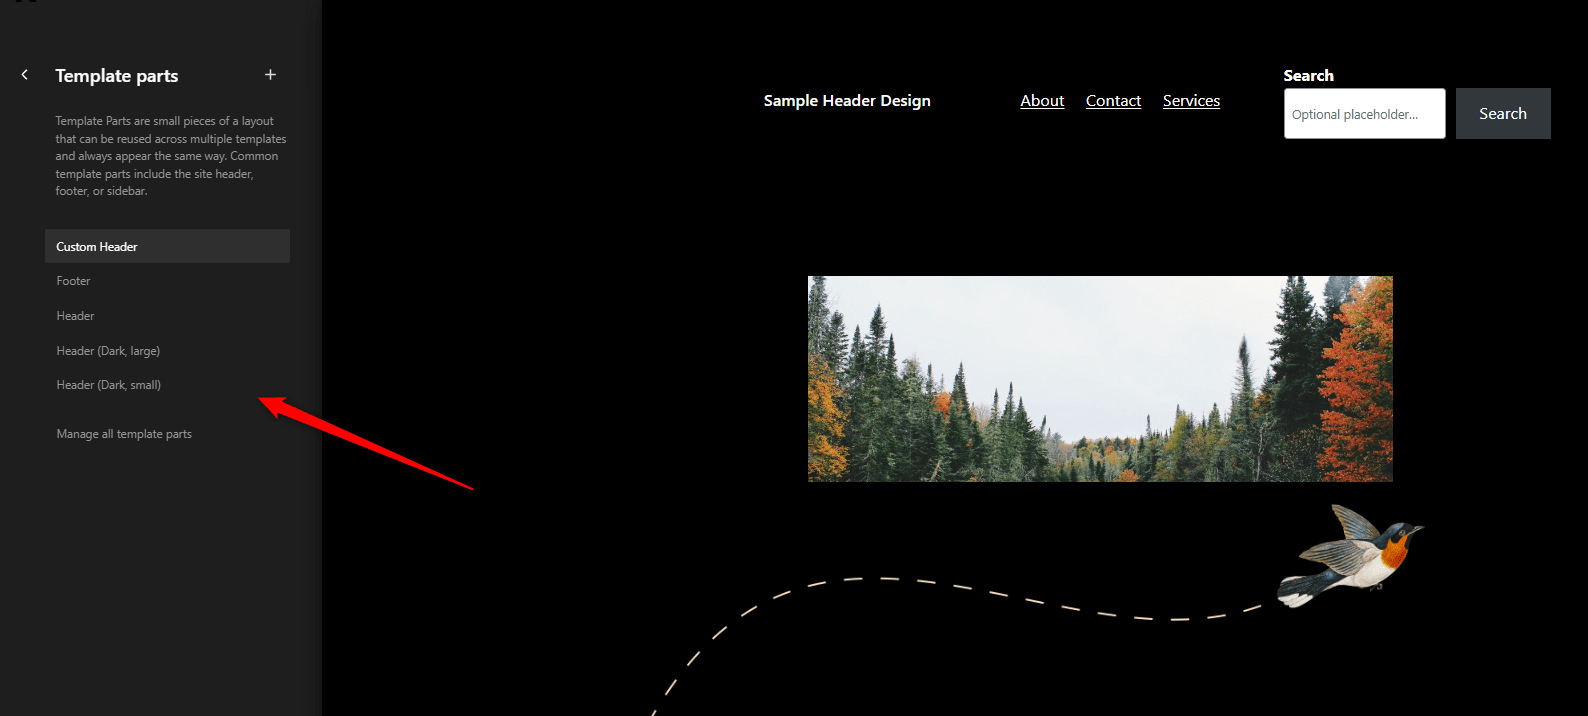
To edit a single part, simply click on it, so the full site editor activates. For this demonstration, we will edit the Header. Once you click on the part you wish to modify, the full site editor will be activated:
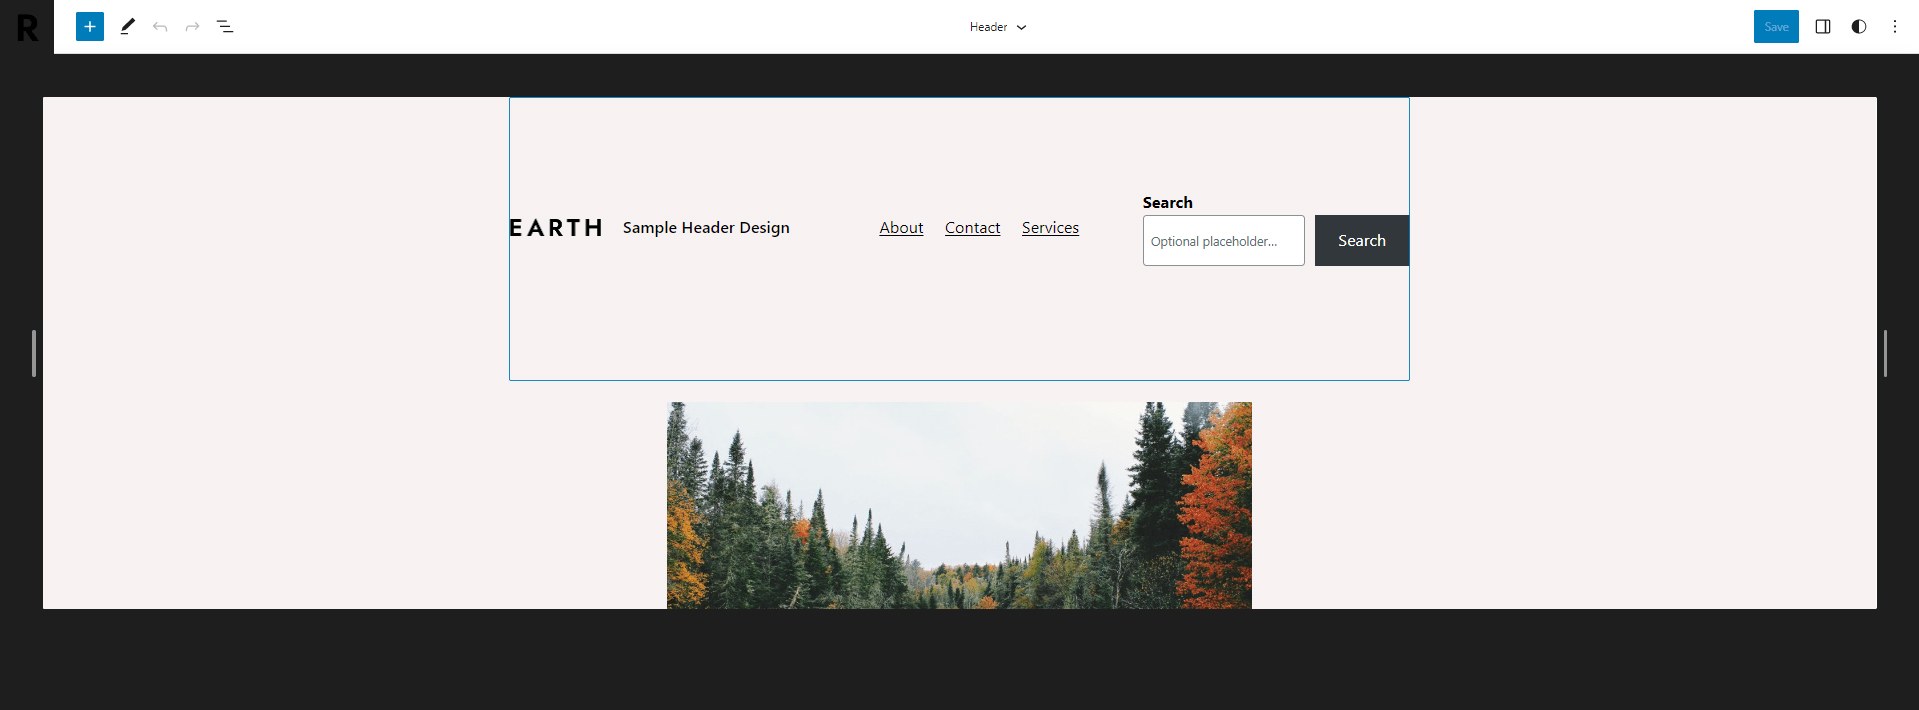
Now, similar to the full-page edit options (Templates) you can insert blocks in the content area by clicking one of the three + signs:

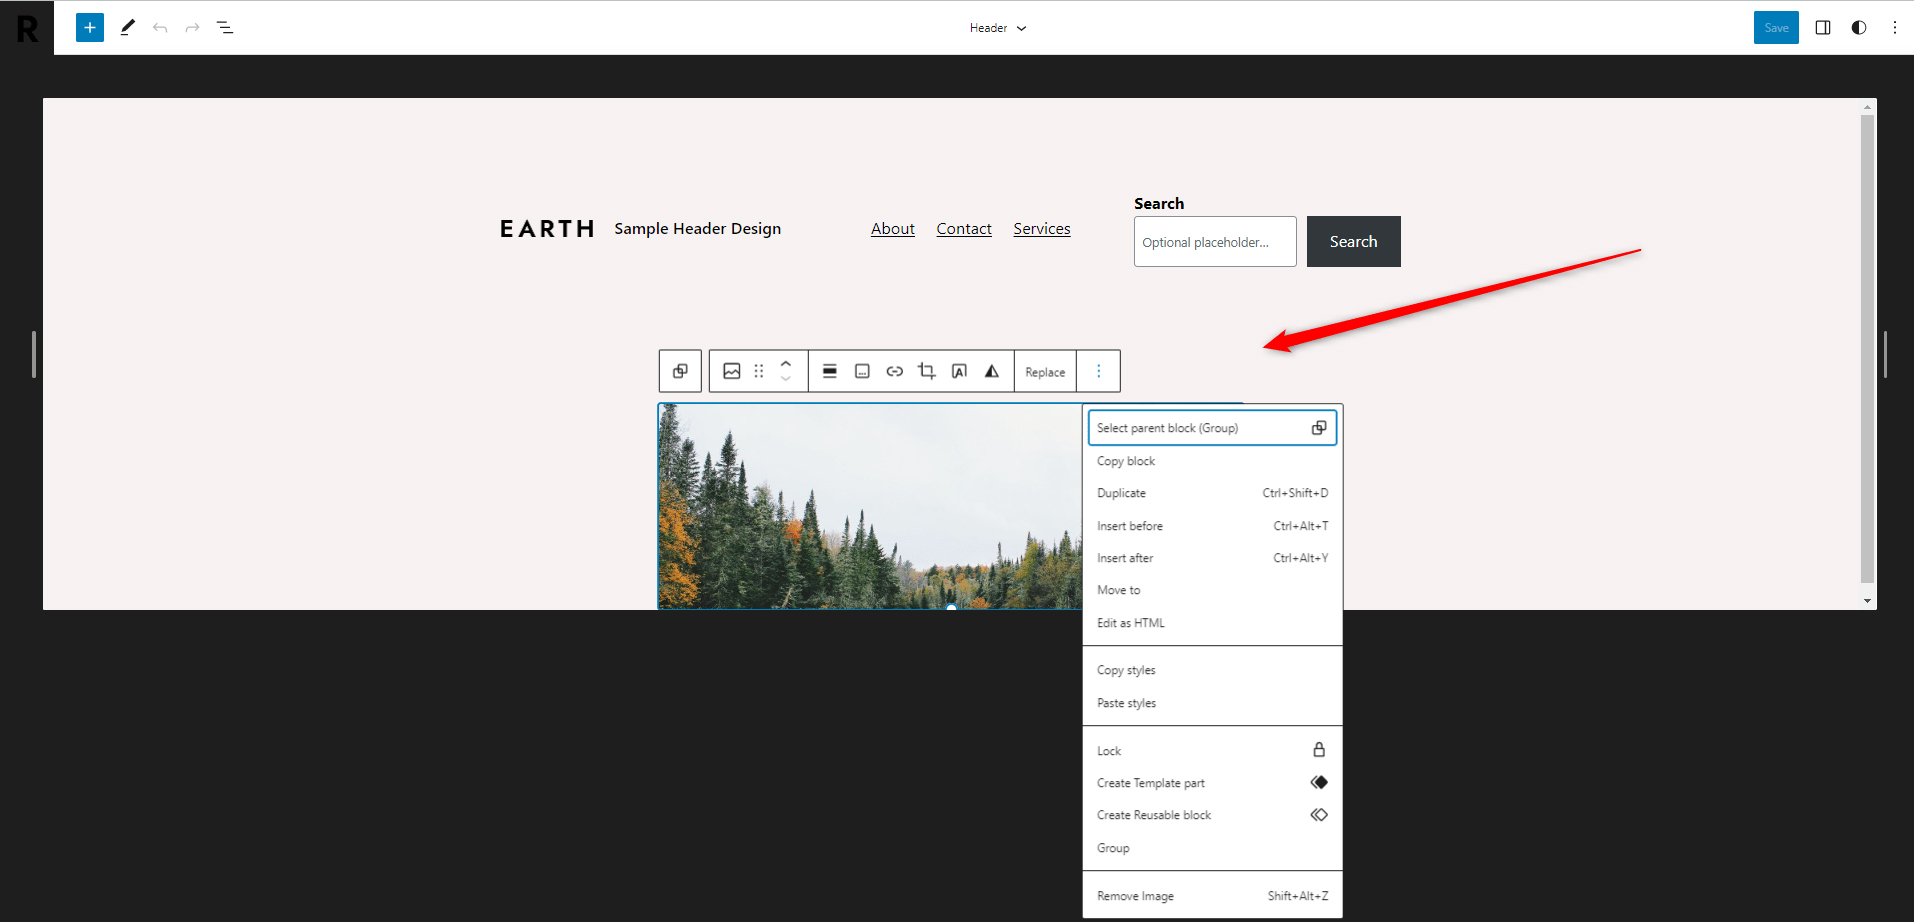
You can also edit an already inserted block by clicking it, so its settings appear:
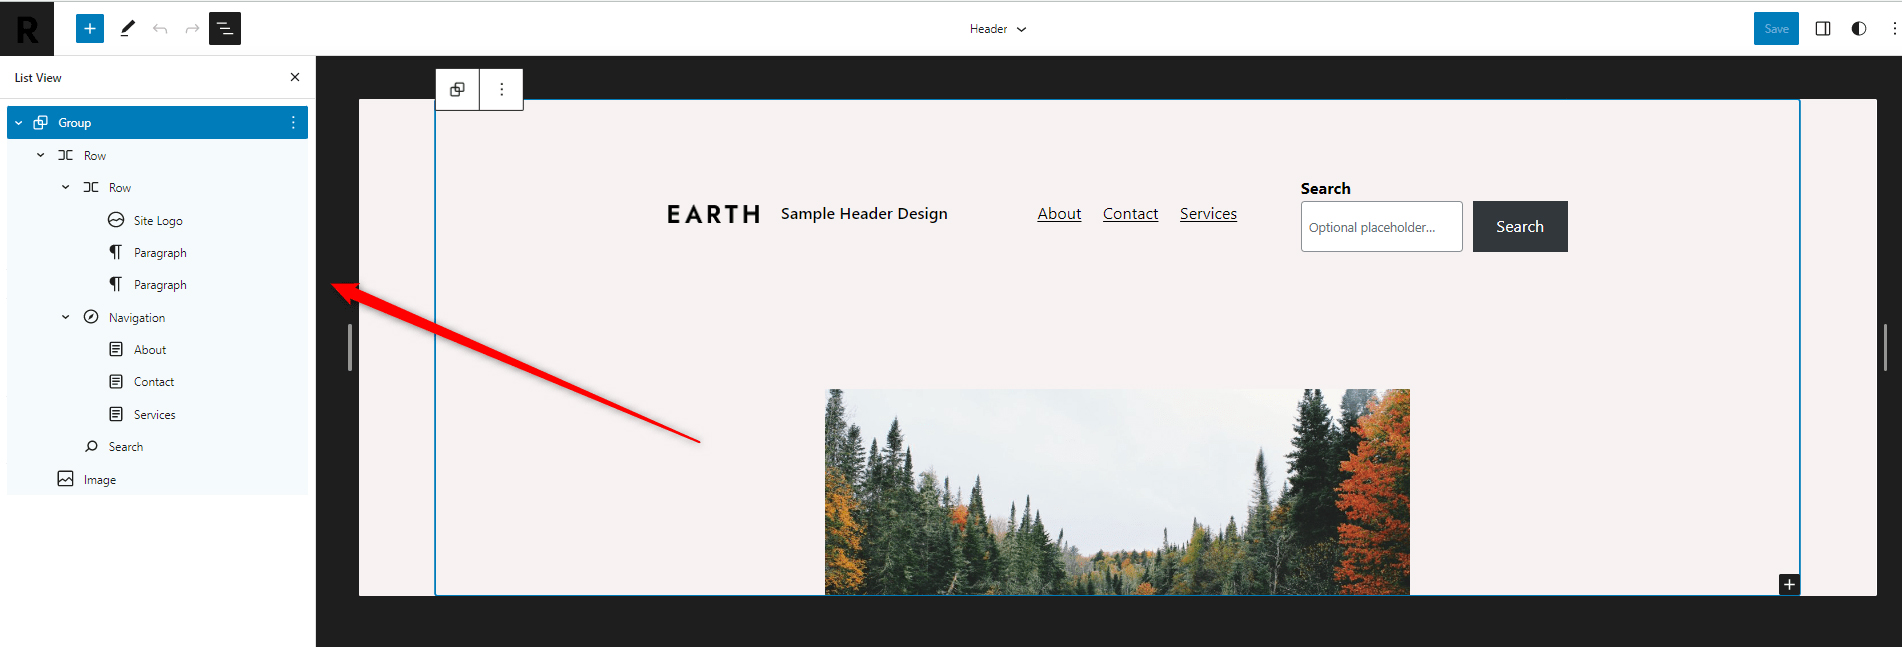
You can also activate the List View sidebar, so you have more clarity over which elements are present in the template part and how are they connected with each other:
![]()
Now you can start editing and experimenting with various design approaches. Once you have finished editing, you should save the changes. To do so, click on the blue Save button at the top right of the page:

Conclusion
Activating the full site editor in WordPress is quite a straightforward process that only requires installing a WordPress theme that supports the feature and activating the editor with a few mouse clicks.
Related:
- Create a WordPress Website – The Ultimate Guide
- How to Create a New Page in WordPress
- How to Browse, Install and Apply a WordPress Theme
- How to Use WordPress Gutenberg Block Editor
- How to Insert Gutenberg Blocks in WordPress
- How to Change Text Color With WordPress Block Editor
- How to Use WordPress Reusable Blocks
- How to Display Code with WordPress Gutenberg Code Block
- How to Use the Navigation Block in Gutenberg
- 5 Best WordPress Slider Plugins for Gutenberg
- 5 Best Gutenberg Plugins for WordPress
- How to Create Tables in WordPress Using Gutenberg Editor
- How to Add Tabs to Your WordPress Site with Gutenberg
- How to Copy a Page with WordPress Gutenberg Editor
- How to Add a Contact Form with WordPress Gutenberg Editor
- How to Add Images in WordPress with Gutenberg
- How to Add a Site Logo Block in WordPress with Gutenberg