There is a default way of adding a logo on your site, which is available with almost all themes. Keep in mind, however, that there are WordPress themes that are created with a different approach and might well come with a different way of accessing the customization menu.
Such difference derives from the fact that some themes include their own dedicated customizer, along with the WordPress one.
How to Add Logo to the WordPress Header
To access the customizer and add a logo, follow these steps:
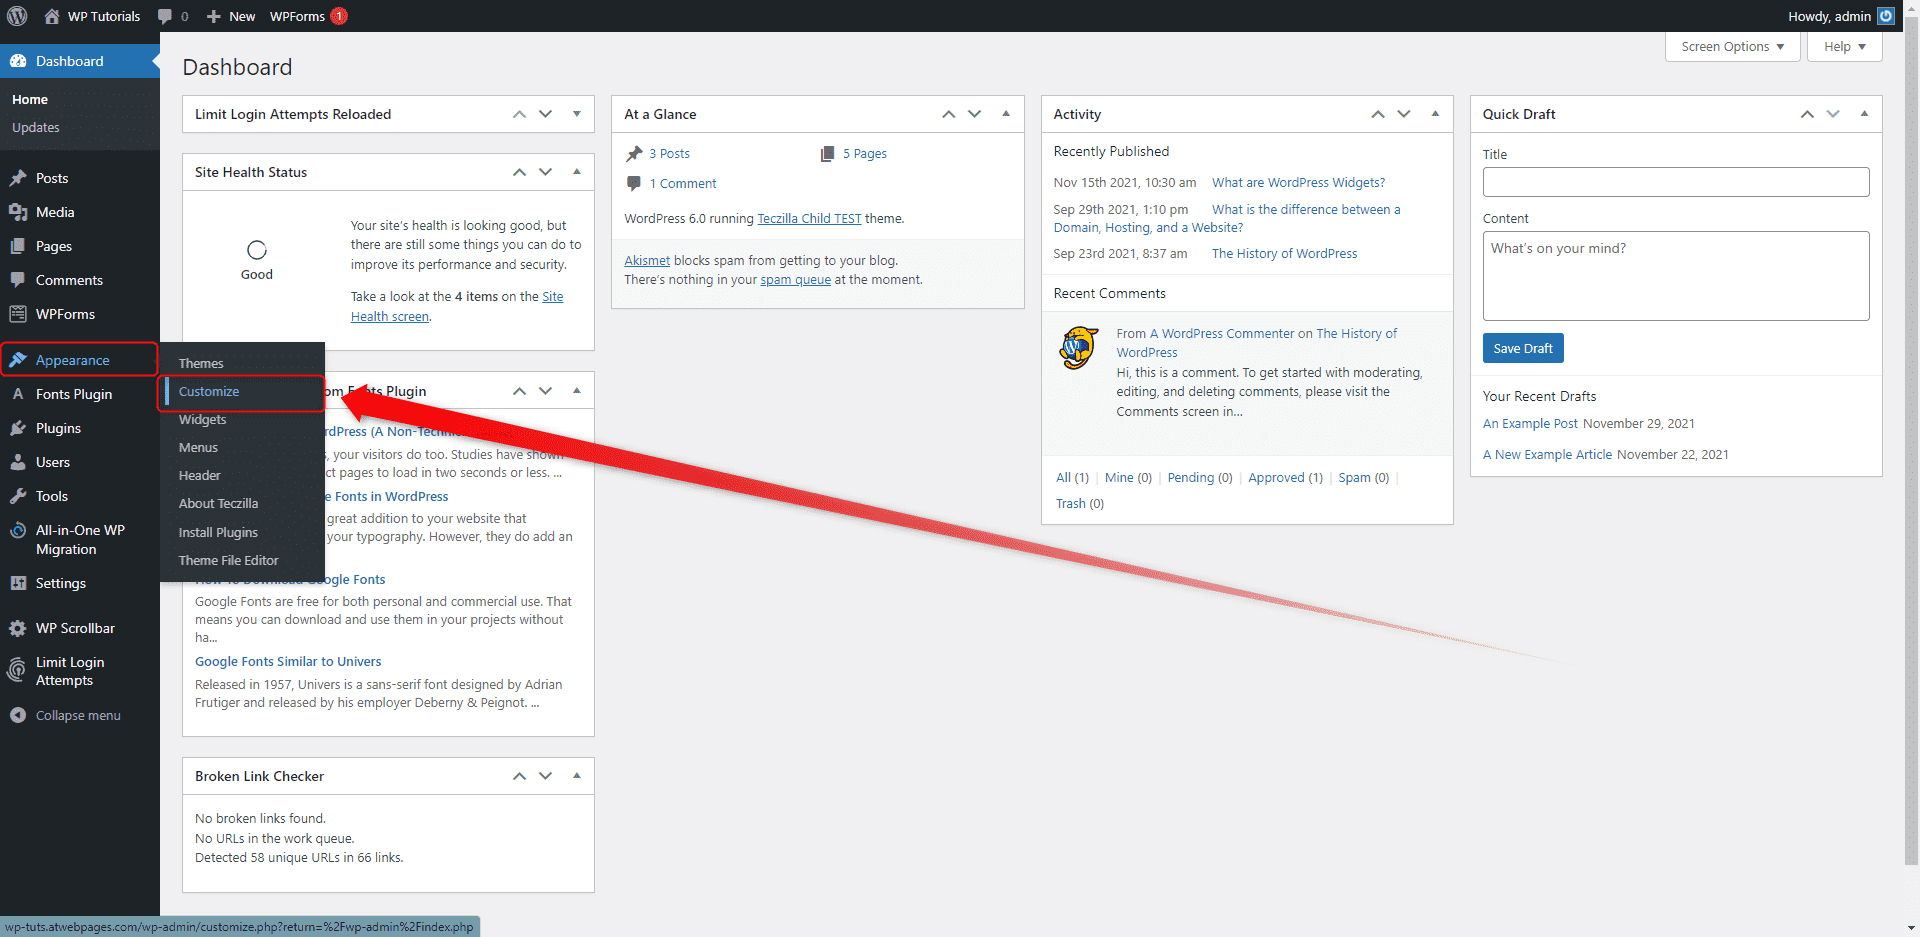
- Via the admin panel, go to Appearance->Customize. This will open the default customization options:

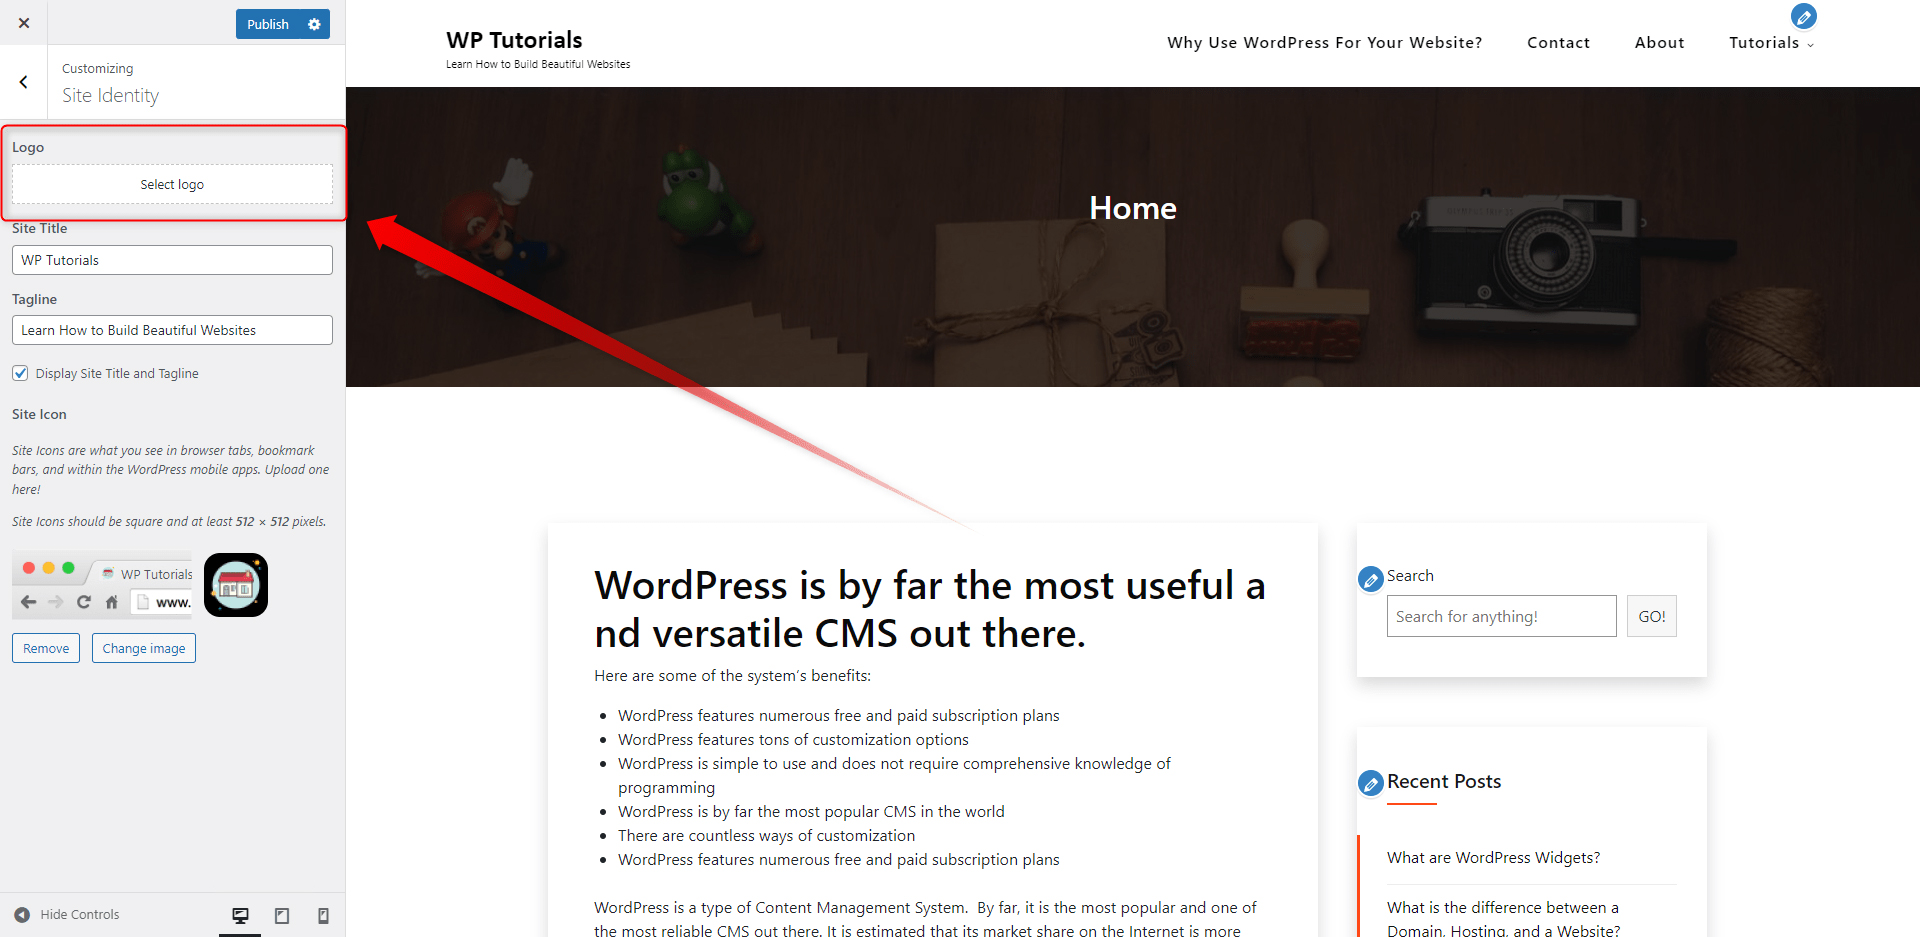
2. Then, browse the menu and search for the “Add Logo” (Keep in mind that the place of the settings varies from theme to theme). In our case, the option is located in the Site Identity menu section and looks like this:

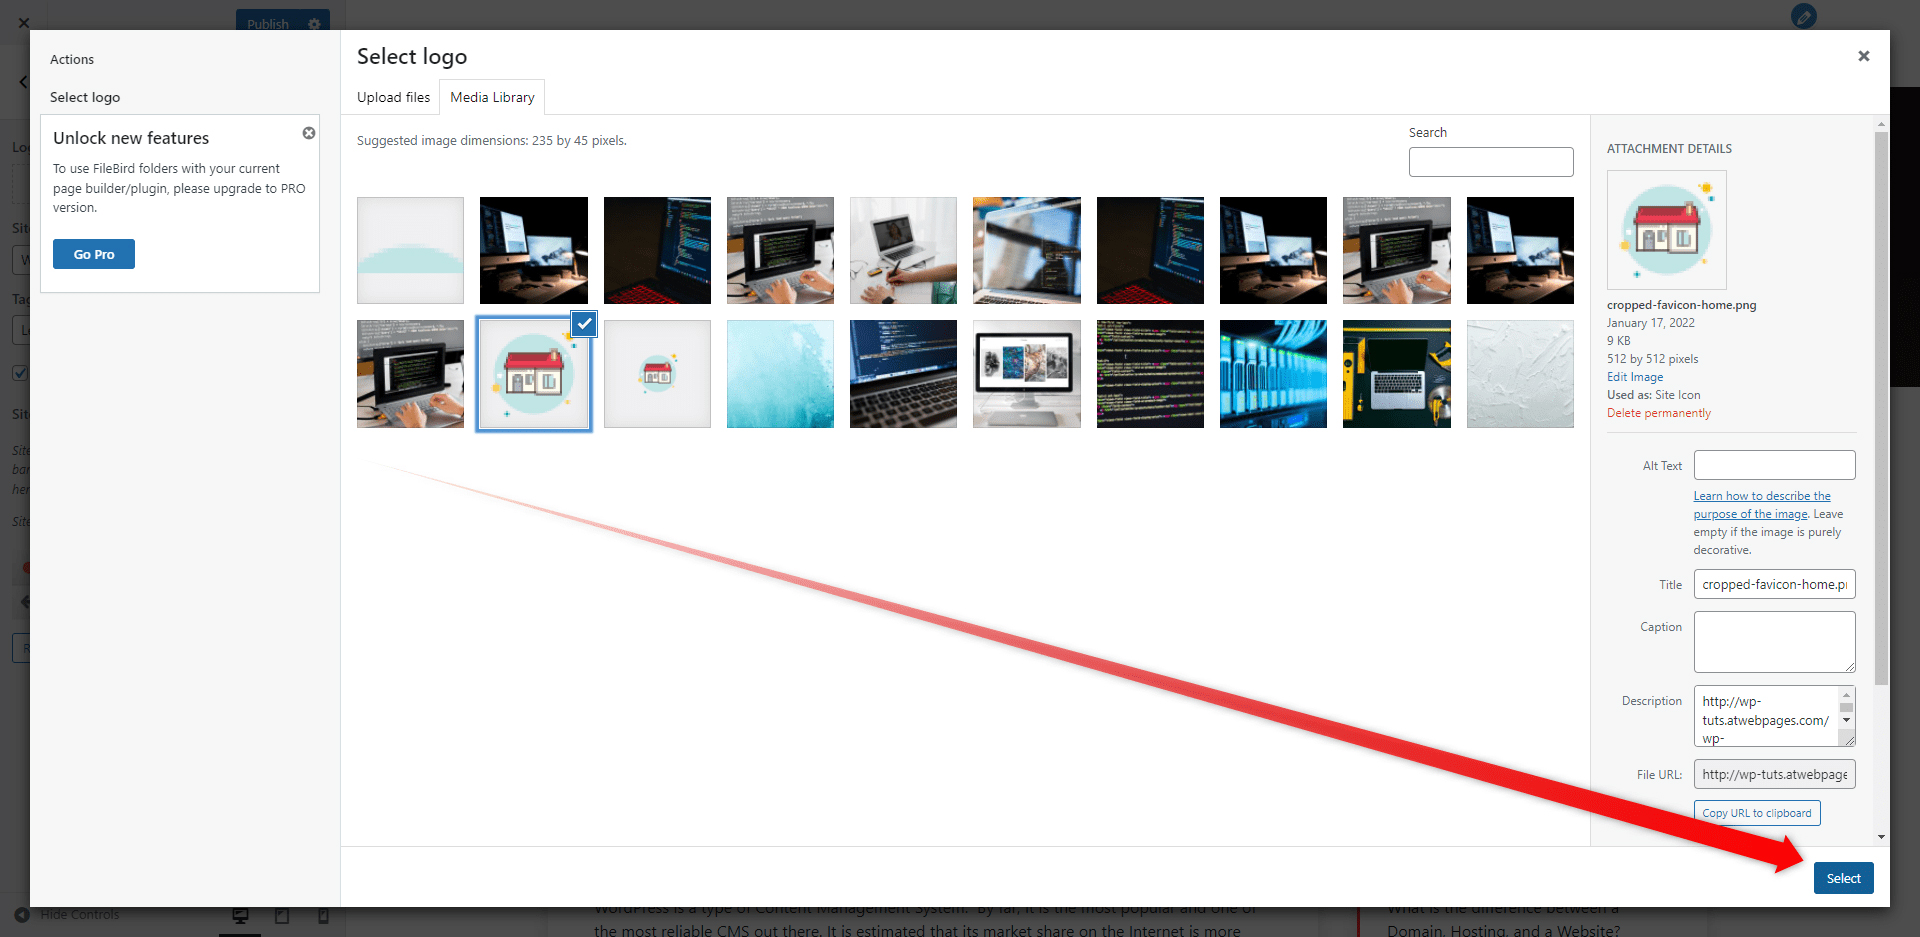
3. Click on the “Select Logo” button. This will open the Media Library from where you will browse your image. Keep in mind that your image should be in a particular size – 235 by 45 pixels. When you choose an image, click on the blue Select button at the bottom right:

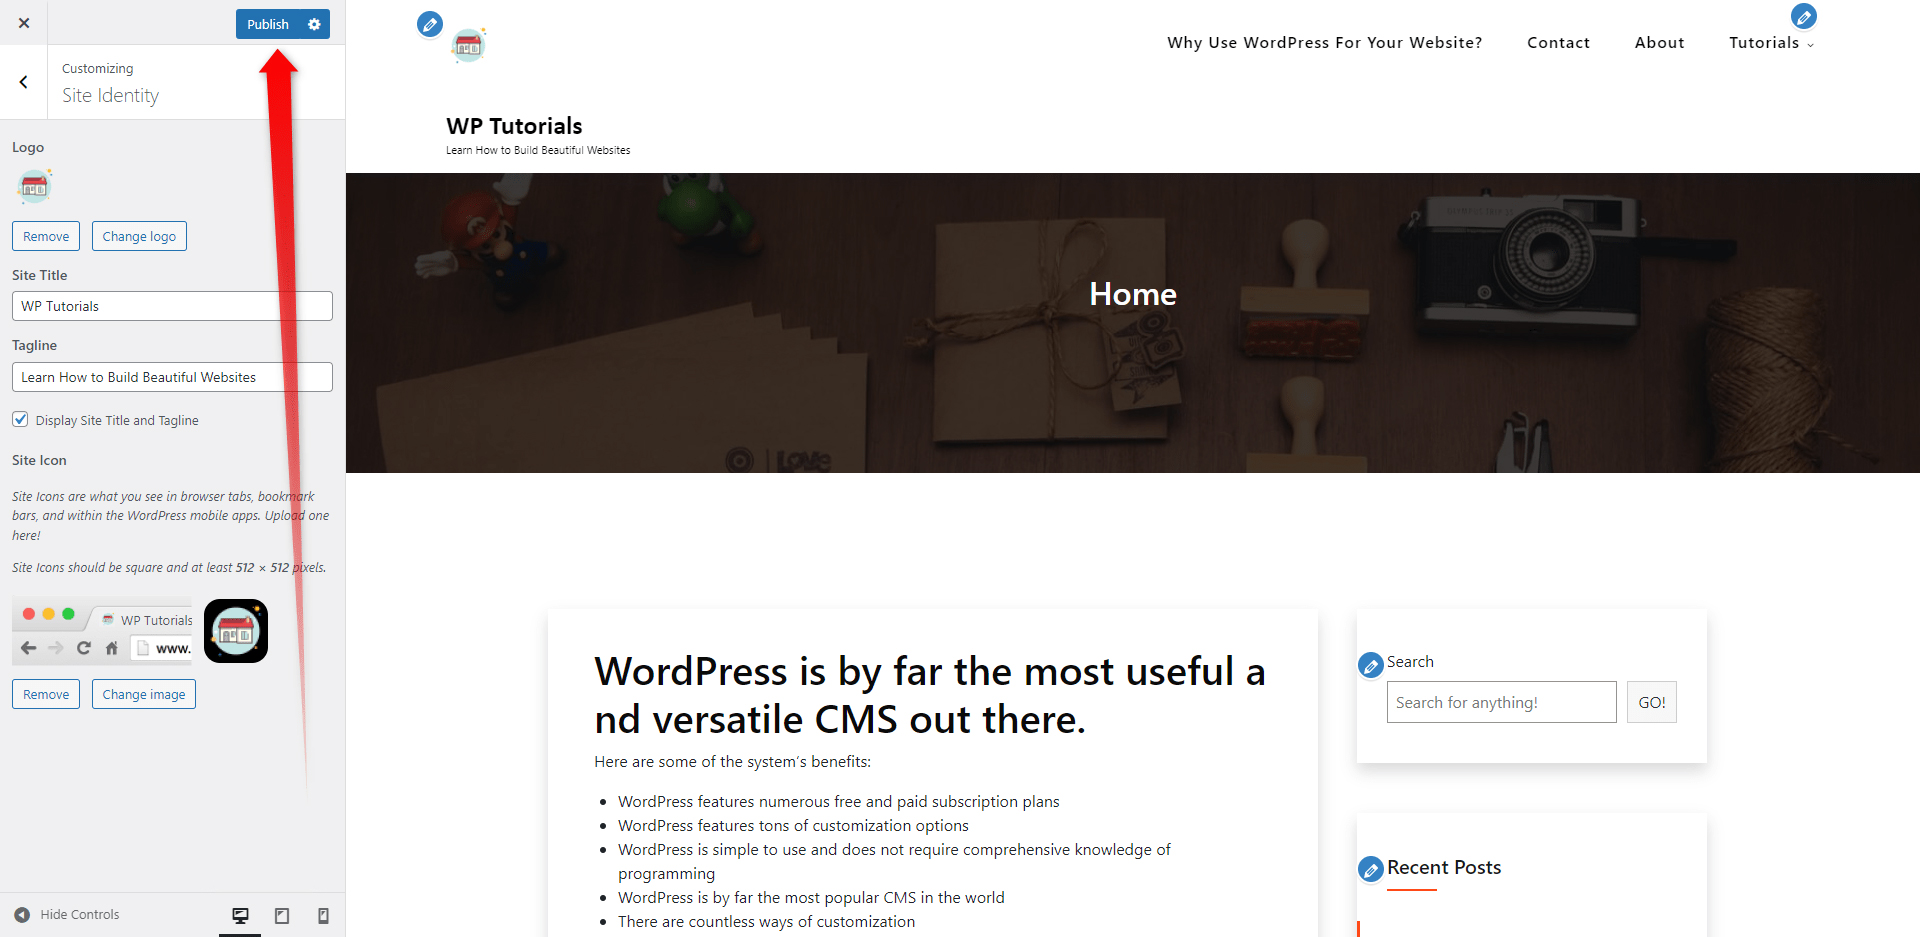
4. Then, click on the blue Publish button, so WordPress applies and saves the changes you’ve made:

Now, you can open your website and see how the final result has turned out to be!
Experiment with different logo sizes and types to find out what suits your preference the most and don’t be afraid to try out new things!
Conclusion
Along with being functional, a contemporary website should be also aesthetically pleasing. This will not only make a good impression on your visitors but can also increase conversion rates.
Including one on your website will help you in two main ways:
- A logo adds a kick to the aesthetics of pages.
- Logos work wonders for brand recognition and thus, enhancing the trust towards you and your site.
There is also one more advantage to putting your logo within the header – the header is always present on all pages and will make the logo always visible to your audience.