If you wish to make some general changes to your website text formatting, then using the WordPress theme customizer is a great way to do so.
Each installed WordPress Theme comes with a customizer, and when formatting your texts, it is a good idea to have a closer look at the options it presents to you.
In the following paragraphs, you will read how to change your text colors using the customizer.
How to Change Text Color With WordPress Theme Customizer
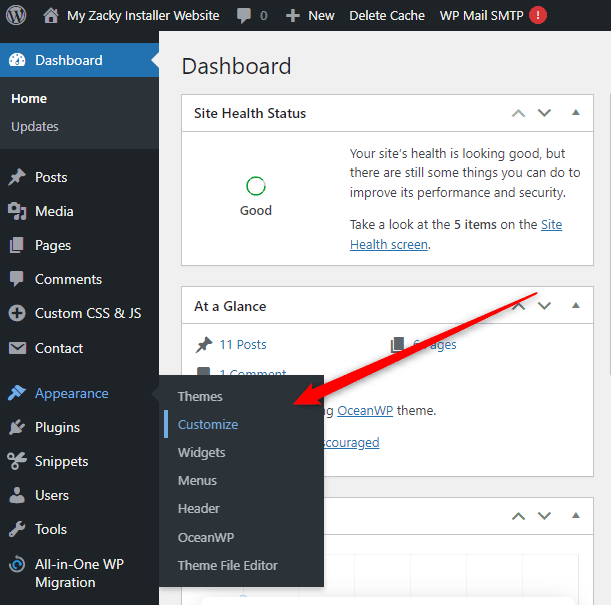
To open and browse the customization settings, via your admin dashboard go to Appearance->Customize:
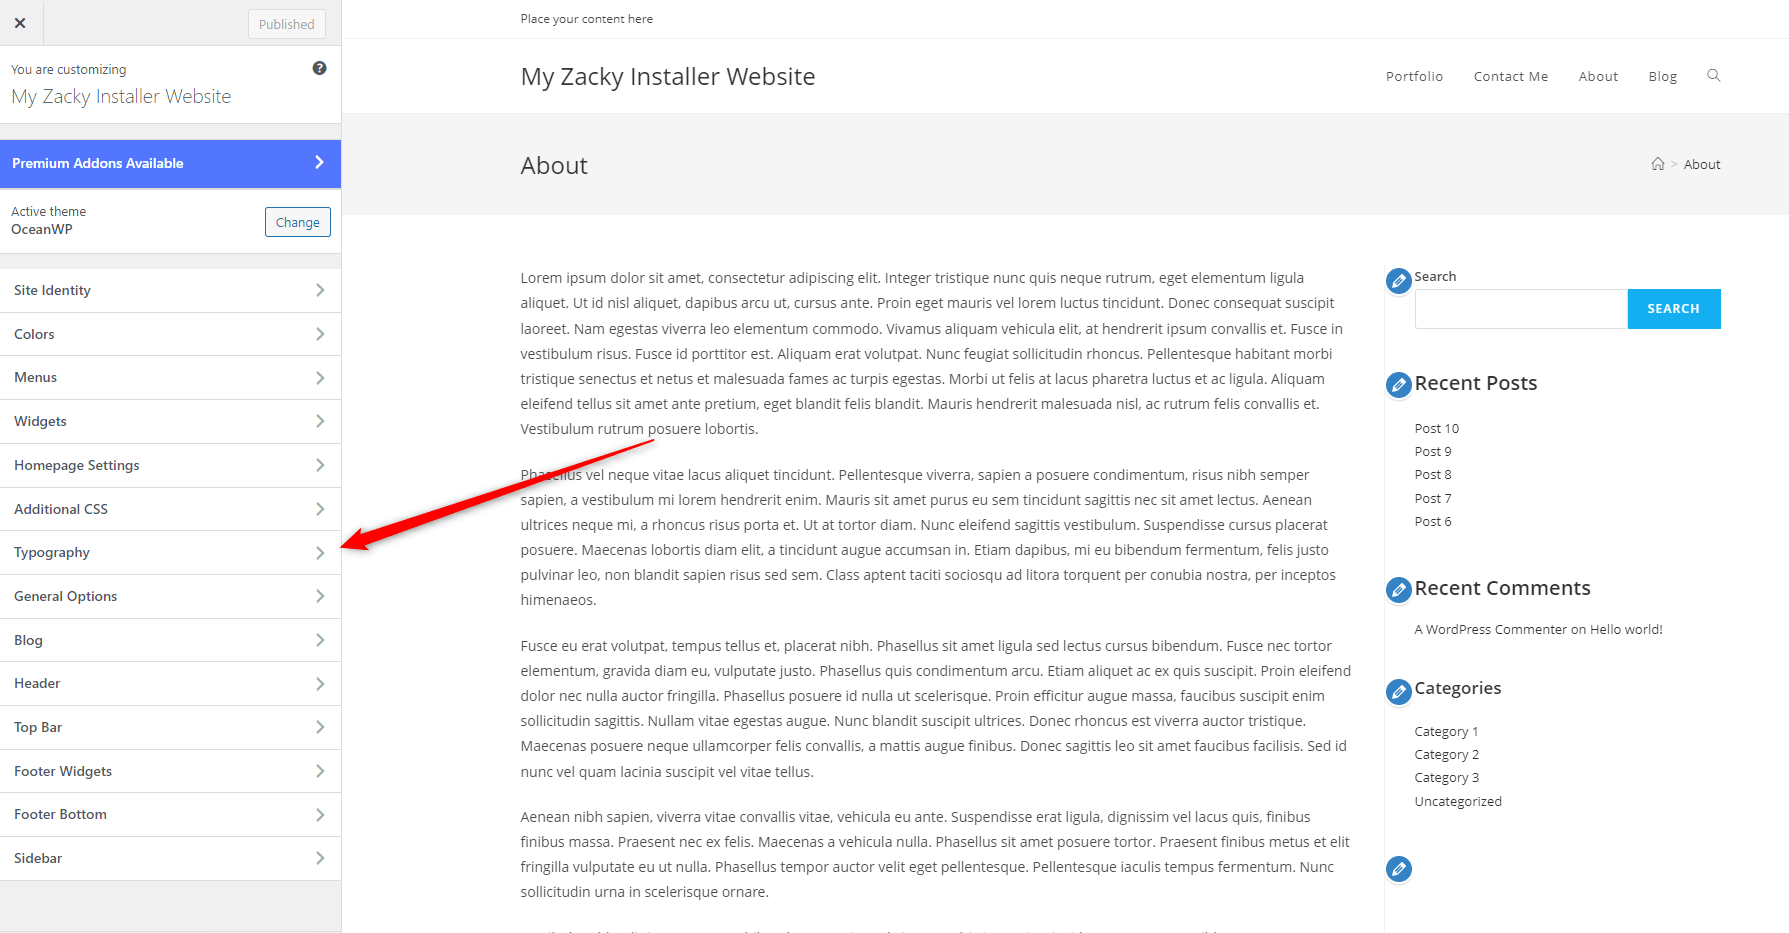
Depending on the selected theme, the customization page can vary in menus and options. However, you should be able to access a menu called Typography. This is where the general text settings are placed:
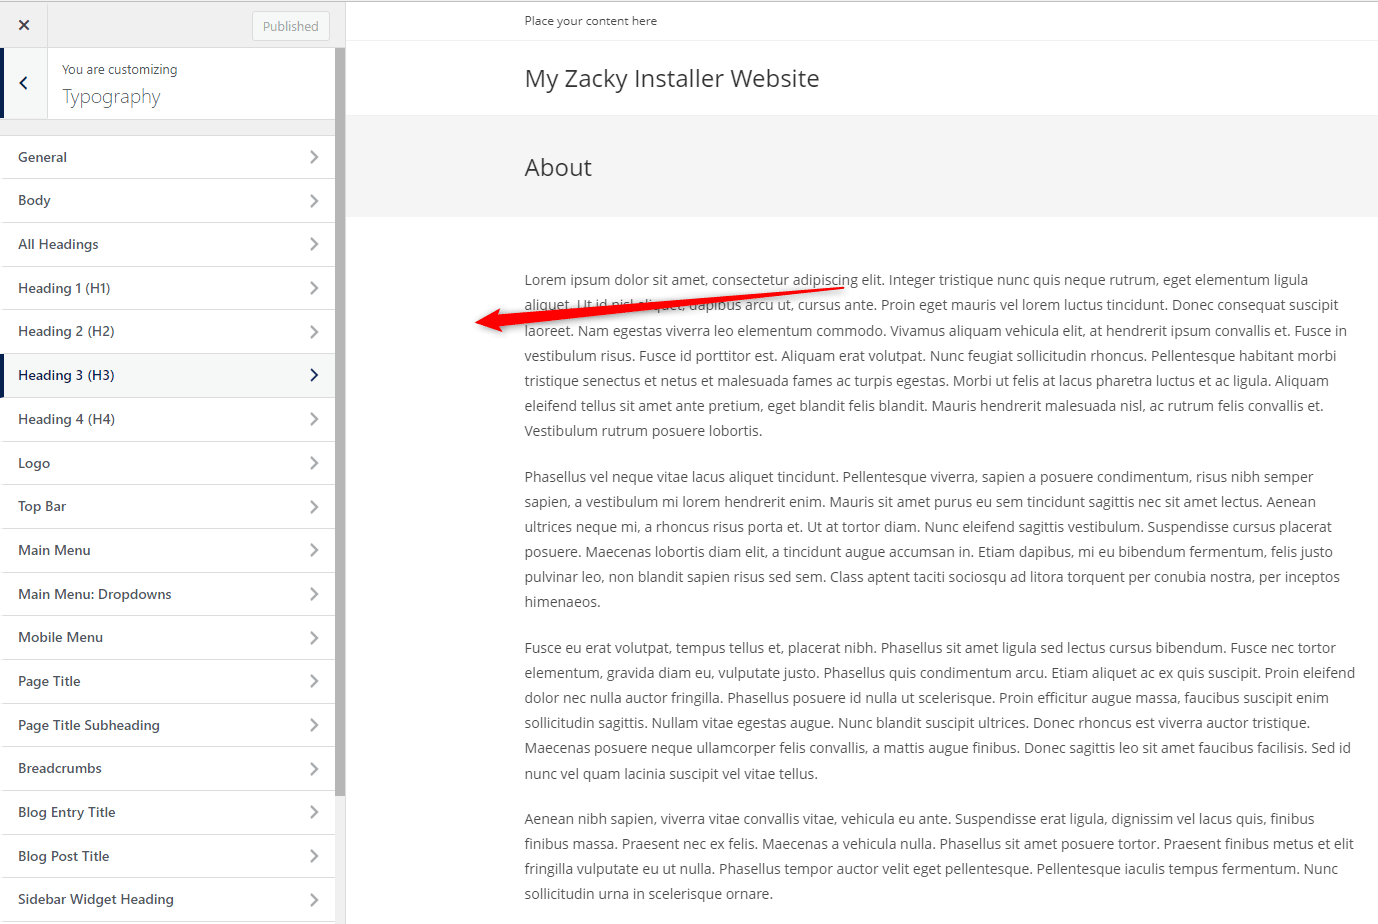
Once you click on Typography, various options will appear. Again, the number and type of options depend on the theme you’ve chosen for your website.
In our case the typography options menu looks like this:
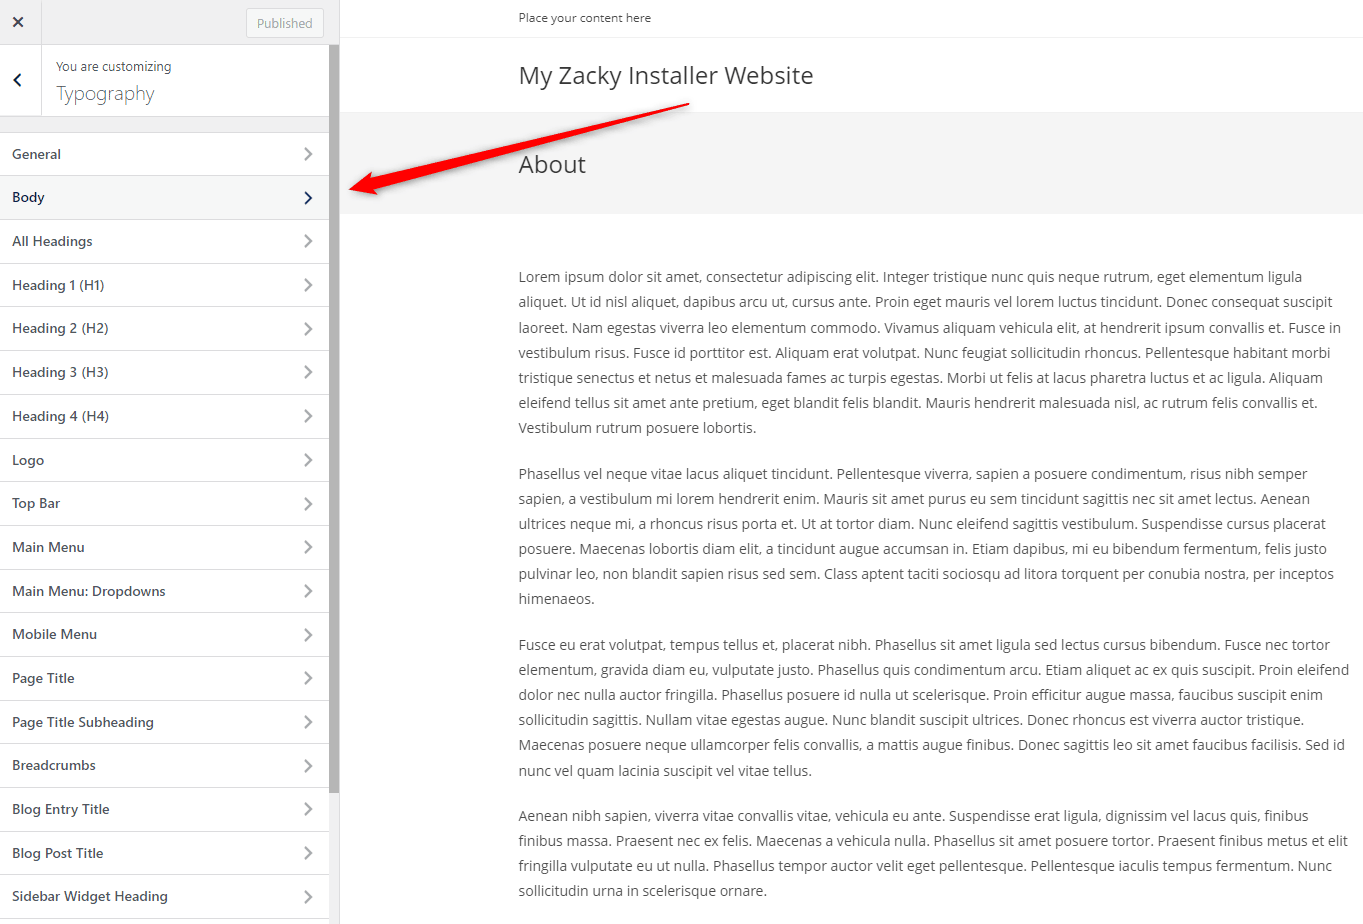
Now, click on Body or Text Color:
This will open the available options for your texts across the website:
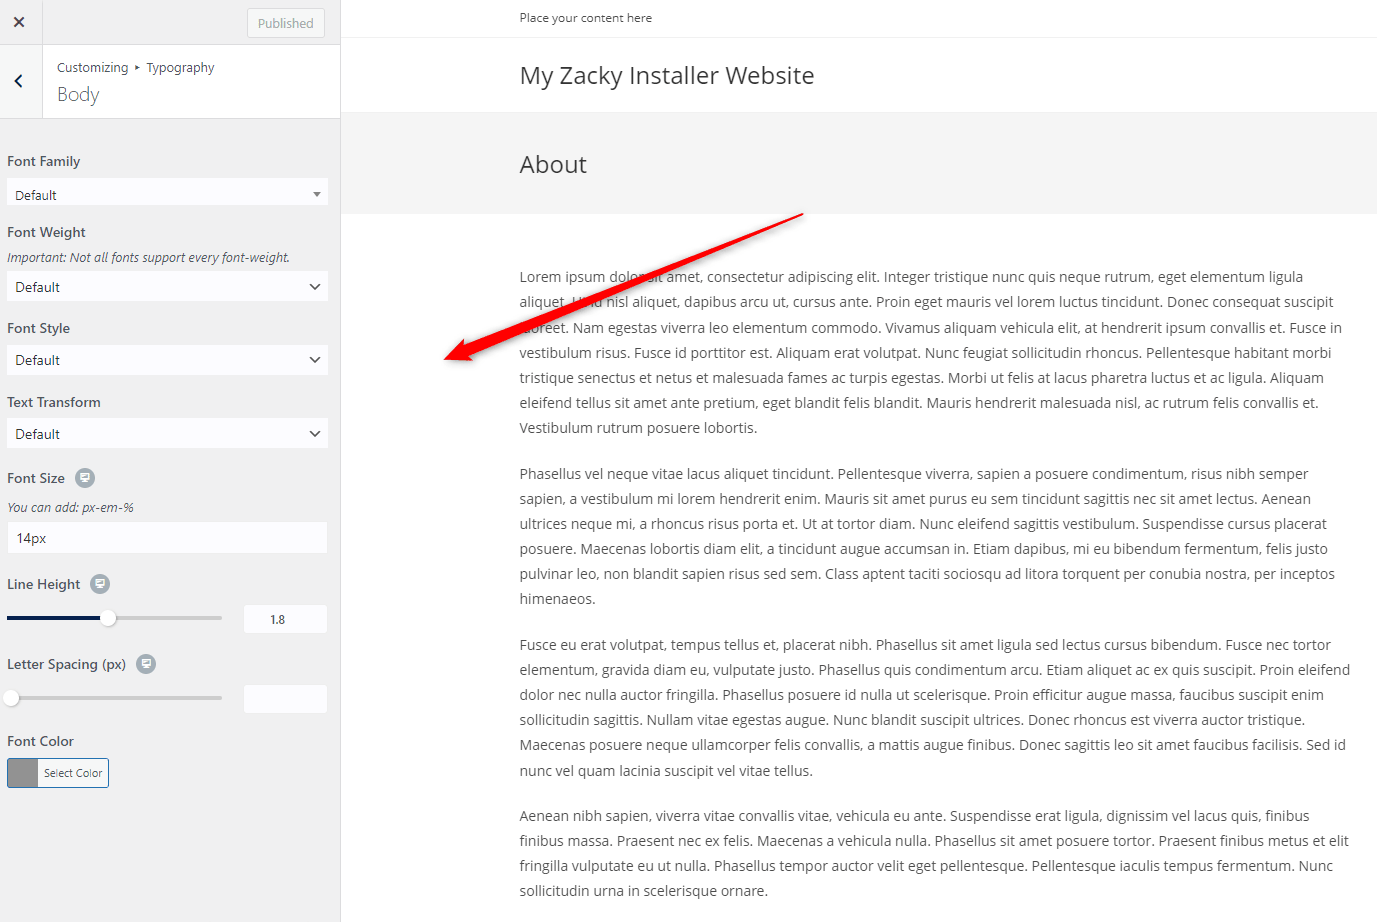
Now, search for the Font Color option:
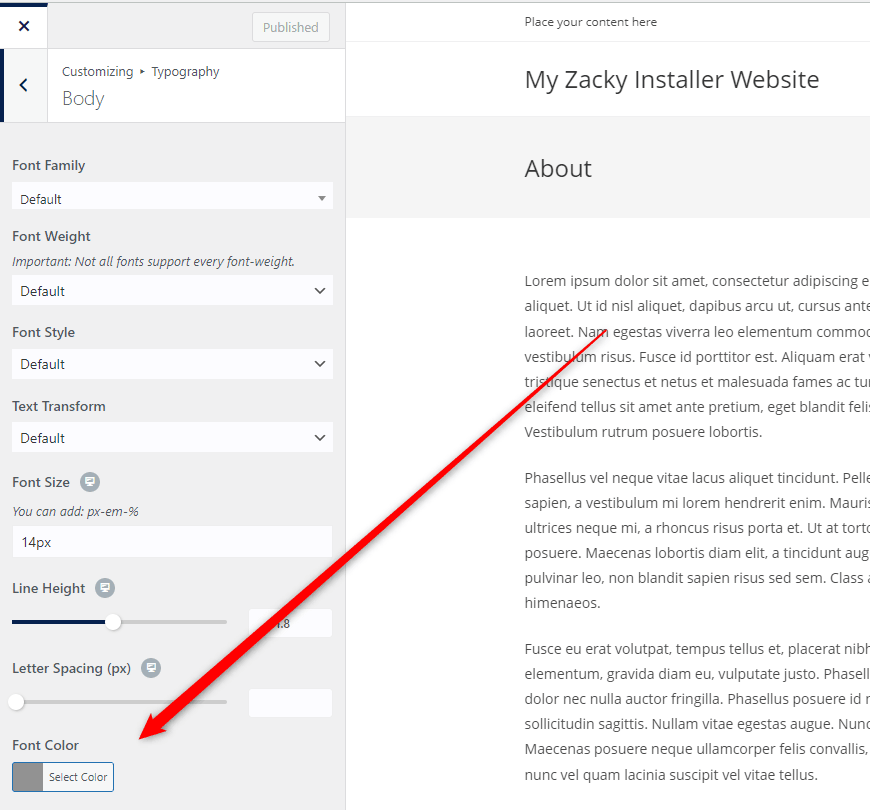
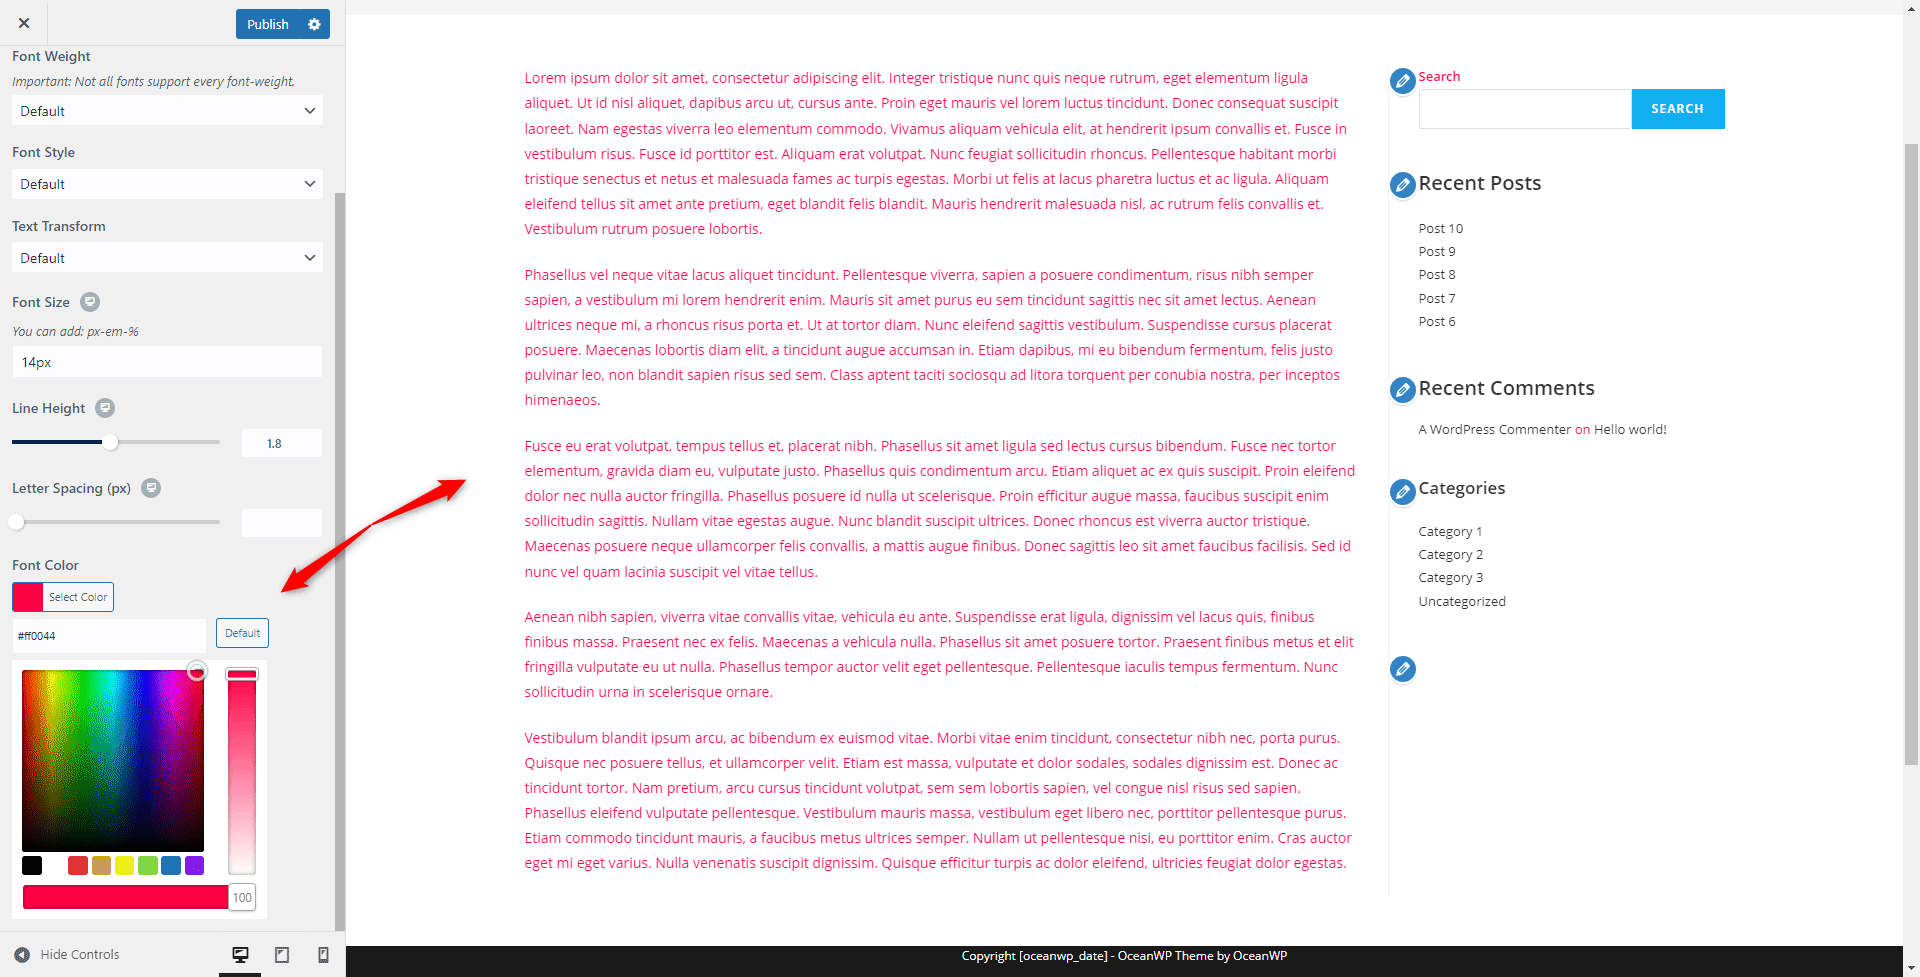
Click on the button and notice how an option box will appear. From this box, you can fully customize the color for your body texts across your web pages. Try out different colors and see how they will appear on the right side of the screen:
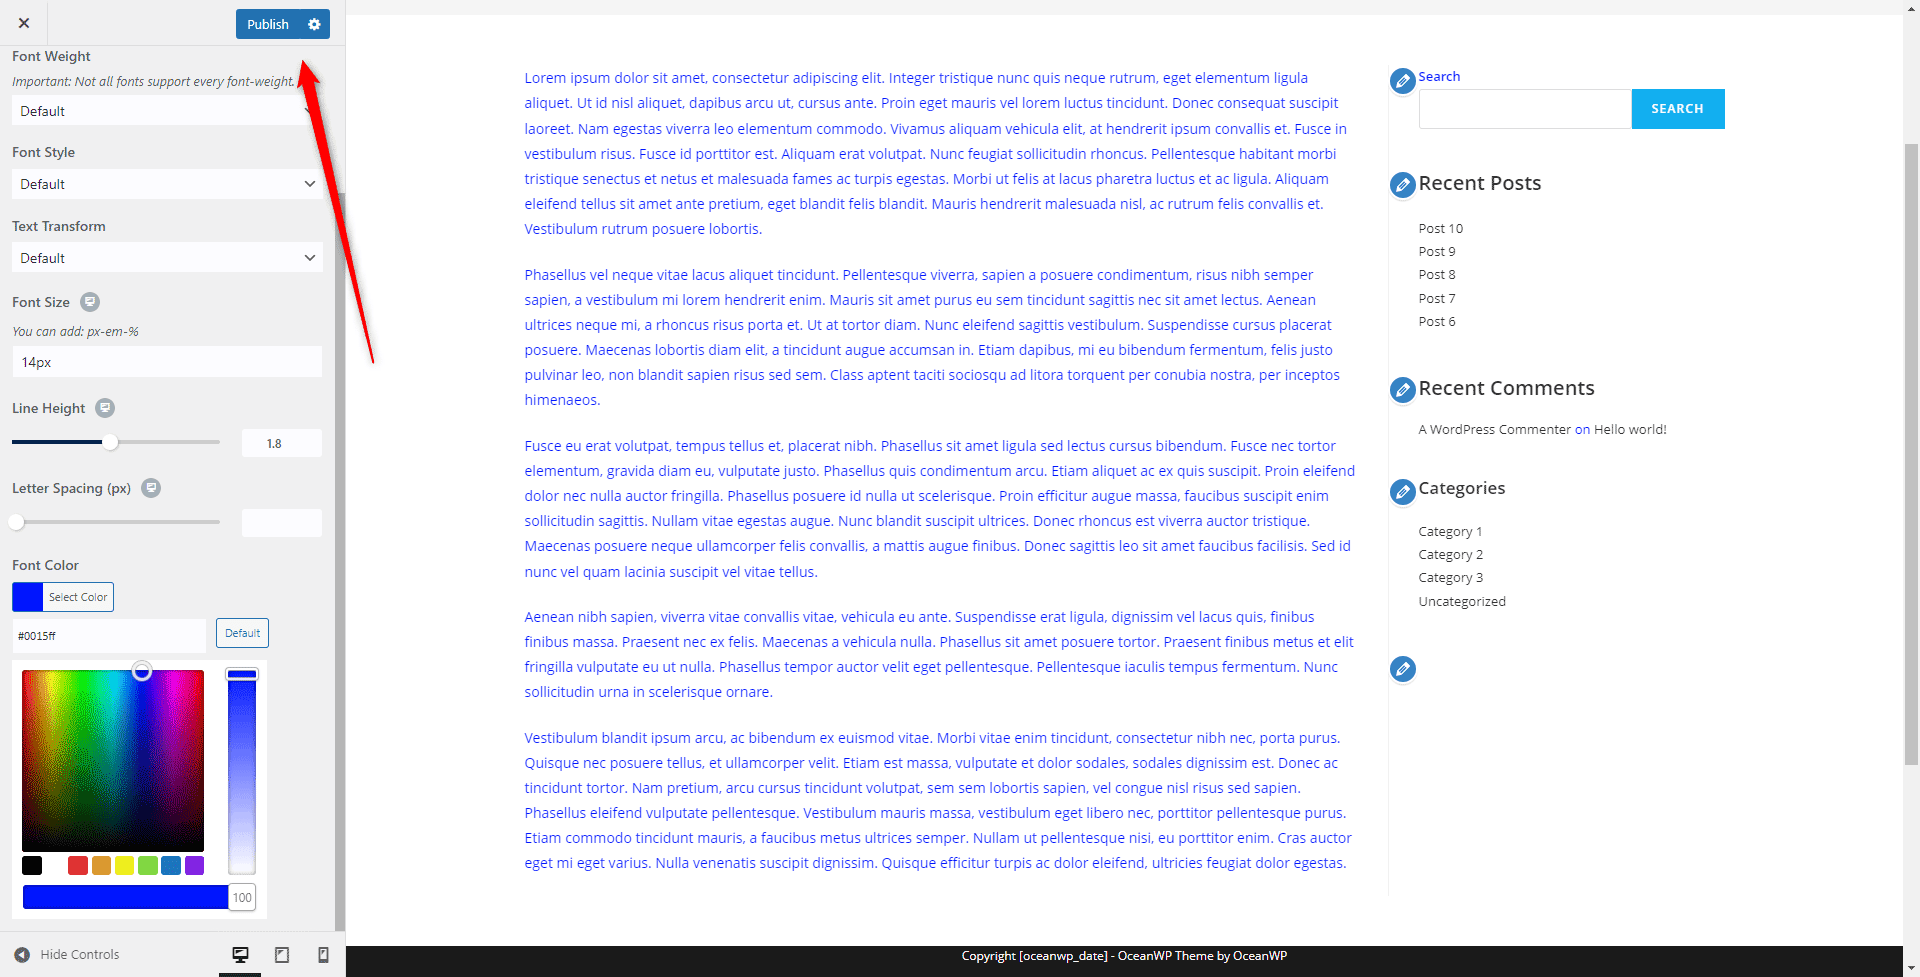
Once you are satisfied with the color scheme, click on the blue Publish button at the top left of the screen. This will apply and save your changes:
Conclusion
Changing text color is a great way of attracting the attention of your site visitors and pointing out all the important bits of information across your WordPress pages.
The built-in WordPress theme customizer allows you to change colors quickly and efficiently, only with a few clicks here and there.
Related: