When crafting your WordPress website with Gutenberg, it is highly likely that you would want to focus more attention on the website’s header section and create a design that fully fits your personal requirements and your website’s goals.
If this is the case, then you can design a website header with Gutenberg’s full site editor functionalities.
Because of how effective the full site editor is, in the following paragraphs you will read how to access it and how to design a header for your WordPress website.
How to Design a Website Header with Gutenberg
The full-site editor is Gutenberg’s comprehensive suite of tools and features that help you design your web pages exactly as you wish them to be without dealing with the limitations of various WordPress themes.
However, to access the full site editor, you should first install a WordPress theme that supports the feature. This article showcases the process in detail:
How to Activate Full Site Editor in WordPress
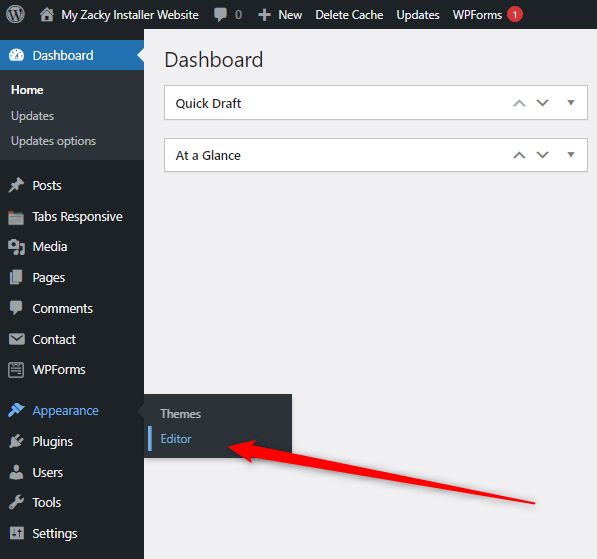
Once you have installed and activated a WordPress theme that supports a full site editor, enter the admin dashboard, and go to Appearance->Editor (keep in mind that only themes that support a full site editor will feature a button “editor”):
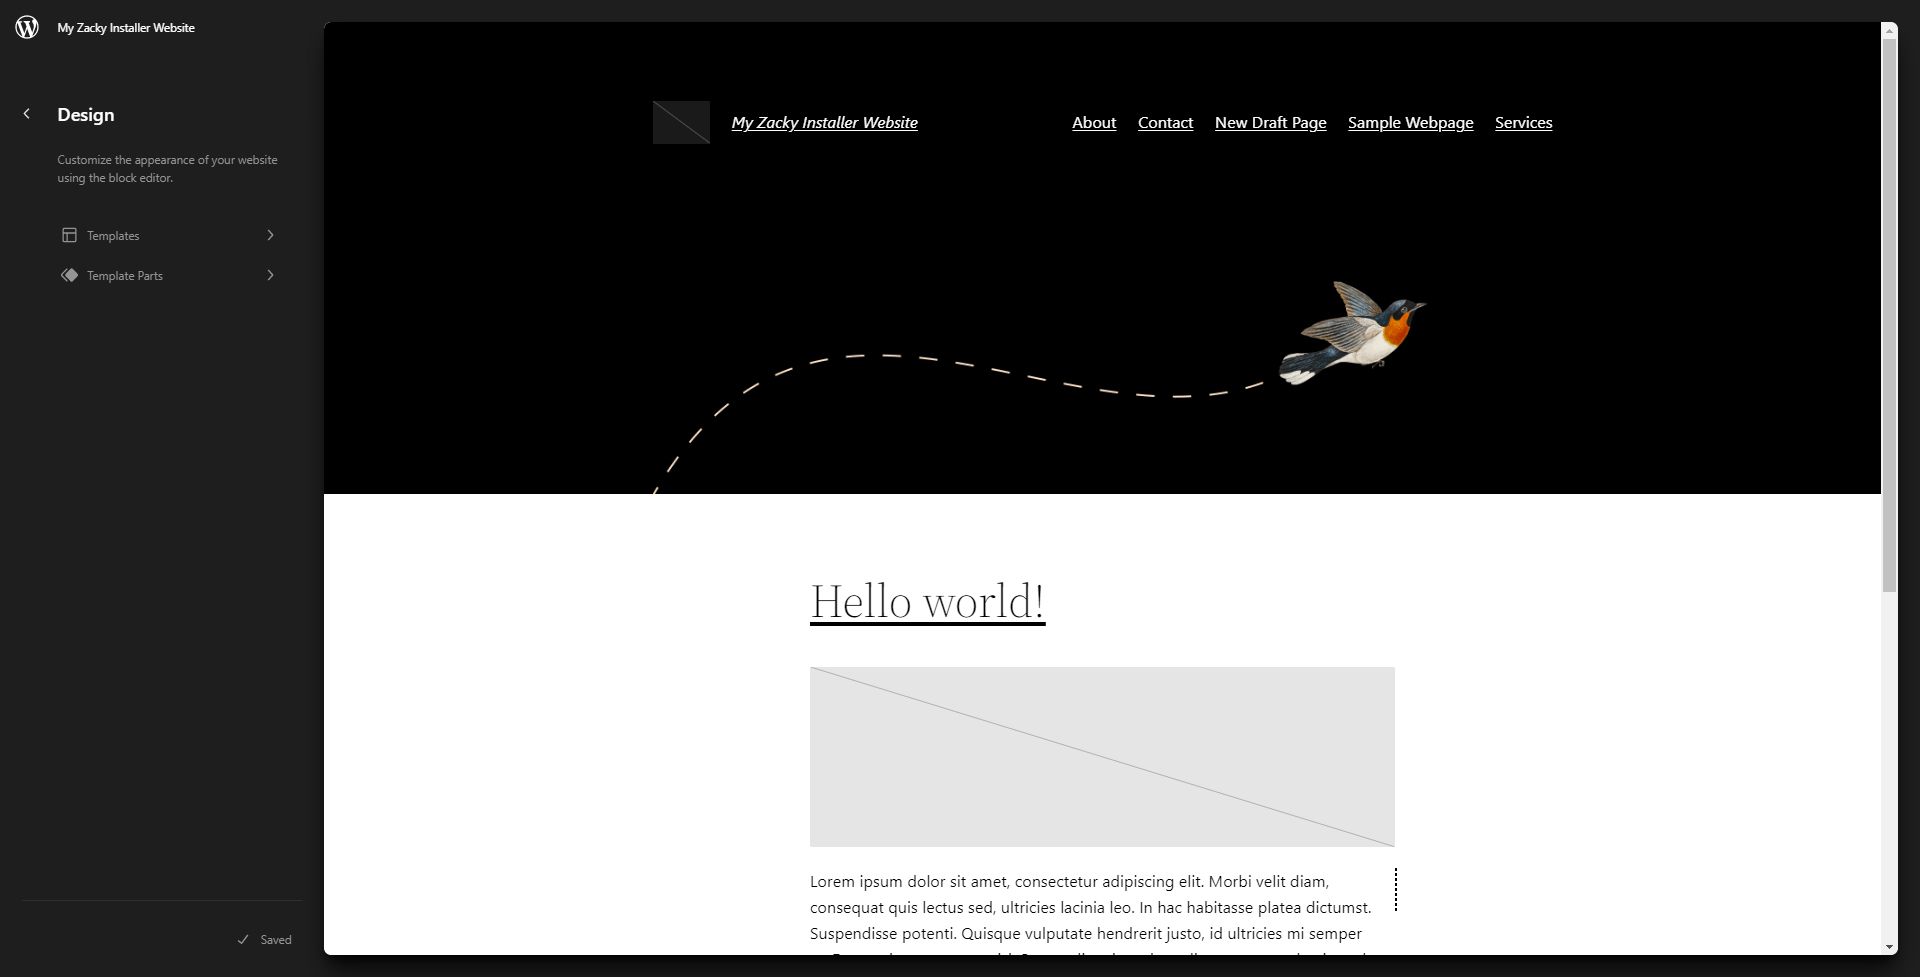
Clicking on the Editor button will open a new page with a visual editor, a Templates menu, and a Template Parts menu:
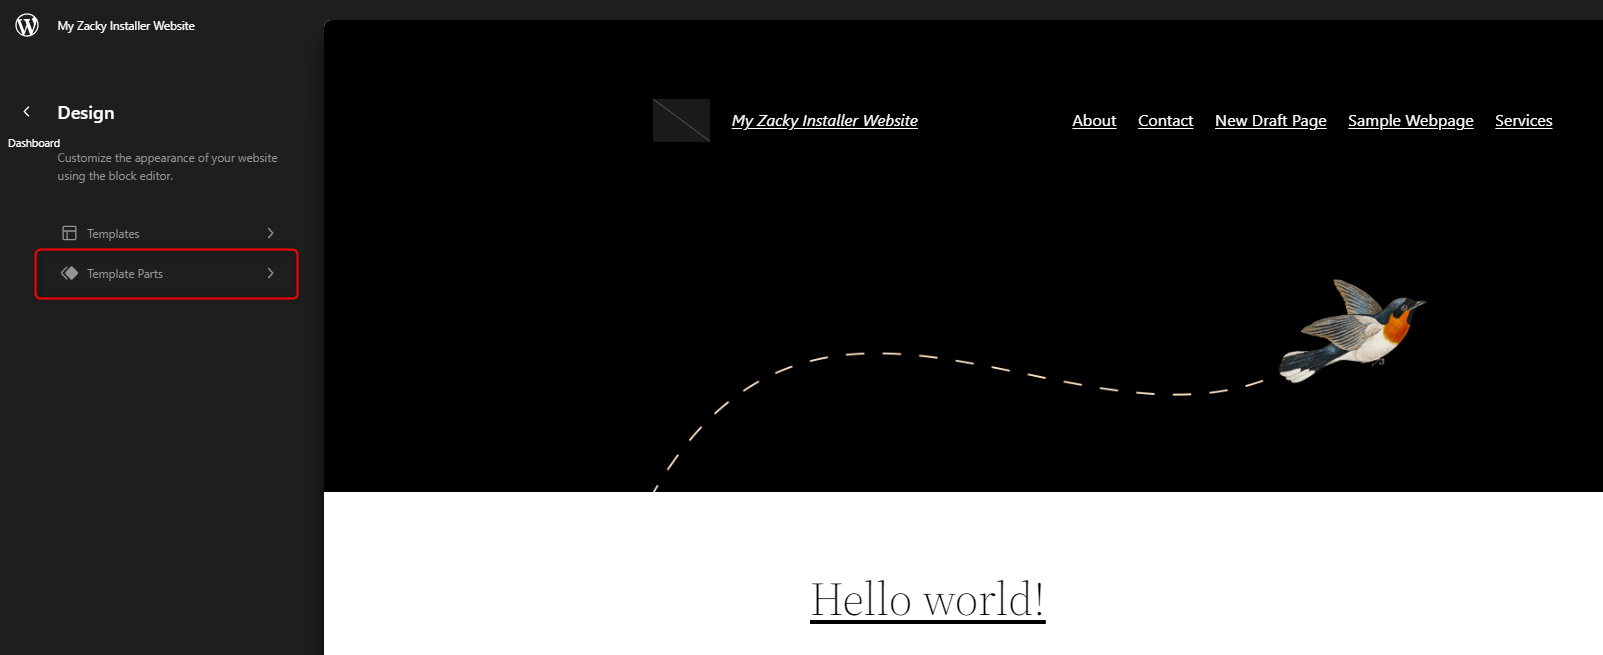
To design a header for your website, click on Template Parts and then click on Custom Header:
Clicking on Custom Header will activate the block editor and will give you various options to design your site’s custom header:

To be able to add and customize the details that comprise your website’s header, click on the white Edit icon located at the top left of the page:
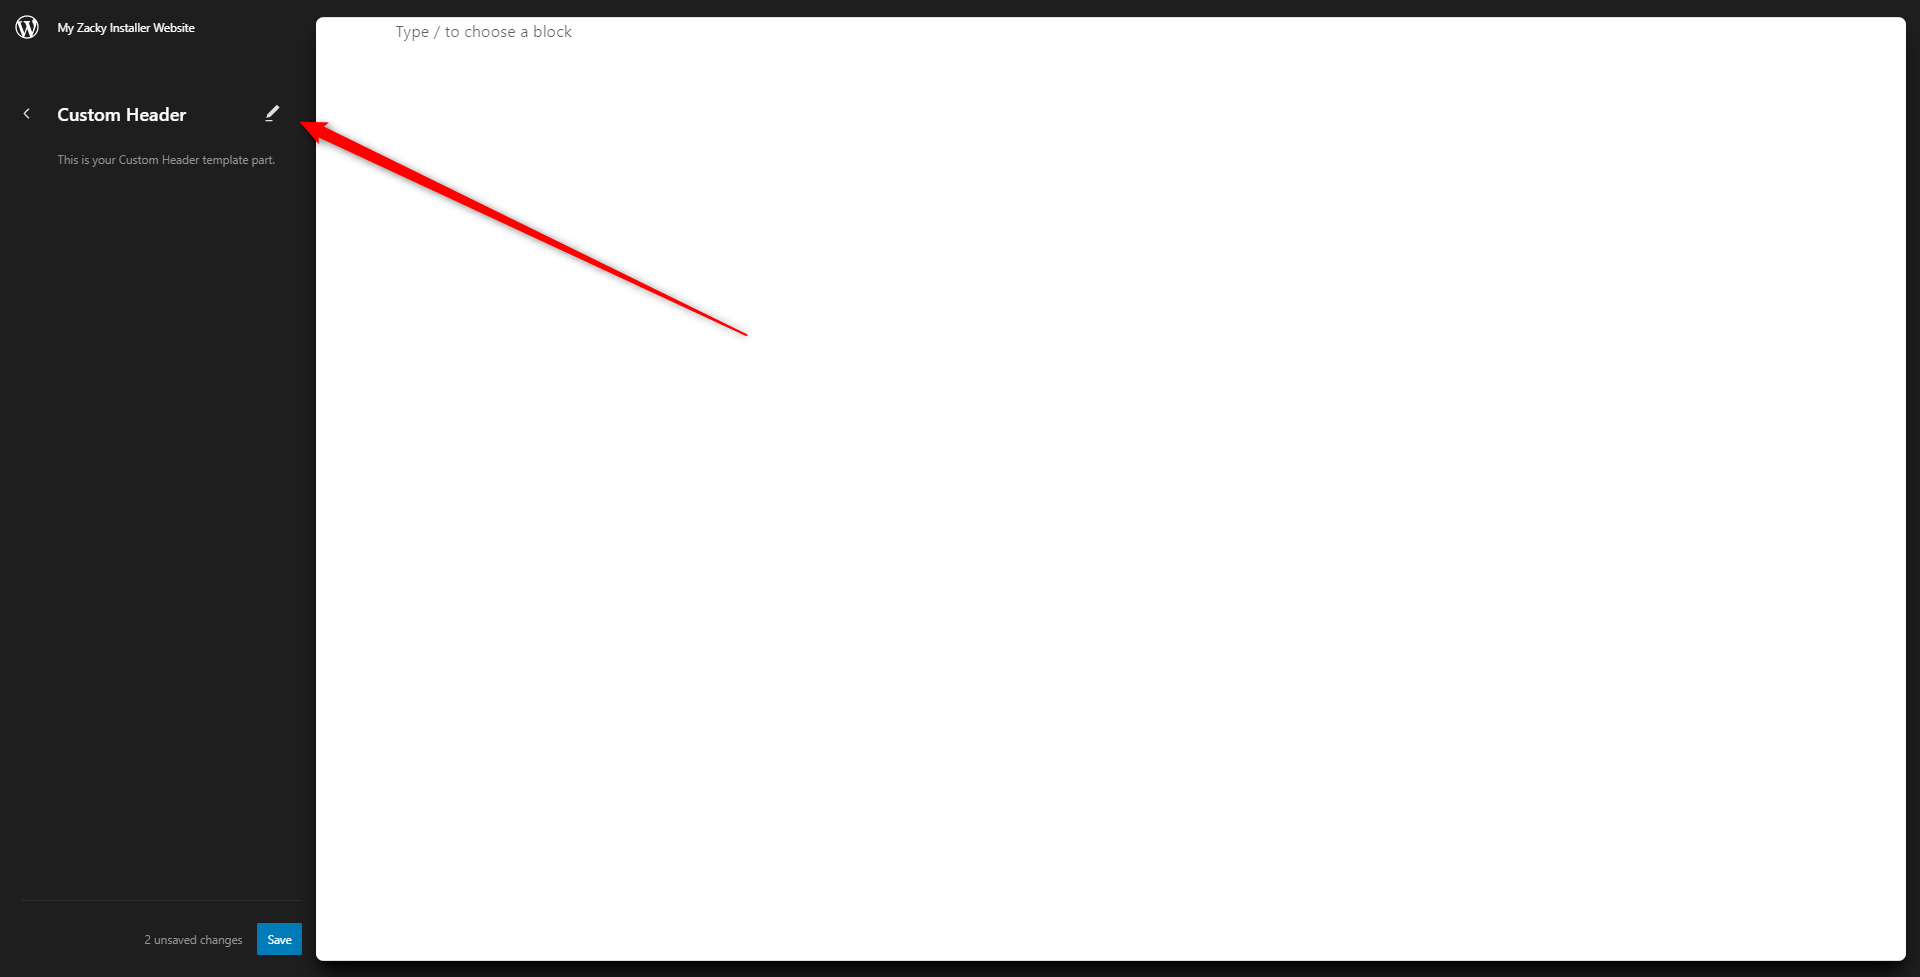
Clicking this icon will give you the opportunity to start inserting blocks that would eventually become your new custom header:
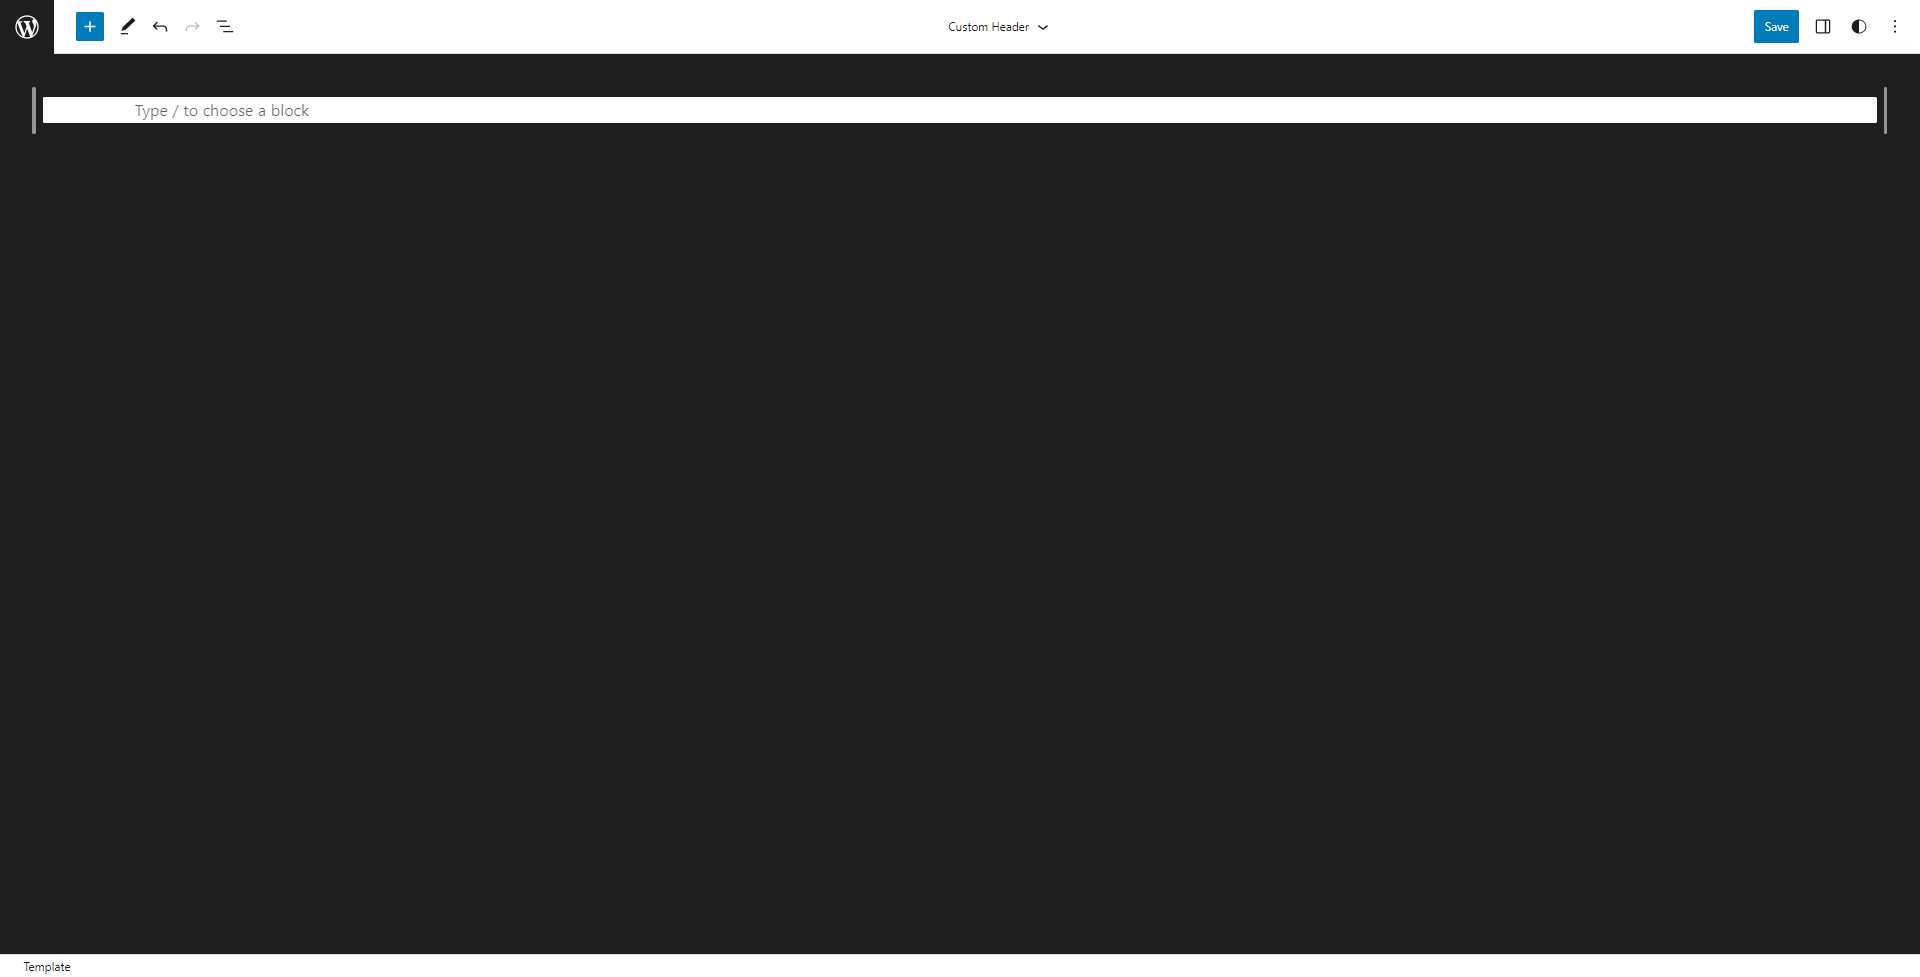
The process of working with the full site editor is the same as inserting Gutenberg blocks when crafting your web pages and blog posts.
Spend your time and try out various combinations of blocks, so you come up with a layout that fits your website’s overall design and your personal requirements.
Here is an example of a simple header with the website’s logo, a simple navigation section, and a search button, along with an image:

Once you are ready with your header design, you should save it. To do so, click on the blue Save button located at the top right of the screen:
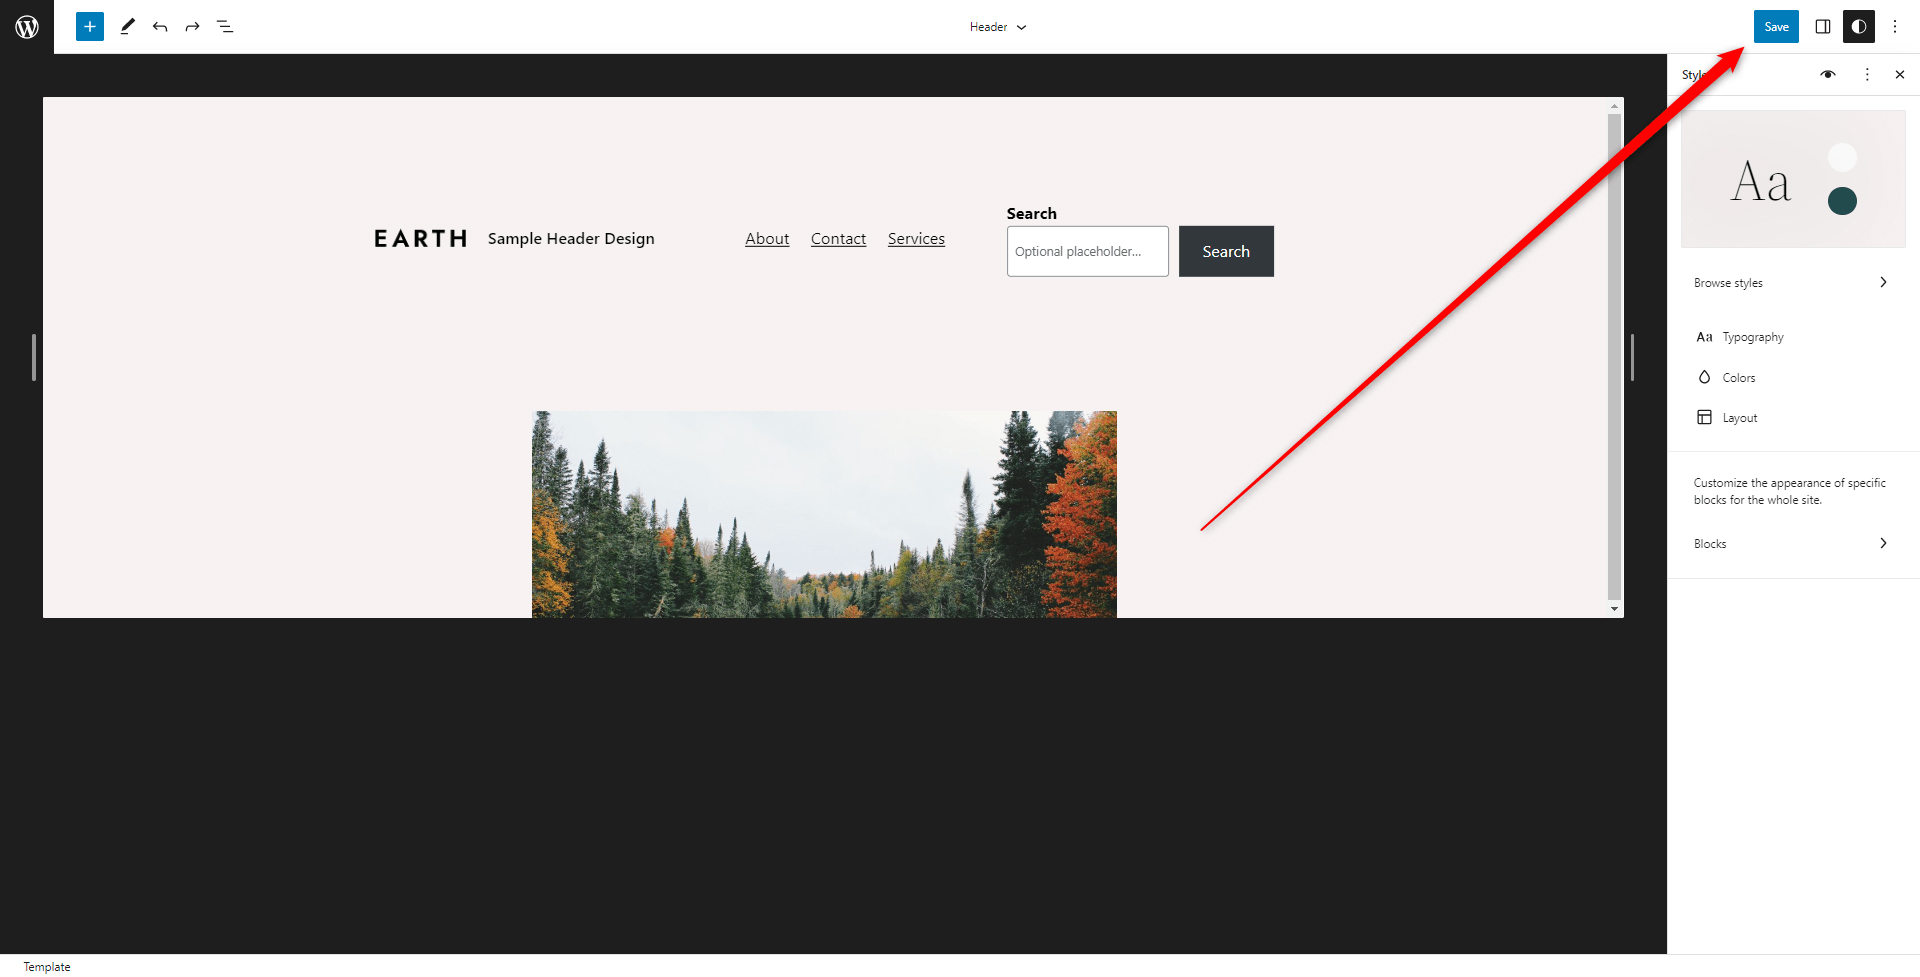
Clicking on Save will prompt WordPress to apply and change your settings.
Conclusion
Should you wish to design a custom header with Gutenberg, then you can do so by using the full site editor function that expands the customization capabilities of the default theme customizer options and allow you to set up a header that is exactly to your liking.
Related:
- Create a WordPress Website – The Ultimate Guide
- How to Create a New Page in WordPress
- What is a WordPress Theme
- How to Browse, Install and Apply a WordPress Theme
- How to Use WordPress Gutenberg Block Editor
- How to Insert Gutenberg Blocks in WordPress
- How to Change Text Color With WordPress Block Editor
- How to Use WordPress Reusable Blocks
- How to Display Code with WordPress Gutenberg Code Block
- How to Use the Navigation Block in Gutenberg
- 5 Best WordPress Slider Plugins for Gutenberg
- 5 Best Gutenberg Plugins for WordPress
- How to Create Tables in WordPress Using Gutenberg Editor
- How to Add Tabs to Your WordPress Site with Gutenberg
- How to Copy a Page with WordPress Gutenberg Editor
- How to Add a Contact Form with WordPress Gutenberg Editor
- How to Add a Site Logo Block in WordPress with Gutenberg